Magnetic Loop Controller for 4 Antennas
DESCRIPTION
This project is for those ham amateurs who don't have a commercial one . It's easy to build with a soldering iron, a plastic case and a little knowledge of arduino.
This controller doesn't have endstop limit capabilities. In case you'd prefer a model with this feature, I have another design with three motor and endstop capability:
-https://www.instructables.com/id/Controller-for-3-...
The controller is made with budget components you can find easily in Internet (~20€). The main component is a cnc shield that fits over an Arduino Uno. Both made a compact, small and cheap controller.
Features:
- New revision of the software ver 2.0 01/03/2020 fixed some bug. Some improvements in the code
- timer for every function
- Capable up to 4 different antennas.
- Range of 65000 steps for moving every antenna.
- Microstepping capability 1/2 1/4 1/8 1/16 or even more depending on the pololu stepper control.
- 4 memory banks with 14 programmable memories for antenna (56 memories).
- Programmable upper limit for every antenna.
- backlash compensation from 0 to 200
- speed control
-Power supply 12V
The controller is made by budget components you can find easily in Internet. The main component is a cnc shield that fits over an Arduino Uno. Both made a compact, small and cheap controller.
Supplies:
CNC shield v3 with arduino UNO
LCD LCD-1602 + I2C IIC 5V para arduino
Added STL files por 3d printing at the end of the article.
-the platform for adapting the arduino UNO to whatever case you have
-the nkob por the rotary encoder.
The links I have done are only examples. Needless to say that you can buy wherever you want.
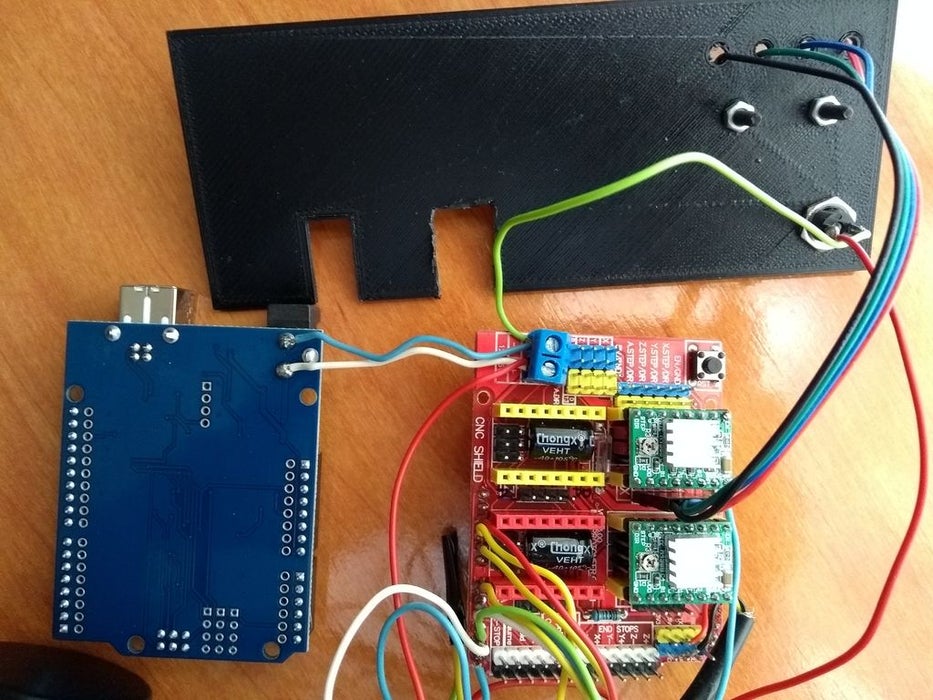
The arduino board is almost free of wires. The only ones you'll need are the power supply ones. It is necessary to weld some wires into the arduino board and connect them to the cnc shield.The shield comes with 4 pololus a4988 or similar. The pololu has a potentiometer so you can limit the maximum torque of the step motor . My advice is limit the torque to the minimum necessary to move the capacitor. This way prevent for damaging the capacitor
The optical rotary encoder is a 100 pulses one. The photo you can see how the wires yellow (A ) and green (B) are welded to the pins 10 and 9. just in case a clockwise rotation makes a descending count, you might swap the wires.
Connect the wires in this order:
Black - GND
red - 5V+
green - digital pin 9
yellow - digital pin 10
For a deeper understanding of the cnc shield visit this web page :
Arduino CNC Shield V3.XX – Assembly Guide
Using the fourth stepper control implies using d12 and d13 in the cnc shield.
Code on github (click on clone or download and download zip)
For arduino ide you need to have the librairies :
LiquidCrystal_I2C.h
EEPROM.h
The shield comes with 4 pololus a4988 or similar. The pololu has a potentiometer so you can limit the maximum torque of the step motor . My advice is limit the torque to the minimum necessary to move the capacitor. This way prevent for damaging the capacitor.
Finally, pololus might be damaged if don't have any motor connected. Please, install only the same number of pololus than motors.


 2 More Images


