Variometer for Paragliding
DESCRIPTION
A few years ago I built a Variometer with the help of Andrei's Instructables.
It was working nice, but there were a few things I didn't like.
I powered it with a 9V battery and this took a lot of space and endet in a bulky wooden case for the electronics. Often on the most promising day's the battery got empty and I didn't have a spare battery with me.
So I decidet to change this and designed my own Version of a Vario inspired by Andrei.
My main goal was to make it smaller and rechargeable.
Since I wanted to use an SSD1306 as display I also had to write the software from scratch.
Because I struggled with the altitude calculation logic (I am not a C programmer) I reused a few code segments from Andrei's Sketch and his libraries.
The result was a decent 8x3x2cm vario with just the minimum functionality.

- Arduino Nano
TC4056A (Lipo Charging Board)
Piezo Buzzer
10 kO Resistor
On/Off Switch
Push Button
BMP280 Baro Sensor
SSD1306 (32x128) Oled Display
1S Lipo Battery (I used one from my RC Plane)
4KO - 10KO SMD Resistor (depending on your LiPos C Rate)
DISCLAIMER:
As you see in the sceme I powered the Arduino through the 5V Pin. This is not recommended and can cause Instability on the processor. To avoid this, you can put a step up converter after the TC4056A and power the Arduino regularly. But since I was aiming for a small size, I didn't use the stepup. After a few hours in flight I didn't face any problems doing so.

For Compiling and uploading the code to your arduino you will need the arduino Software and also some libraries.
- Arduino IDE
- Libraries: Go to Sketch > Include Library > Manage Libraries
search for the following and install them- Adafruit_SSD1306
- Adafruit GFX Library
- Adafruit BMP280 Library
- SBB_Click and Bounce2 (see attached files and add them to your library folder)
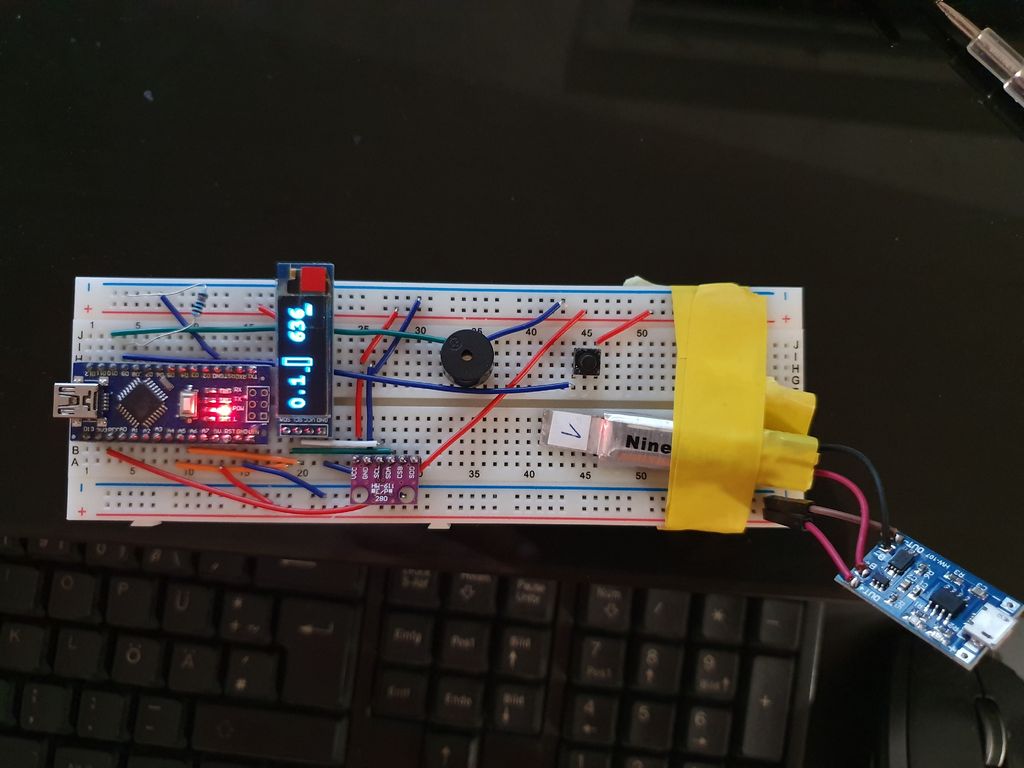
Put evetything on the breadboard, compile and upload the sketch.
If there is an error when compiling, you have to fit the Adafruit SSD1306 Library for the correct display address. This Instructable may help you.
DISCLAIMER:
Be sure that the arduino is only powered by it's USB when uploading the code.
Remove the battery before plugging in the USB cable to the programming port.
Attachments


Since my TC4056A was designed to charge the battery with 1A of power and this is a little bit too much for the small lipo, so I had to re programm it.
According tho the datasheet of the TC4056A this can be done by changing the resistor R3 on the board. So I unsoldered the 1.2 KO resistor and changed it with an 4KO. This needs a really precise soldering iron, tweezers and some practice.
You have to get the right resistor to fit your charging capacity of your lipo.
TIP: you don't need to buy these resistors, if you have some outsourced electronic stuff at home, these little components can be found nearly on every platine. Just take a multimeter, find the right one, and repurpose it.
After this the lipo can be soldered to the TC4056A and connected with the arduino.
DISCLAIMER: According to the datasheet the power has to be off when charging the lipo!
Attachments


 5 More Images


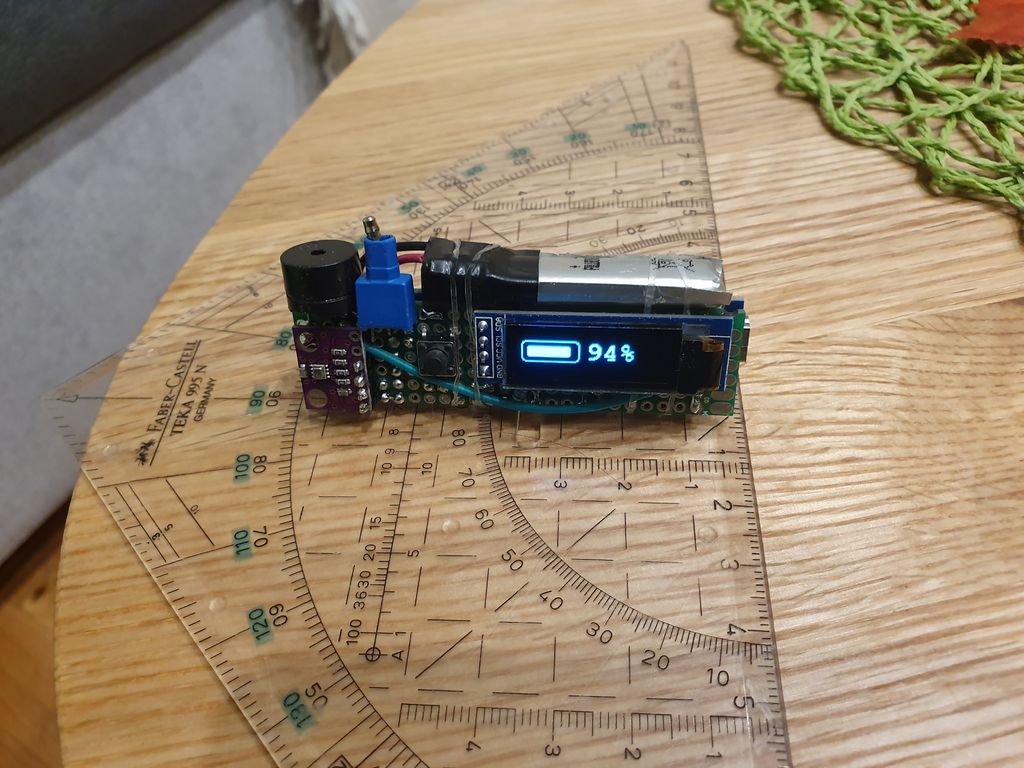
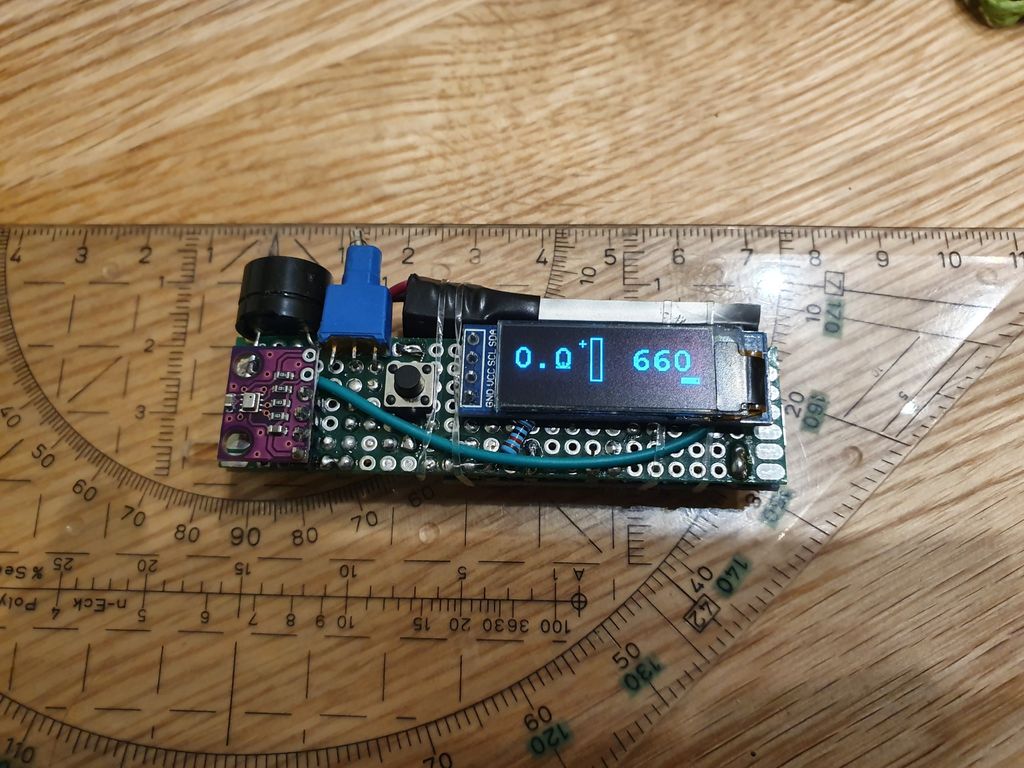
I soldered everything in place using a hole board and some wires.
I also removed the powerstatus LED on the Arduino to use less power.
TIP: Removing this LED was a real mess and I destroyed it with my soldering Iron. Later I found out that it is easier to remove the resistor in front of the LED, since the resistor transfers the heat to the other soldering pad easier, it can be simply unsoldered by just heating one pin.


I designed a case for the electronics and printed it out on my 3d printer.
At the moment I won't provide the housing, because there are some errors in it which I endet up postprocessing a lot to make it fit.
Also the measurements for this housing is taken with really small clearences for my electronics. So it might not fit for your electronics.
After Switching the Vario on, the initscreen comes and then the screen stays black.(Most of the time i just need the audio. If you don't want this to happen, change the "display_on" variable in the sketch to true (line 30) and menu = 1 (line 26))
If you press the Button once, you should see the first page.
With Button short press you can switch between the four main pages.
- PAGE: Climb Rate, Climb Bar, Altitude and Battery Power
- PAGE: Climb Bar Big (for vertical riser mounting)
- PAGE: Temperature and Pressure
- PAGE: Battery Power %
with a long press you can switch to the settings menu. With a short press you can iterate through all the settings. With a long press again you can enter the specific settings and change them by short pressing. A long press again saves it.
- Settings Page: Altitude
- Settings Page: Beep ON/OFF
- Settings Page: Display ON/OFF
- Exit