Arduino Rotating Platform Based on NEMA17 © LGPL
DESCRIPTION
I saw a 28BYJ-48 5V Mini Stepper Motor Rotating Platform and want to make it but I didn't have 28BYJ-48 so I made my own version of that rotating platform.
But WHY MAKE A ROTATING PLATFORM!?GOAL was to make a rotating platform which can be used to shoot stuff like this-
BASIC things about BASE STRUCTUREThis is Version 1
this version is not a proper encloser and has few issues which I'm gonna solve in V2.
first, I designed the basic body according to these gears I found on Thingiverse,
https://www.thingiverse.com/thing:43090
Thanks UTSOURCE.net to offer electronic components for this project!
you can check UTSOURCE.net, they deal in all kinds of electronics components like for example Attiny84, stepper motor driver which I'm using in this project, and many more.
these are the 3D printed parts that were needed - (for V1)
- BASE
- BIG GEAR
- SMALL GEAR
- BIG GEAR PIN
- PIN
- Paper Holder x2
I Designed these parts in Fusion360 and 3D printed them with 40% Infill to provide EXTRA STRENGTH because I'm using PLA, ABS or PET G is a suitable alternative.
assembly is pretty straight forward, I just put everything together like a custom lego.
This is the V2 which have a better encloser with mounting holes for mounting it to a wooden base with these L brackets-
also, I've made these paper holder brackets which will hold any a4 size paper which will then become the background, you can add different color papers to get the different backgrounds to suit your video.
The final setup will look something like this -
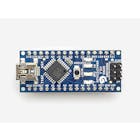
ELECTRONICS and Wiring-FOR NOW, I'm using an Arduino NANO as the main controller along with a4988 stepper motor driver to run this system.
(in version 2, I will use an Attiny84 to run this setup)
this board which I made a few weeks ago (PCB was provided by JLCPCB)
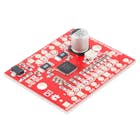
A4988 Stepper motor driver will do the job smoothly
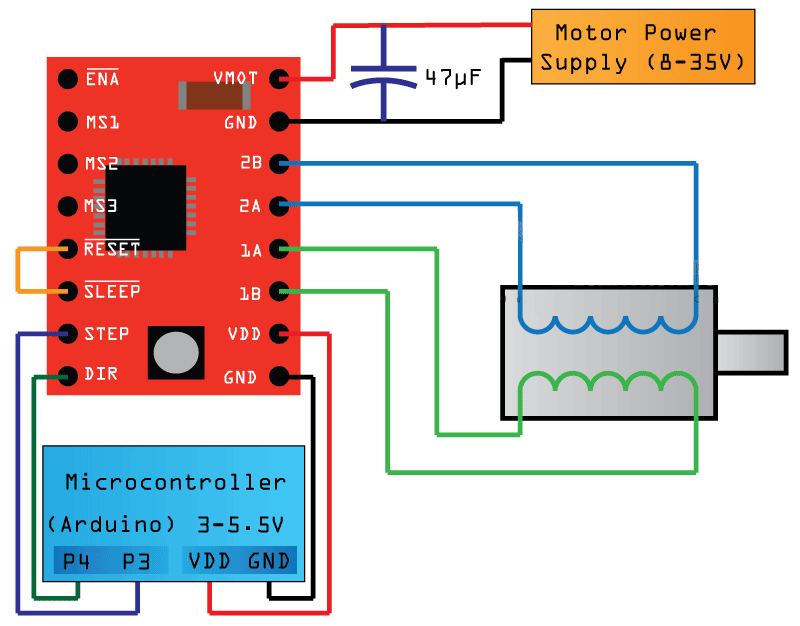
wire everything according to this scheme-
after wiring
upload this test code and you're basically done-
The Updated Circuit-
I've attached my custom Attiny84 breakout with A4988 Driver on a perf board with some female headers.
it's small and minimal, so I put it inside the V2 encloser and tested it.
 |
| × | 1 | |||
| × | 1 | ||||
| × | 1 | ||||
 |
| × | 1 | |||
 |
| × | 1 |
 |
|
I saw a 28BYJ-48 5V Mini Stepper Motor Rotating Platform and want to make it but I didn't have 28BYJ-48 so I made my own version of that rotating platform.
But WHY MAKE A ROTATING PLATFORM!?GOAL was to make a rotating platform which can be used to shoot stuff like this-
BASIC things about BASE STRUCTUREThis is Version 1
this version is not a proper encloser and has few issues which I'm gonna solve in V2.
first, I designed the basic body according to these gears I found on Thingiverse,
https://www.thingiverse.com/thing:43090
Thanks UTSOURCE.net to offer electronic components for this project!
you can check UTSOURCE.net, they deal in all kinds of electronics components like for example Attiny84, stepper motor driver which I'm using in this project, and many more.
these are the 3D printed parts that were needed - (for V1)
- BASE
- BIG GEAR
- SMALL GEAR
- BIG GEAR PIN
- PIN
- Paper Holder x2
I Designed these parts in Fusion360 and 3D printed them with 40% Infill to provide EXTRA STRENGTH because I'm using PLA, ABS or PET G is a suitable alternative.
assembly is pretty straight forward, I just put everything together like a custom lego.
This is the V2 which have a better encloser with mounting holes for mounting it to a wooden base with these L brackets-
also, I've made these paper holder brackets which will hold any a4 size paper which will then become the background, you can add different color papers to get the different backgrounds to suit your video.
The final setup will look something like this -
ELECTRONICS and Wiring-FOR NOW, I'm using an Arduino NANO as the main controller along with a4988 stepper motor driver to run this system.
(in version 2, I will use an Attiny84 to run this setup)
this board which I made a few weeks ago (PCB was provided by JLCPCB)
A4988 Stepper motor driver will do the job smoothly
wire everything according to this scheme-
after wiring
upload this test code and you're basically done-
The Updated Circuit-
I've attached my custom Attiny84 breakout with A4988 Driver on a perf board with some female headers.
it's small and minimal, so I put it inside the V2 encloser and tested it.


