Arduino Sump Pump © CC0
DESCRIPTION

This Arduino Pump Tutorial shows an example of how to use a float switch, Powertail, and pump to create a sump pump system. When you want to operate larger pumps from an Arduino you need a stronger relay to handle the larger voltage and current. The PowerSwitch Tail is a perfect tool for the job. It incorporates the relay and outlet plugs all into one unit making it easy to turn on and off larger motors, fans, and pumps.
Step 1: Setup your Arduino/Geekduino

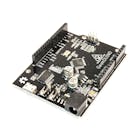
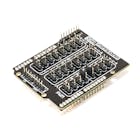
Our tutorial will be using the RobotGeek Geekduino board and the RobotGeek Sensor Shield. If you've never used an Arduino or the RobotGeek Sensor Shield, these guides will get you up to speed.
RobotGeek Sensor Shield Wiring Primer
Geekduino Getting Started Guide
We'll also have some wiring diagrams for a standard Arduino Uno if you're not using a RobotGeek kit.
Step 2: Wiring


Wire as shown in the diagram above that matches the parts you've chosen to use.

Step 3: Coding
You can download the code sketch here: https://github.com/robotgeek/sumpPumpDemo/archive/master.zip
If you take a look at the code, you'll notice that it is incredibly simple, turning the pump and LED on when the float switch is floating, and turning them off when it isn't. We do take advantage of the Arduino's internal pullup resistors using the line pinMode(FLOAT_SWITCH_PIN, INPUT_PULLUP); to invert the HIGH/LOW behavior of the float switch and allow us to use it with no external pullup resistor.
Step 4: Project ideas
Now that you've got a working sump pump, what are you going to do next? Could you find a sensor to replace the float switch? How about activating something that makes noise instead of just the LED? What about finding a way to integrate a Raspberry Pi to send twitter alerts when the pump is active? Maybe you could integrate this into a Hydroponic system, keeping your fluid levels steady? There's a lot you can do, so get to it!

|

This Arduino Pump Tutorial shows an example of how to use a float switch, Powertail, and pump to create a sump pump system. When you want to operate larger pumps from an Arduino you need a stronger relay to handle the larger voltage and current. The PowerSwitch Tail is a perfect tool for the job. It incorporates the relay and outlet plugs all into one unit making it easy to turn on and off larger motors, fans, and pumps.
Step 1: Setup your Arduino/Geekduino
Our tutorial will be using the RobotGeek Geekduino board and the RobotGeek Sensor Shield. If you've never used an Arduino or the RobotGeek Sensor Shield, these guides will get you up to speed.
RobotGeek Sensor Shield Wiring Primer
Geekduino Getting Started Guide
We'll also have some wiring diagrams for a standard Arduino Uno if you're not using a RobotGeek kit.
Step 2: Wiring
Wire as shown in the diagram above that matches the parts you've chosen to use.
Step 3: Coding
You can download the code sketch here: https://github.com/robotgeek/sumpPumpDemo/archive/master.zip
If you take a look at the code, you'll notice that it is incredibly simple, turning the pump and LED on when the float switch is floating, and turning them off when it isn't. We do take advantage of the Arduino's internal pullup resistors using the line pinMode(FLOAT_SWITCH_PIN, INPUT_PULLUP);
to invert the HIGH/LOW behavior of the float switch and allow us to use it with no external pullup resistor.
Step 4: Project ideas
Now that you've got a working sump pump, what are you going to do next? Could you find a sensor to replace the float switch? How about activating something that makes noise instead of just the LED? What about finding a way to integrate a Raspberry Pi to send twitter alerts when the pump is active? Maybe you could integrate this into a Hydroponic system, keeping your fluid levels steady? There's a lot you can do, so get to it!
Github

