ASCII-Braille Real-Time Translation via Arduino © GPL3+
DESCRIPTION
Take an absurd idea: create a 2x6 solenoid matrix, and translate ASCII characters received via serial port into the corresponding Braille dot configuration.
Then, try to implement it in the cheapest, quickest and dirtiest way in a few days before your summer holydays.
What do you get? A mess.
But an interesting one (at least on the software side...), and easily improvable by everyone!
Why absurd? Visually impaired people use screen readers, incredibly more effective than any mechanical device. Plus, even for deaf and blind people, my prototype, requiring that somebody sends ASCII characters to an Arduino, would be very unpractical to say the least.
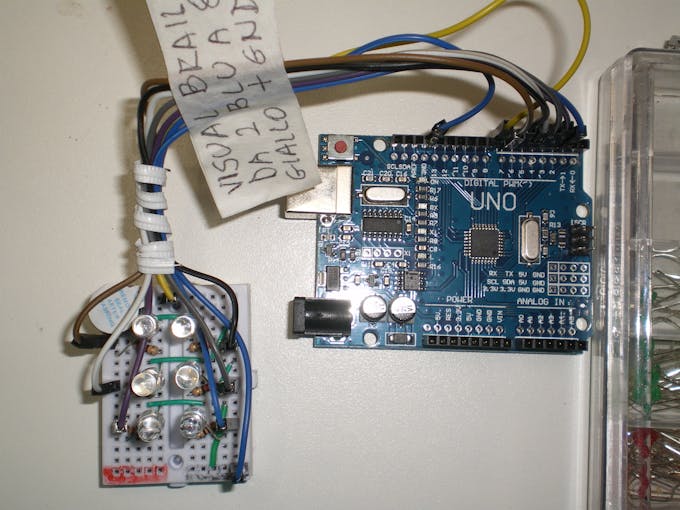
In any case, one can as well implement a 2 x 6 LED matrix (in fact, that's how I tested the software!) to get the utmost absurdity: visual Braille! And that was my true intention, making an unusual implementation requiring the use of bit masks in a translation process.
Contrary to the poor breadboarding and component choice, the software is fully successful, and most probably is the only useful part of this project.
Even before describing the idea, I'd like to state that I know that I should and would have done better.
It's very obvious that I ventured in uncharted terrain totally beyond my minimal knowledge. I'll gladly accept to be the laughing stock of any competent Arduino fan.
Main problems:
- 1) I would have needed push-pull solenoids, like these: https://core-electronics.com.au/solenoid-5v-small.html that were in fact used in this tutorial by Aidan: https://core-electronics.com.au/tutorials/solenoid-control-with-arduino.html.
Real push-pull solenoids have the extraordinary advantage that they snap back in their default position as soon as the current is removed - having bought on ebay the cheap, push-only solenoids described here (Don't be mislead! Despite the ad, they are NOT push-pull type!): https://www.ebay.it/itm/Mini-DC-5V-5mm-Push-Pull-Type-Permanent-Magnet-Strong-magnetic-Electric-Solenoid/172438873301, my greatest waste of time was trying to transform them into something that could snap back when inactive. And I didn't succeed...

- 2) I shouldn't have been worried to use 12V or 9V solenoids. When purchasing the cheapest 5V ones, I wanted to power everything with the classic 5V from Arduino (I still ignored the current absorption problem of the solenoids).
A silly concern on my part: it's very easy to power a breadboard at 9V or 12V with a separate power supply, then control it with Arduino.
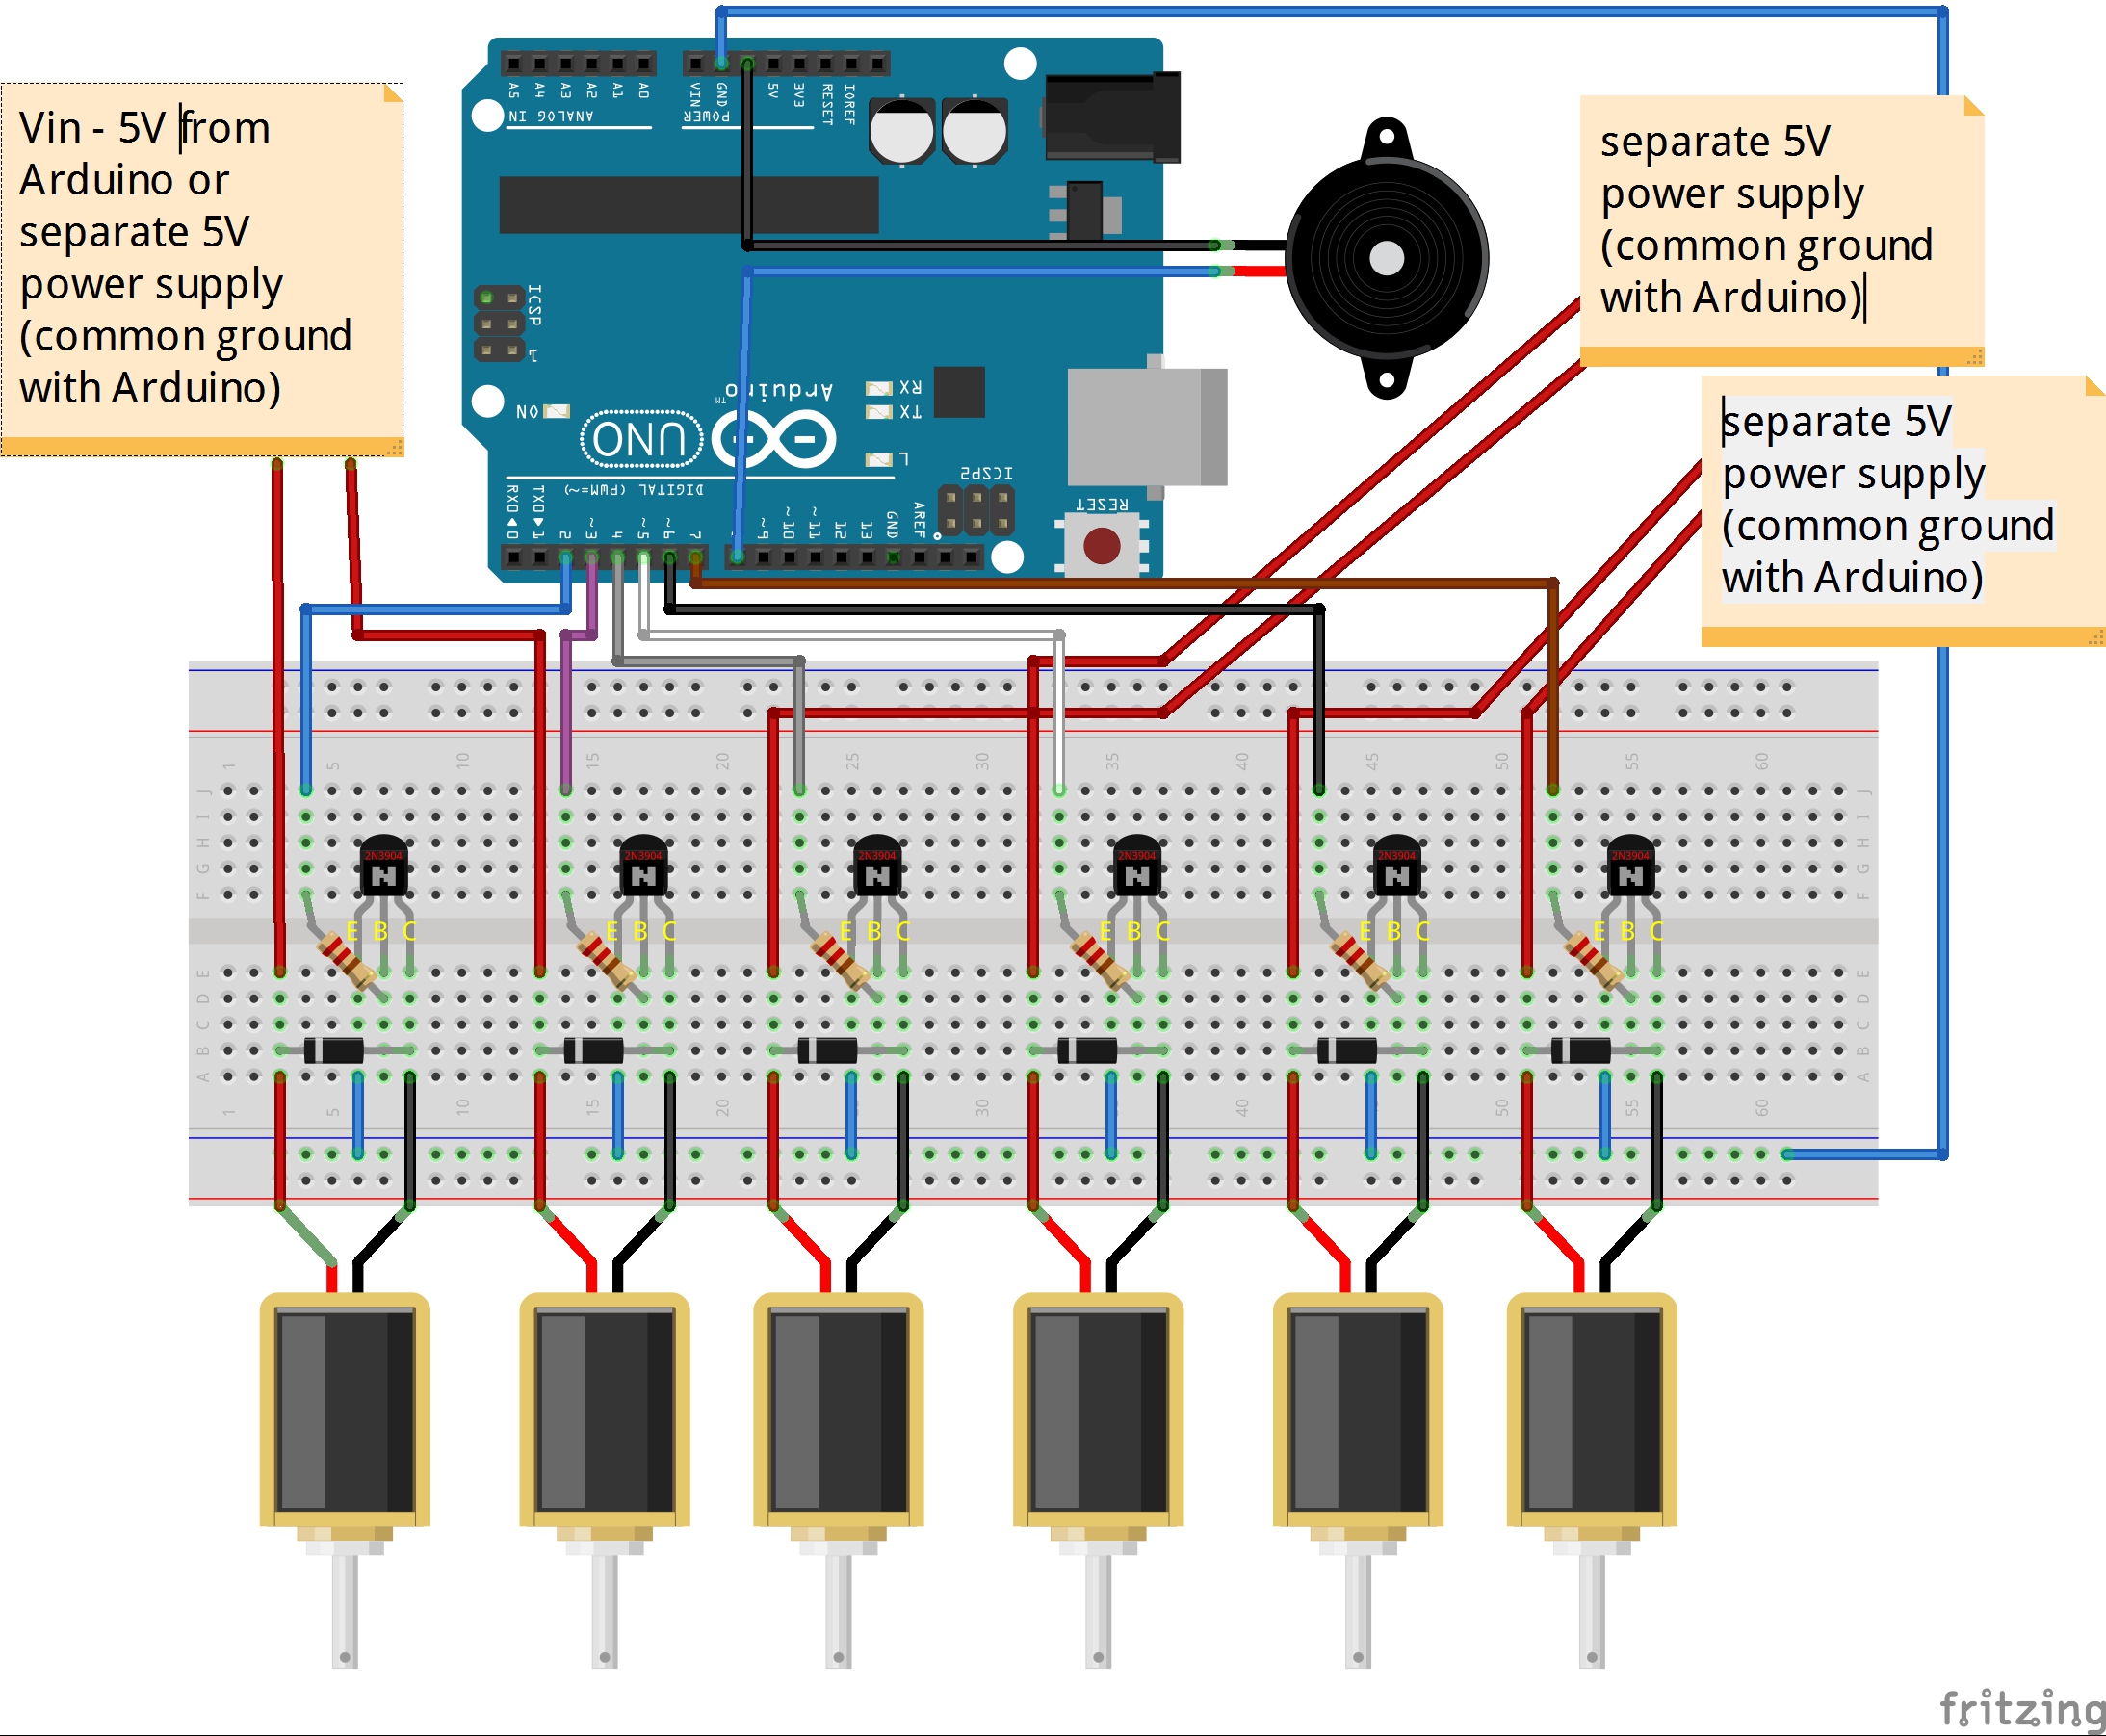
- 3) Current: solenoids, even the smallest and cheapest 5V that I used, are thirsty devices. Any attempt to power more than two solenoids with Vin or 5V from Arduino results in continuous resets, due to the excessive current absorption by the solenoids. Even with separate power to the solenoids, if power is marginal, misfires are frequent. Any serious project involving solenoids & Arduino requires independent supplies of adequate power and well-conceived circuits. Important: by powering my cheap solenoids above their nominal voltage (e.g. by setting the external switchable power supply to 7, 5V instead of 5V), action is much more energetic, with the "piston" of the solenoid being ejected at some distance.
Here is a list of good implementations of solenoids + Arduino: https://www.google.com/search?tbs=li%3A1&q=arduino+solenoids&oq=arduino+solenoids - see in particular https://arduino.stackexchange.com/questions/50668/can-arduino-control-8-solenoids for good technical advice. For a single 5V solenoid, Arduino alone may suffice - but you will see that most implementations require special components and a good knowledge of electronics.

Operation
With the solenoids arranged in a 3x2 pack as illustrated (each solenoid was individually wrapped in insulating tape, then again in rows and in a single block), the objective would be to have the core of each solenoid pop out /stick out if its respective point is activated. And that would work egregiously with *real* push-pull solenoids, that would pop out decidedly then pop in as soon as inactivated.

In fact, with the illustrated circuit and components, and with everything powered at 5V, even with separate power supplies the solenoids barely move (unless power supplies are set at an higher voltage... that may be unsafe!) but, with the thumb's pad gently pressed on the tips of the pistons, one may anyway perceive which tips are being rised and which tips are motionless. If one piston disengages and is ejected, it must be clicked in again: another drawback of this suboptimal equipment.
I would beg anybody that may be interested in improving this project to share a refined version of the circuit as soon as available, for everybody to see.
Thanks for the attention!

Take an absurd idea: create a 2x6 solenoid matrix, and translate ASCII characters received via serial port into the corresponding Braille dot configuration.
Then, try to implement it in the cheapest, quickest and dirtiest way in a few days before your summer holydays.
What do you get? A mess.
But an interesting one (at least on the software side...), and easily improvable by everyone!
Why absurd? Visually impaired people use screen readers, incredibly more effective than any mechanical device. Plus, even for deaf and blind people, my prototype, requiring that somebody sends ASCII characters to an Arduino, would be very unpractical to say the least.
In any case, one can as well implement a 2 x 6 LED matrix (in fact, that's how I tested the software!) to get the utmost absurdity: visual Braille! And that was my true intention, making an unusual implementation requiring the use of bit masks in a translation process.
Contrary to the poor breadboarding and component choice, the software is fully successful, and most probably is the only useful part of this project.
Even before describing the idea, I'd like to state that I know that I should and would have done better.
It's very obvious that I ventured in uncharted terrain totally beyond my minimal knowledge. I'll gladly accept to be the laughing stock of any competent Arduino fan.
Main problems:
- 1) I would have needed push-pull solenoids, like these: https://core-electronics.com.au/solenoid-5v-small.html that were in fact used in this tutorial by Aidan: https://core-electronics.com.au/tutorials/solenoid-control-with-arduino.html.
Real push-pull solenoids have the extraordinary advantage that they snap back in their default position as soon as the current is removed - having bought on ebay the cheap, push-only solenoids described here (Don't be mislead! Despite the ad, they are NOT push-pull type!): https://www.ebay.it/itm/Mini-DC-5V-5mm-Push-Pull-Type-Permanent-Magnet-Strong-magnetic-Electric-Solenoid/172438873301, my greatest waste of time was trying to transform them into something that could snap back when inactive. And I didn't succeed...
- 2) I shouldn't have been worried to use 12V or 9V solenoids. When purchasing the cheapest 5V ones, I wanted to power everything with the classic 5V from Arduino (I still ignored the current absorption problem of the solenoids).
A silly concern on my part: it's very easy to power a breadboard at 9V or 12V with a separate power supply, then control it with Arduino.
- 3) Current: solenoids, even the smallest and cheapest 5V that I used, are thirsty devices. Any attempt to power more than two solenoids with Vin or 5V from Arduino results in continuous resets, due to the excessive current absorption by the solenoids. Even with separate power to the solenoids, if power is marginal, misfires are frequent. Any serious project involving solenoids & Arduino requires independent supplies of adequate power and well-conceived circuits. Important: by powering my cheap solenoids above their nominal voltage (e.g. by setting the external switchable power supply to 7, 5V instead of 5V), action is much more energetic, with the "piston" of the solenoid being ejected at some distance.
Here is a list of good implementations of solenoids + Arduino: https://www.google.com/search?tbs=li%3A1&q=arduino+solenoids&oq=arduino+solenoids - see in particular https://arduino.stackexchange.com/questions/50668/can-arduino-control-8-solenoids for good technical advice. For a single 5V solenoid, Arduino alone may suffice - but you will see that most implementations require special components and a good knowledge of electronics.
Operation
With the solenoids arranged in a 3x2 pack as illustrated (each solenoid was individually wrapped in insulating tape, then again in rows and in a single block), the objective would be to have the core of each solenoid pop out /stick out if its respective point is activated. And that would work egregiously with *real* push-pull solenoids, that would pop out decidedly then pop in as soon as inactivated.
In fact, with the illustrated circuit and components, and with everything powered at 5V, even with separate power supplies the solenoids barely move (unless power supplies are set at an higher voltage... that may be unsafe!) but, with the thumb's pad gently pressed on the tips of the pistons, one may anyway perceive which tips are being rised and which tips are motionless. If one piston disengages and is ejected, it must be clicked in again: another drawback of this suboptimal equipment.
I would beg anybody that may be interested in improving this project to share a refined version of the circuit as soon as available, for everybody to see.
Thanks for the attention!