Atari 65XE as USB-Keyboard © GPL3+
DESCRIPTION
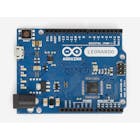
Making retro Atari 65XE as USB-keyboard for a modern computer. And it will leave the opportunity to use this Atari in the native mode. Arduino Leonardo is used for connect the Atari's keyboard to an USB. With an UNIX this keyboard will works without any restrictions. With Windows it is need to switch on some USB-mouse at BIOS startup for boot with this keyboard. For Apple or others will need some corrections within the Arduino program for a keys order correction.
There are no other reasons besides a nostalgia.
This Atari 65XE is near 30 years old. And he works. For add one more function for him - the USB-keyboard - is needed only Arduino Leonardo, not a lot of wires, an USB-cable. No a DC-adapter of Atari will needed for this function.

Only 34 soldering points is need to make. Because the pitch of contacts on slots of the Atari's keyboard and on Arduino is 2.54 mm, the process of soldering is easy.
Note: for Linux usage it is applicable, as restrictions described bottom is not important. But for full usage (in Windows, for example) need to make more soldering (described here in the Appendix) and to modify the Arduino sketch.


After soldering wires from Arduino to J8 connector of Atari, Arduino can be placed at any cozi position under the case. The USB-cable need to be connect to Arduino and let out from the Atari's case. Now possible to use this Atari like regular USB-keyboard.

Not all keys of the retro Atari is correspond to keys of a modern PC-keyboard. Some keys of Atari will be with 2 functions to make all PC's comands. It is possible to make some differents layots within the Arduino sketch. Within the layot of the Arduido sketch thats here, mainly keys of Atari corresponded to PC-keys, but this ones are need to be noted:

In addition to the USB-keyboard usage it remains possible to enable this Atari in the native mode. But, of course, not at the same time when he are connected via an USB to a PC like a keyboard.


Flash Arduino Leonardo is easy via an USB. So, download:
- The Arduino sketch that need to flash to Arduino Leonard within Arduino IDE
- Keypad v.3.1.1 Arduino library, optional*
- Keyboard v.1.0.2 Arduino library, optional*
* Because here all ICs of Atari is stayed in his places (that makes possibility of Atari to work in the native mode) when Arduino scanning the keyboard's matrix, time to time some random signals is appears from a chips. Mainly them affects keys "Pause" and "Control" as tested. Some protection from this signals is maked within the Arduino sketch and was tested. But if libraries "keyboard" and "keypad", that is developed independent will change incompatible, some weirds can ocured. For this case here fixed for download the versions of libraries that was tested with the Arduino sketch. This libraries will be need only if the Arduino sketch will no work with actual libraries.
Appendix (not a required, but improves buttons handling in its combinations)
For the full usage of all buttons and all its possible combinations for USB application, while keep the native Atari mode alive, need to exclude from the work a part of the Atari circuit (marked red) when the keyboard is connected via USB; and to engage this section if Atari is running in native mode.

It is not very difficult to do, only a lot of soldering is required (of course, not in the Atari scheme) and one chip CD4066.
One more thing that will help is that the 0.1 in (2.54 mm) male PCB strip connector is fits perfectly into the Atari J8 slot.


Making retro Atari 65XE as USB-keyboard for a modern computer. And it will leave the opportunity to use this Atari in the native mode. Arduino Leonardo is used for connect the Atari's keyboard to an USB. With an UNIX this keyboard will works without any restrictions. With Windows it is need to switch on some USB-mouse at BIOS startup for boot with this keyboard. For Apple or others will need some corrections within the Arduino program for a keys order correction.
There are no other reasons besides a nostalgia.
This Atari 65XE is near 30 years old. And he works. For add one more function for him - the USB-keyboard - is needed only Arduino Leonardo, not a lot of wires, an USB-cable. No a DC-adapter of Atari will needed for this function.
Only 34 soldering points is need to make. Because the pitch of contacts on slots of the Atari's keyboard and on Arduino is 2.54 mm, the process of soldering is easy.
Note: for Linux usage it is applicable, as restrictions described bottom is not important. But for full usage (in Windows, for example) need to make more soldering (described here in the Appendix) and to modify the Arduino sketch.
After soldering wires from Arduino to J8 connector of Atari, Arduino can be placed at any cozi position under the case. The USB-cable need to be connect to Arduino and let out from the Atari's case. Now possible to use this Atari like regular USB-keyboard.
Not all keys of the retro Atari is correspond to keys of a modern PC-keyboard. Some keys of Atari will be with 2 functions to make all PC's comands. It is possible to make some differents layots within the Arduino sketch. Within the layot of the Arduido sketch thats here, mainly keys of Atari corresponded to PC-keys, but this ones are need to be noted:
In addition to the USB-keyboard usage it remains possible to enable this Atari in the native mode. But, of course, not at the same time when he are connected via an USB to a PC like a keyboard.
Flash Arduino Leonardo is easy via an USB. So, download:
- The Arduino sketch that need to flash to Arduino Leonard within Arduino IDE
- Keypad v.3.1.1 Arduino library, optional*
- Keyboard v.1.0.2 Arduino library, optional*
* Because here all ICs of Atari is stayed in his places (that makes possibility of Atari to work in the native mode) when Arduino scanning the keyboard's matrix, time to time some random signals is appears from a chips. Mainly them affects keys "Pause" and "Control" as tested. Some protection from this signals is maked within the Arduino sketch and was tested. But if libraries "keyboard" and "keypad", that is developed independent will change incompatible, some weirds can ocured. For this case here fixed for download the versions of libraries that was tested with the Arduino sketch. This libraries will be need only if the Arduino sketch will no work with actual libraries.
Appendix (not a required, but improves buttons handling in its combinations)
For the full usage of all buttons and all its possible combinations for USB application, while keep the native Atari mode alive, need to exclude from the work a part of the Atari circuit (marked red) when the keyboard is connected via USB; and to engage this section if Atari is running in native mode.
It is not very difficult to do, only a lot of soldering is required (of course, not in the Atari scheme) and one chip CD4066.
One more thing that will help is that the 0.1 in (2.54 mm) male PCB strip connector is fits perfectly into the Atari J8 slot.