Compass for astronomers © CC0
DESCRIPTION
I like astronomy and recently bought a telescope.
To start observing the sky, I found that would have the need for a level compass and a tilt meter to correctly position my telescope.
I could do all this calibration with my cell phone.
However, I thought that eventually I wouldn't be able to count on him, so I had the idea of assembling a device that would meet all my needs without a cell phone.
How to assemble the hardwareThe assembly was not difficult, after designing the structure in FreeCAD, I printed the parts on the 3D printer and placed the Arduino, the compass and the buttons. I made the connection in a mini proroboard.
The softwareTo make the software, I set up a sketch on the Arduino API with the help of some youtubers programmers. I made the reference in the comments of the main.INO file. I also made some comments. Only they are in Brazilian Portuguese, my native language.
OperationTo operate is easy.
1) When turning on the equipment, it will calibrate the LSM303 D, automatically.
2) The menu indicates the magnetic compass.
You can navigate to the other functions using the left and right buttons.
But the first thing to do is to level the telescope's tripod.
To do this, mount the tripod, with one leg turned for the North, if you are in the northern hemisphere of the planet or for the south, if you are in the southern hemisphere. Navigate the menu to "Nivelamento" and press the central button. The indicator shows the values that must be at zero for the base to be level.
3) After leveling press the middle button to stop the reading and navigate with the side buttons to "Bussola Magn" and activate the central button again for the reading.
Locate the north. Use the pointer to mark the geographic north, according to your location on the planet. Point the telescope to the north or to the geographical south, depending on the hemisphere you are in.
4) If you want to know the vertical inclination of the observed object, just go to the "Inclinação" menu, activate the reading and place the base of the equipment on the telescope body.
Finally, I put a scale in centimeters, next to the equipment, in case you want to use it on a map for geographic location.
This is the first version. The next will have a GPS, barometer and air temperature and humidity meters. It will be suitable for people who enjoy walking, running or cycling in nature.
 |
| × | 1 | |||
| × | 1 | ||||
| × | 1 | ||||
| × | 1 | ||||
| × | 3 | ||||
| × | 1 |
I like astronomy and recently bought a telescope.
To start observing the sky, I found that would have the need for a level compass and a tilt meter to correctly position my telescope.
I could do all this calibration with my cell phone.
However, I thought that eventually I wouldn't be able to count on him, so I had the idea of assembling a device that would meet all my needs without a cell phone.
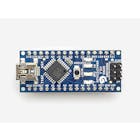
How to assemble the hardwareThe assembly was not difficult, after designing the structure in FreeCAD, I printed the parts on the 3D printer and placed the Arduino, the compass and the buttons. I made the connection in a mini proroboard.
The softwareTo make the software, I set up a sketch on the Arduino API with the help of some youtubers programmers. I made the reference in the comments of the main.INO file. I also made some comments. Only they are in Brazilian Portuguese, my native language.
OperationTo operate is easy.
1) When turning on the equipment, it will calibrate the LSM303 D, automatically.
2) The menu indicates the magnetic compass.
You can navigate to the other functions using the left and right buttons.
But the first thing to do is to level the telescope's tripod.
To do this, mount the tripod, with one leg turned for the North, if you are in the northern hemisphere of the planet or for the south, if you are in the southern hemisphere. Navigate the menu to "Nivelamento" and press the central button. The indicator shows the values that must be at zero for the base to be level.
3) After leveling press the middle button to stop the reading and navigate with the side buttons to "Bussola Magn" and activate the central button again for the reading.
Locate the north. Use the pointer to mark the geographic north, according to your location on the planet. Point the telescope to the north or to the geographical south, depending on the hemisphere you are in.
4) If you want to know the vertical inclination of the observed object, just go to the "Inclinação" menu, activate the reading and place the base of the equipment on the telescope body.
Finally, I put a scale in centimeters, next to the equipment, in case you want to use it on a map for geographic location.
This is the first version. The next will have a GPS, barometer and air temperature and humidity meters. It will be suitable for people who enjoy walking, running or cycling in nature.
The buttons go on pins D10, D11 and D12 of the Arduino.


