Home/Hotel Monitoring System with Automated controls © GPL3+
DESCRIPTION
Everyday we see a changing trend in technology and no matter what it has changed the way we live today and is still changing, Here we are prototyping a hardware which connects the essential components of a house or a hotel to the cloud for secure data monitoring through a computer or from an Android application. This also gives you the control on your components from anywhere and automates them according to the settings you set, Furthermore some actions can also be set to provide a better communication extension like EMAIL someone regarding the changes in parking or water level etc.
This idea will encourage people to make their homes and business structure more smart and the secure data storage will provide a structured record for future use.
OverviewApplication and automated settings below


Following are the demonstrations for all the systems, demonstrated separately.
Parking demo
Temperature demo
Automated Waterlevel
Standard waterlevel
How to set the prototypeThis tutorial is divided into four sections
- Configuring your ARTIK cloud account
- Setting up your Arduino with demo videos
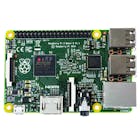
- Setting up your Raspberry pi
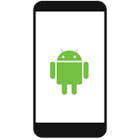
- Setting up the Android application
- Signup for an account on https://developer.artik.cloud/
- goto Dashbaord then DEVICE TYPES

- NEW DEVICE TYPE

- Type your desired display name and unique name

(I named it hotel testing)
- Now move onto the manifest from left and then click NEW MANIFEST

- Now you have to enter the variables with their type which will upload the results to cloud

Create all these (from new field)
Field name : Type
water_value : String
parking_value : String
temperature_value : String
state_motor : Boolean
state_gate : Boolean

- After creating all these move to Actions

- Type actions : motor_on , motor_off , gate_on , gate_off

- ACTIVATE MANIFEST

- NOW MOVE TO APPLICATIONS (described in below picture)

- Create new application and Name it
- In AUTHORIZATION METHODS check Client credentials, auth code, implicit
- In AUTH REDIRECT URL write http://localhost:8000/acdemo/index.php
Save application
- After this move to PERMISSIONS (on the left bar) and give it read

- Now click on the SHOW CLIENT ID & SECRET
Write down both of them for later use
Here the developer part ends and we will move to the final step of cloud configuring
- Move to the ARTIK CLOUD NOW

- Click on the DEVICES as shown below

- Click on the connect device and now write your device name which you entered previously when creating device type (shown below)

Because I named it hotel testing, it shows up in the drop down list.
- After creating move onto the settings as shown below

- You will now see a windows popping up, Click on the generate button to generate the token for your device (shown below)

- Note down Device ID, Device Token.
We will use all of these later.
Now the last thing is to add one rule (optional)

--> On MY ARTIK CLOUD drop down click rules
I have added one rule of mailing whenever my motor turns on (shown in above picture) and SAVE it
-----------------------------------------------------------------------------------------------------------------------
Setting up the ARDUINOThis part is divided into four parts (Parking, temperature, waterlevel and controls), Circuit diagram is provided.
- Setup the hardware accordingly
- Then upload the program on your arduino
- There is no problem if you are planning to make only one or two parts, the application will still work and receive the data (analog pins might give random values if they are not connected to any thing)
Parking
LDR's are used to detect objects on the surface and is programmed accordingly to send the data, when the data reaches the android client it automatically changes the UI depending on the data and car is shown on that particular slot.
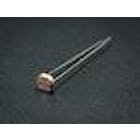
Temperature
LM35 is used to detect the temperature and is programmed accordingly to send the data, when the data reaches the android client it automatically changes the UI depending on the data and temperature is update on the block.
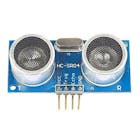
Waterlevel
Ultrasonic is used here to detect the level, you will need a container to hold the water and attach the ultrasonic sensor on top.
- Please note that the motors I'm using for demo are very small brushless dc motors and they dont require much current, so they are safe to use directly otherwise you will need driver circuit such as (using 2N222,diodes or H bridge).
You will see an email if you have done the optional Rule step

-----------------------------------------------------------------------------------------------------------------------
Setting up Raspberry piWe will be needing Node.js to run the code, after installing we have to just fire up the code in the raspberry pi with some little modifications to the code.
Start by installing Node.js
- Log in to your Raspberry pi and Enter the following commands:
sudo apt-get update This will update your pi (takes some time)
- Install Node.js
sudo apt-get install node - First create a folder in your Raspberry pi and name it cloudlive in your home directory.
sudo mkdir ~/cloudlive Then create a new file and name it server.js
sudo nano ~/cloudlive/server.js Then open the following link and Copy the code into this file from server.js
https://github.com/Anas-siddiqui/cloudlive
-----------------------------------------------------------------------------------------------------------------------
OR if you prefer git then use the following command
git clone This will directly create a new directory in your home and place all the files with code
- Edit some of the parameters to use it with your cloud account
- Do this by following steps
sudo nano ~/cloudlive/server.js open the editor again and change the following parameters
var device_id = "replace with your DEVICE_ID obtained when setting the cloud";
var device_token = "replace with your DEVICE_TOKEN obtained when setting the cloud";
Connect Arduino to your Raspberry pi (Serial from arduino to USB in RPi)
Start the program using
sudo node ~/cloudlive/server.js We are now ready with the raspberry pi

You will see above red highlighted Authorization message if you connect successfully, the device will then broadcast messages to cloud
-----------------------------------------------------------------------------------------------------------------------
Setting up the Android applicationGet the code from the Repository and make following changes
Recall all the previous ID's and tokens you saved in step 1 when configuring cloud
1- open MainActivity.java
- Insert your client ID (from developers->dashboard->applications)
2- open ArtikCloudSession.java
- Insert your client ID
- Insert Device ID (from cloud->my artik cloud->devices->settings icon)
3- open my_activity.java
- Insert KEY_ACCESS_TOKEN (from cloud->my artik cloud->devices->settings icon->Generate token)
4- BUILD and install apk
5- At first startup you will be asked for login, login using your same account
-----------------------------------------------------------------------------------------------------------------------
Future workWe can add further more components to it for controlling and monitoring, furthermore the the application can be extended made on other devices too because of the cross-platform compatibility from cloud.
 |
| × | 1 | |||
 |
| × | 1 | |||
 |
| × | 1 | |||
 |
| × | 1 | |||
| × | 1 | ||||
 |
| × | 4 | |||
 |
| × | 4 | |||
 |
| × | 1 | |||
 |
| × | 1 | |||
 |
| × | 2 |

Everyday we see a changing trend in technology and no matter what it has changed the way we live today and is still changing, Here we are prototyping a hardware which connects the essential components of a house or a hotel to the cloud for secure data monitoring through a computer or from an Android application. This also gives you the control on your components from anywhere and automates them according to the settings you set, Furthermore some actions can also be set to provide a better communication extension like EMAIL someone regarding the changes in parking or water level etc.
This idea will encourage people to make their homes and business structure more smart and the secure data storage will provide a structured record for future use.
OverviewApplication and automated settings below
Following are the demonstrations for all the systems, demonstrated separately.
Parking demo
Temperature demo
Automated Waterlevel
Standard waterlevel
How to set the prototypeThis tutorial is divided into four sections
- Configuring your ARTIK cloud account
- Setting up your Arduino with demo videos
- Setting up your Raspberry pi
- Setting up the Android application
- Signup for an account on https://developer.artik.cloud/
- goto Dashbaord then DEVICE TYPES
- NEW DEVICE TYPE
- Type your desired display name and unique name
(I named it hotel testing)
- Now move onto the manifest from left and then click NEW MANIFEST
- Now you have to enter the variables with their type which will upload the results to cloud
Create all these (from new field)
Field name : Type
water_value : String
parking_value : String
temperature_value : String
state_motor : Boolean
state_gate : Boolean
- After creating all these move to Actions
- Type actions : motor_on , motor_off , gate_on , gate_off
- ACTIVATE MANIFEST
- NOW MOVE TO APPLICATIONS (described in below picture)
- Create new application and Name it
- In AUTHORIZATION METHODS check Client credentials, auth code, implicit
- In AUTH REDIRECT URL write http://localhost:8000/acdemo/index.php
Save application
- After this move to PERMISSIONS (on the left bar) and give it read
- Now click on the SHOW CLIENT ID & SECRET
Write down both of them for later use
Here the developer part ends and we will move to the final step of cloud configuring
- Move to the ARTIK CLOUD NOW
- Click on the DEVICES as shown below
- Click on the connect device and now write your device name which you entered previously when creating device type (shown below)
Because I named it hotel testing, it shows up in the drop down list.
- After creating move onto the settings as shown below
- You will now see a windows popping up, Click on the generate button to generate the token for your device (shown below)
- Note down Device ID, Device Token.
We will use all of these later.
Now the last thing is to add one rule (optional)
--> On MY ARTIK CLOUD drop down click rules
I have added one rule of mailing whenever my motor turns on (shown in above picture) and SAVE it
-----------------------------------------------------------------------------------------------------------------------
Setting up the ARDUINOThis part is divided into four parts (Parking, temperature, waterlevel and controls), Circuit diagram is provided.
- Setup the hardware accordingly
- Then upload the program on your arduino
- There is no problem if you are planning to make only one or two parts, the application will still work and receive the data (analog pins might give random values if they are not connected to any thing)
Parking
LDR's are used to detect objects on the surface and is programmed accordingly to send the data, when the data reaches the android client it automatically changes the UI depending on the data and car is shown on that particular slot.
Temperature
LM35 is used to detect the temperature and is programmed accordingly to send the data, when the data reaches the android client it automatically changes the UI depending on the data and temperature is update on the block.
Waterlevel
Ultrasonic is used here to detect the level, you will need a container to hold the water and attach the ultrasonic sensor on top.
- Please note that the motors I'm using for demo are very small brushless dc motors and they dont require much current, so they are safe to use directly otherwise you will need driver circuit such as (using 2N222,diodes or H bridge).
You will see an email if you have done the optional Rule step
-----------------------------------------------------------------------------------------------------------------------
Setting up Raspberry piWe will be needing Node.js to run the code, after installing we have to just fire up the code in the raspberry pi with some little modifications to the code.
Start by installing Node.js
- Log in to your Raspberry pi and Enter the following commands:
sudo apt-get update
This will update your pi (takes some time)
- Install Node.js
sudo apt-get install node
- First create a folder in your Raspberry pi and name it cloudlive in your home directory.
sudo mkdir ~/cloudlive
Then create a new file and name it server.js
sudo nano ~/cloudlive/server.js
Then open the following link and Copy the code into this file from server.js
https://github.com/Anas-siddiqui/cloudlive
-----------------------------------------------------------------------------------------------------------------------
OR if you prefer git then use the following command
git clone
This will directly create a new directory in your home and place all the files with code
- Edit some of the parameters to use it with your cloud account
- Do this by following steps
sudo nano ~/cloudlive/server.js
open the editor again and change the following parameters
var device_id = "replace with your DEVICE_ID obtained when setting the cloud";
var device_token = "replace with your DEVICE_TOKEN obtained when setting the cloud";
Connect Arduino to your Raspberry pi (Serial from arduino to USB in RPi)
Start the program using
sudo node ~/cloudlive/server.js
We are now ready with the raspberry pi
You will see above red highlighted Authorization message if you connect successfully, the device will then broadcast messages to cloud
-----------------------------------------------------------------------------------------------------------------------
Setting up the Android applicationGet the code from the Repository and make following changes
Recall all the previous ID's and tokens you saved in step 1 when configuring cloud
1- open MainActivity.java
- Insert your client ID (from developers->dashboard->applications)
2- open ArtikCloudSession.java
- Insert your client ID
- Insert Device ID (from cloud->my artik cloud->devices->settings icon)
3- open my_activity.java
- Insert KEY_ACCESS_TOKEN (from cloud->my artik cloud->devices->settings icon->Generate token)
4- BUILD and install apk
5- At first startup you will be asked for login, login using your same account
-----------------------------------------------------------------------------------------------------------------------
Future workWe can add further more components to it for controlling and monitoring, furthermore the the application can be extended made on other devices too because of the cross-platform compatibility from cloud.

