How to Make an Ultrasonic Levitator Using Arduino © GPL3+
DESCRIPTION
Hello guys, today I will show you how to make your ultrasonic levitator using an Arduino Nano. It’s so easy to make and hope it will be useful for you g uys. If you have any question or suggestion, please feel free to comment in my youtube video and please don’t forget to like and subscribe to my YouTube channel.
Click here for full tutorial and source code.
Click hereto visit my Instagram.
Everything you needed for this project:
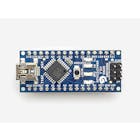
- Arduino Nano
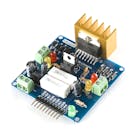
- Motor driver L298N
- Ultrasonic Sensor Module (HC-SR04)
What is an ultrasonic levitator?
Acoustic levitation (also: Acoustophoresis) is a method for suspending matter in a medium by using acoustic radiation pressure from intense sound waves in the medium. Sometimes sound waves at ultrasonic frequencies can be used to levitate objects, thus creating no sound heard by the human ear, such as was demonstrated at Otsuka Lab while others use audible frequencies. There are various ways of emitting the sound wave, from creating a wave underneath the object and reflecting it back to its source, to using a (transparent) tank to create a large acoustic field.
What is an ultrasonic sensor?
As the name indicates, ultrasonic sensors measure distance by using ultrasonic waves.The sensor head emits an ultrasonic wave and receives the wave reflected back from the target. Ultrasonic Sensors measure the distance to the target by measuring the time between the emission and reception.
An optical sensor has a transmitter and receiver, whereas an ultrasonic sensor uses a single ultrasonic element for both emission and reception. In a reflective model ultrasonic sensor, a single oscillator emits and receives ultrasonic waves alternately. This enables the miniaturization of the sensor head.
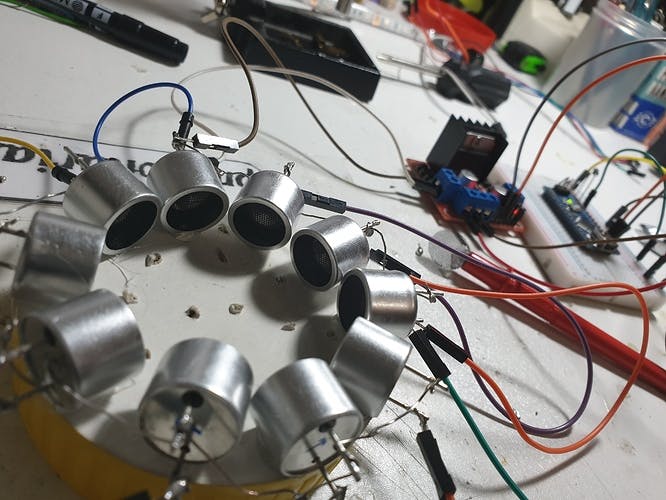
Final project:


Hello guys, today I will show you how to make your ultrasonic levitator using an Arduino Nano. It’s so easy to make and hope it will be useful for you g uys. If you have any question or suggestion, please feel free to comment in my youtube video and please don’t forget to like and subscribe to my YouTube channel.
Click here for full tutorial and source code.
Click hereto visit my Instagram.
Everything you needed for this project:
- Arduino Nano
- Motor driver L298N
- Ultrasonic Sensor Module (HC-SR04)
What is an ultrasonic levitator?
Acoustic levitation (also: Acoustophoresis) is a method for suspending matter in a medium by using acoustic radiation pressure from intense sound waves in the medium. Sometimes sound waves at ultrasonic frequencies can be used to levitate objects, thus creating no sound heard by the human ear, such as was demonstrated at Otsuka Lab while others use audible frequencies. There are various ways of emitting the sound wave, from creating a wave underneath the object and reflecting it back to its source, to using a (transparent) tank to create a large acoustic field.
What is an ultrasonic sensor?
As the name indicates, ultrasonic sensors measure distance by using ultrasonic waves.The sensor head emits an ultrasonic wave and receives the wave reflected back from the target. Ultrasonic Sensors measure the distance to the target by measuring the time between the emission and reception.
An optical sensor has a transmitter and receiver, whereas an ultrasonic sensor uses a single ultrasonic element for both emission and reception. In a reflective model ultrasonic sensor, a single oscillator emits and receives ultrasonic waves alternately. This enables the miniaturization of the sensor head.
Final project: