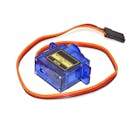
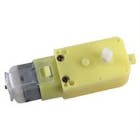
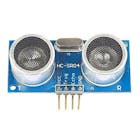
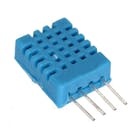
#include <NewPing.h> //
#include <AFMotor.h> // You can download the code library below
#include <Servo.h> //

// Ultranic Pin Configuration

#define TRIG_PIN A0
#define ECHO_PIN A1

#define MAX_DISTANCE 400
#define MAX_SPEED 255
#define MAX_SPEED_OFFSET -8

#define COLL_DIST 20
#define TURN_DIST COLL_DIST+10
#define ACT_TIME 250
 int calibrationTime = 30;

//the time when the sensor outputs a low impulse
long unsigned int lowIn;

//the amount of milliseconds the sensor has to be low
//before we assume all motion has stopped
long unsigned int pause = 5000;

boolean lockLow = true;
boolean takeLowTime;

int pirPin = A3;    //the digital pin connected to the PIR sensor's output
int ledPin = A2;
NewPing sonar(TRIG_PIN, ECHO_PIN, MAX_DISTANCE);

AF_DCMotor motorR(1, MOTOR12_1KHZ); // Set motor #1, 1kHz PWM
AF_DCMotor motorL(4, MOTOR12_1KHZ); // Set motor #2, 1kHz PWM

Servo myservo;  // Set servo object to control a servo
String motorSet = "";

int curDist = 0, pos, speedSet = 0;
//int pos;
//int speedSet = 0;

void setup() {
  Serial.begin(9600);
  pinMode(pirPin, INPUT);
  pinMode(ledPin, OUTPUT);
  digitalWrite(pirPin, LOW);

  //give the sensor some time to calibrate
  Serial.print("calibrating sensor ");
    for(int i = 0; i < calibrationTime; i++){
      Serial.print(".");
      delay(1000);
      }
    Serial.println(" done");
    Serial.println("SENSOR ACTIVE");
    delay(50);
  myservo.attach(9);  // Set to attach the servo on pin 9
  myservo.write(90);  // Write 90 to face servo forward
  delay(2000);

  motorSet = "FORWARD";
  moveForward();

}

void loop() {

  checkPath();
  if(digitalRead(pirPin) == HIGH){
       digitalWrite(ledPin, HIGH);   //the led visualizes the sensors output pin state
       if(lockLow){
         //makes sure we wait for a transition to LOW before any further output is made:
         lockLow = false;
         Serial.println("---");
         Serial.print("motion detected at ");
         Serial.print(millis()/1000);
         Serial.println(" sec");
         delay(50);
         }
         takeLowTime = true;
       }

     if(digitalRead(pirPin) == LOW){
       digitalWrite(ledPin, LOW);  //the led visualizes the sensors output pin state

       if(takeLowTime){
        lowIn = millis();          //save the time of the transition from high to LOW
        takeLowTime = false;       //make sure this is only done at the start of a LOW phase
        }
       //if the sensor is low for more than the given pause,
       //we assume that no more motion is going to happen
       if(!lockLow && millis() - lowIn > pause){
           //makes sure this block of code is only executed again after
           //a new motion sequence has been detected
           lockLow = true;
           Serial.print("motion ended at ");      //output
           Serial.print((millis() - pause)/1000);
           Serial.println(" sec");
           delay(50);
           }
       }

}

void checkPath() {

  int curLeft = 0; int curRight = 0; int curFront = 0;
  curDist = 0;

  checkForward();
  myservo.write(135);
  delay(100);
  for (pos = 135; pos >= 45; pos -= 45) {
    myservo.write(pos);
    delay(170);
    curDist = readPing();

    if (curDist < COLL_DIST) { checkCourse(); break; }
    if (curDist < TURN_DIST) { changePath(); }

  }
}

int readPing() {
  int cm = 0;
  while (cm < 2) {int uS = sonar.ping(); cm = uS/US_ROUNDTRIP_CM;}
  return cm;
}

void checkForward() {
  if (motorSet=="FORWARD") { motorR.run(FORWARD); motorL.run(FORWARD); }
}
void changePath() {

  if (pos < 90) { veerLeft(); }
  if (pos > 90) { veerRight(); }

}

void veerRight() {
  motorR.run(BACKWARD);  motorL.run(FORWARD);
  delay(ACT_TIME);
  motorR.run(FORWARD);   motorL.run(FORWARD);
  motorSet = "FORWARD";
}

void veerLeft() {
  motorL.run(BACKWARD);  motorR.run(FORWARD);
  delay(ACT_TIME);
  motorL.run(FORWARD);   motorR.run(FORWARD);
  motorSet = "FORWARD";
}

void checkCourse() {
  moveBackward();
  delay(ACT_TIME);
  moveStop();
  setCourse();
}

void setCourse() {
  if (pos < 90) { turnRight(); }
  if (pos > 90) { turnLeft(); }
}

void moveBackward() {
  motorSet = "BACKWARD";

  motorR.run(BACKWARD); // Turn right motor backward
  motorL.run(BACKWARD);  // Turn left motor backward

  for (speedSet = 0; speedSet < MAX_SPEED; speedSet +=2)
  {
    motorL.setSpeed(speedSet);
    motorR.setSpeed(speedSet+MAX_SPEED_OFFSET);
    delay(5);
  }
}

void moveForward() {
  motorSet = "FORWARD";
  checkForward();
  for (speedSet = 0; speedSet < MAX_SPEED; speedSet +=2)  {
    motorL.setSpeed(speedSet);
    motorR.setSpeed(speedSet+MAX_SPEED_OFFSET);
    delay(4);
  }
}

void moveStop() { motorR.run(RELEASE); motorL.run(RELEASE); }

void turnRight() {
  motorSet = "RIGHT";
  motorR.run(FORWARD);      // Turn right motor forward
  motorL.run(BACKWARD);     // Turn left motor backward
  delay(ACT_TIME);
  motorSet = "FORWARD";
  checkForward();
}

void turnLeft() {
  motorSet = "LEFT";
  motorR.run(BACKWARD);     // Turn right motor backward
  motorL.run(FORWARD);      // Turn left motor forward
  delay(ACT_TIME);
  motorSet = "FORWARD";
  checkForward();
}
