Indoor Air Quality and Garbage Monitoring System © CC BY-NC-SA
DESCRIPTION
1. Introduction
Building automation is the automatic centralized control of a building's heating, ventilation and air conditioning, lighting and other systems through a building management system or building automation system (BAS). The objectives of building automation are improved occupant comfort, efficient operation of building systems, reduction in energy consumption and operating costs, and improved life cycle of utilities.
Building automation is an example of a distributed control system – the computer networking of electronic devices designed to monitor and control the mechanical, security, fire and flood safety, lighting, HVAC and humidity control and ventilation systems in a building.

IOTA is an open source distributed accounting technology, whose objective is to securely exchange information and value in the Internet of Things. One of the main innovations of IOTA is that, instead of the traditional Blockchain, it uses its own architecture (Tangle) based on a mathematical concept called Directed Acyclic Graph (DAG). This architecture makes it possible that there are no commissions, that the latency of the network is low and better perspectives of scalability. IOTA is currently under development and it is expected that, throughout 2019, the technology will be ready to be adopted on a large scale.
The project is supervised by the IOTA Foundation, a non-profit organization located in Germany, which is responsible for the development of technology and to encourage its adoption. One of the main objectives of the Foundation is to increase the adoption of the protocol in order to make it a standard

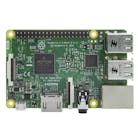
The specs for the Raspberry Pi 3 B include:
- CPU: Quad-core 64-bit ARM Cortex A53 clocked at 1.2 GHz.
- GPU: 400MHz VideoCore IV multimedia.
- Memory: 1GB LPDDR2-900 SDRAM (i.e. 900MHz)
- USB ports: 4.
- Video outputs: HDMI, composite video (PAL and NTSC) via 3.5 mm jack.
- Network: 10/100 Mbps Ethernet and 802.11n Wireless LAN.

Features of the Arduino UNO board:
- Microcontroller: ATmega328.
- Operating Voltage: 5V.
- Input Voltage (recommended): 7-12V.
- Input Voltage (limits): 6-20V.
- Digital I/O Pins: 14 (of which 6 provide PWM output)
- Analog Input Pins: 6.
- DC Current per I/O Pin: 40 mA.
- DC Current for 3.3V Pin: 50 mA.

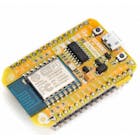
NodeMCU, features:
- Finally, programable WiFi module.
- Arduino-like (software defined) hardware IO.
- Can be programmed with the Arduino IDE.
- USB-TTL included, plug & play.
- 10 GPIOs D0-D10, PWM functionality, IIC and SPI communication, 1-Wire and ADC A0 etc. all in one board.

This project is divided into three versions. For a better understanding of the project we have divided it into the following chapters:
- 1. Introduction
- 2. Software Installation
- 3. Indoor Air Quality Monitoring System v1
- 4. Indoor Air Quality Monitoring System v2
- 5. Garbage Monitoring System
- 6. Conclusions
2. Software Installation
a) Install Raspbian on the Raspberry PI 3 B
I installed NOOBS, the download link and the instructions are in: https://www.raspberrypi.org/downloads/
b) Install Node.JS
$ curl -sL https://deb.nodesource.com/setup_8.x | sudo -E bash -
$ sudo apt-get install -y nodejs
c) Download and build the BCM2835 library on the Raspberry Pi. This library helps us to work with the DHT11 sensor.
$ wget http://www.airspayce.com/mikem/bcm2835/bcm2835-1.56.tar.gz
$ tar zxvf bcm2835-1.56.tar.gz
$ cd bcm2835-1.56
$ ./configure
$ make
$ sudo make check
$ sudo make install
d) Download and install the indoor-air-quality-iota project on the Raspberry Pi
$ cd ~
$ git clone https://github.com/guillengap/indoor-air-quality-and-garbage-monitoring-system.git
$ cd indoor-air-quality-and-garbage-monitoring-system
$ npm install
e) Download and install serialport
$ nmp install serialport f) Download and install Arduino IDE:
https://www.arduino.cc/en/Main/Software
3. Indoor Air Quality Monitoring System v1
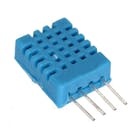
The DHT11 sensor data is read and published to the Tangle using MAM.
How does it work?
a) The indoor-air-quality-iota project has 3 java script files:
- sensor.js: The DHT11 sensor data is read and displayed: temperature and humidity.
- mam_sensor.js: The DHT11 sensor data is read and published to the IOTA Tangle using MAM.
- mam_receive.js: Extract the stored data from the IOTA Tangle using MAM and display the data.
b) The full node end point and side key are both hardcoded in the javascript files. To stop a script from running, press CTRL+Z.
c) Connect to the Arduino UNO board, the DHT11 sensor.

d) Execute nodesensor.js to check if the Raspberry Pi can read temperature and humidity data from the DHT11 sensor module.
$ node sensor.js Here we can see the humidity and temperature data captured by the DHT11 sensor. If all is well, then we go to the next step.
e) Execute node mam_sensor.js. This script will store the temperature and humidity data from the DHT11 sensor module to the Tangle.
$ node mam_sensor.js 
We tested with three nodes and had better results with: https://potato.iotasalad.org:14265
//const iota = new IOTA({ provider: 'https://nodes.testnet.iota.org:443' });
const iota = new IOTA({ provider: 'https://potato.iotasalad.org:14265' });
//const iota = new IOTA({ provider: 'https://peanut.iotasalad.org:14265' });
You can consult some available nodes in: https://iotasalad.org/nodes
We are sending the following information:
- City: MEXICO
- Building: 65
- Date and Time (UTC): YEAR. MONTH, DAY, HOUR. MINUTES AND SECONDS
- Data: Temperature in degrees Celsius and Fahrenheit and Relative Humidity Percentage
function readSensor(){
   sensor.read(SENSORTYPE, GPIOPIN, async function(err, temperature, humidity) {
       if (!err) {
           const city = ('MEXICO');
           const building = ('65');
           const dateTime = moment().utc().format('YYYY/MM/DD hh:mm:ss');
           const data = `{Temperature: ${temperature.toFixed(1)}°C (${(temperature.toFixed(1)*1.8)+32}°F), Humidity: ${humidity.toFixed(1)}%}`;
           const json = {"data": data, "dateTime": dateTime, "building": building, "city": city};
           const root = await publish(json);
           console.log(`City: ${json.city}, Building: ${json.building}, Time: ${json.dateTime} UTC, Data: ${json.data}, root: ${root}`);
       } else {
           console.log(err);
       }
   });
}
f) Open another terminal and type: node mam_receive.js your_root and the stored sensor data are displayed. For example:
$ node mam_receive.js AMBTIKZKEVEEQFCUGIDUOLDOXL9OZQ9GOMNBFYHVRAUCAMHDQQJBSNAMFZYRLTUVAHFDINHTTFKIPELIG 
The code that manages the received data is:
// RECEIVE DATA FROM THE TANGLE
const executeDataRetrieval = async function(rootVal, keyVal) {
   let resp = await Mam.fetch(rootVal, MODE, keyVal, function(data) {
       let json = JSON.parse(iota.utils.fromTrytes(data));
       console.log(`City: ${json.city}, Building: ${json.building}, Time: ${json.dateTime} UTC, Data: ${json.data}`);
   });
}
Test
Images


4. Indoor Air Quality Monitoring System v2
The DHT11, MQ-2, and MQ-7 sensors data are read and published to the Tangle using MAM
How does it work?
a) The indoor-air-quality-iota project has 5 files:
- sensorArduino.ino: This code is to capture the data of the three sensors: DHT11 humidity and temperature sensor, MQ-2 LPG gas sensor, and MQ-7 CO gas sensor.
- listportsArduino.ino: It shows us the available ports of the Arduino UNO board.
- sensorArduino.js: The DHT11, MQ-2 and MQ-7 sensors data are read and displayed.
- mam_sensorArduino.js: The DHT11, MQ-2, and MQ-7 sensors data are read and published to the Tangle using MAM.
- mam_receiveArduino.js: Extract the stored data from the Tangle using MAM and display the data.
b) The full node end point and side key are both hardcoded in the javascript files. To stop a script from running, press CTRL+Z.
c) Connect to the Arduino UNO board, the sensors: DHT11, MQ-2 and MQ-7.

d) In the "sensorArduino" folder, which is found in the indoor-air-quality-iota project, we have the sensor libraries: DHT11, MQ-2 and MQ7. We must install them in the Arduino libraries.
e) Upload the sketch sensorArduino.ino, to the Arduino UNO board and run it. Select the communication port with the Arduino UNO board, in my case it is: Tools> Port> / dev / ttyACM0
f) Open a terminal and execute node listportsArduino.js to verify that our port is active.
$ node listportsArduino.js 
g) Execute node mam_sensorArduino.js. This script will store the data from the Arduino UNO board to the Tangle.
$ node mam_sensorArduino.js 
We are sending the following information:
- City: NY
- Building: 13
- Date and Time (UTC): YEAR. MONTH, DAY, HOUR. MINUTES AND SECONDS
- Data: LPG gas in ppm, CO gas in ppm, Temperature in degrees Celsius, Relative Humidity Percentage,
async function readSerialData(data){
   let json = {};
   const time = moment().utc().format('YYYY/MM/DD hh:mm:ss');
   const city = ('NY');
   const building = ('13');
   json['time'] = time;
       json['city'] = `${city}`;
       json['building'] = `${building}`;
	json['data'] = `{${data}}`;
   console.log('json = ',json);
   const root = await publish(json);
}
h) Open another terminal and type: node mam_receiveArduino.js your_root and the stored sensor data is displayed. For example:

The code that manages the received data is:
// RECEIVE DATA FROM THE TANGLE
const executeDataRetrieval = async function(rootVal, keyVal) {
   let resp = await Mam.fetch(rootVal, MODE, keyVal, function(data) {
   let json = JSON.parse(iota.utils.fromTrytes(data));
   console.log(`City: ${json.city}, Building: ${json.building}, Time: ${json.time} UTC, Data: ${json.data}`);
   });
   executeDataRetrieval(resp.nextRoot, keyVal);
}
Test
Images


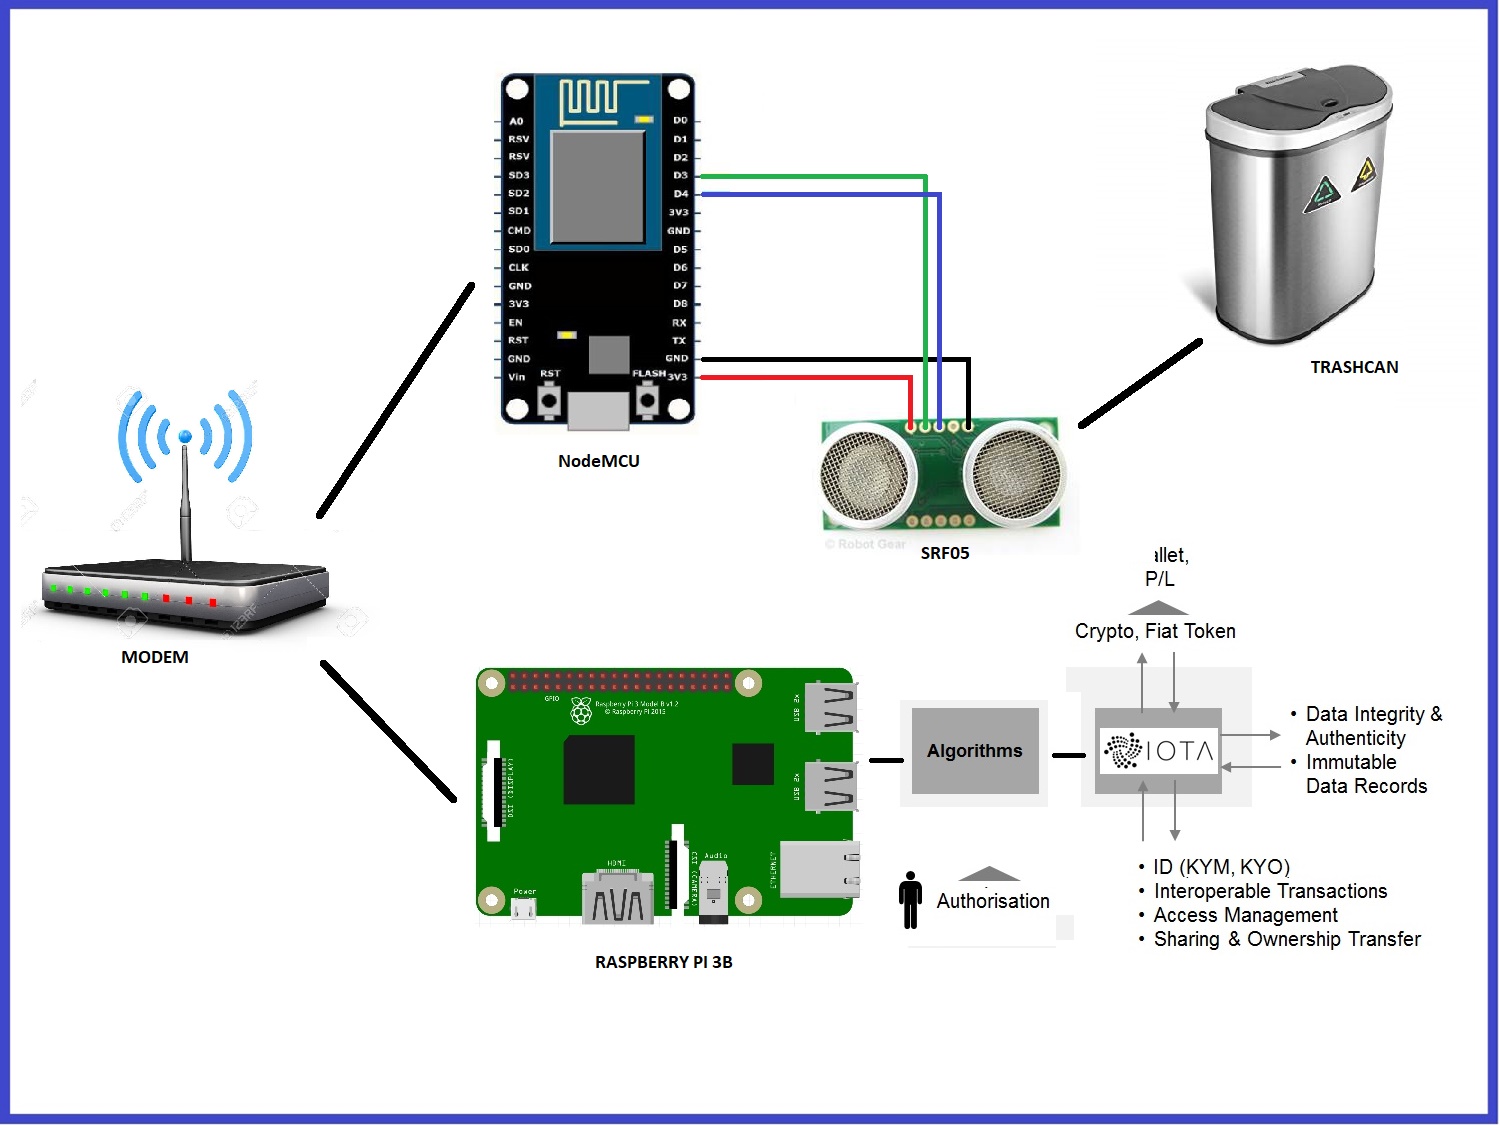
5. Garbage Monitoring System
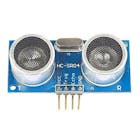
Send SRF05 sensor data using NodeMCU and MQTT to IOTA Tangle using MAM
How does it work?
a) This project has 3 files:
- trashcan.ino: This code calculates the amount of garbage, inside a trashcan in %. Then, send the data to the Raspberry Pi 3B board, using the MQTT protocol.
- nodemcu_mqtt_mam.js: The SRF05 sensor data are read and published to the Tangle using MAM.
- nodemcu_mam_receive.js: Extract the stored data from the Tangle using MAM and display the data.
b) The full node end point and side key are both hardcoded in the javascript files. To stop a script from running, press CTRL+Z.
c) Connect to the NodeMCUboard, the SRF05 ultrasonic sensors.

d) Install esp8266 packages using the Boards Manager. Open the Arduino IDE preferences window and enter in the Additional Board Manager URLs field: http://arduino.esp8266.com/stable/package_esp8266com_index.json
Select menu: Tools > Board > Board Manager... In the search field, type: esp8266 and install the latest version.

e) Now lets make the NodeMCU communicate with a mosquitto server. First begin by adding the PubSubClient library to the Arduino IDE. This library is for MQTT messaging and it supports NodeMCU.
- Select menu: Sketch > Include Library > Manage Libraries
- Search for: PubSub
- Select PubSubClient (Nick O'Leary) and install the latest version
f) Next install Mosquitto (MQTT) on the RaspberryPi 3B. The MQTT protocol provides a lightweight method of carrying out messaging using a publish/subscribe model. This makes it suitable for Internet of Things messaging such as with low power sensors or mobile devices such as phones, embedded computers or microcontrollers. Log into your Raspberry Pi, open a terminal and type:
$ cd~
$ wget http://repo.mosquitto.org/debian/mosquitto-repo.gpg.key
$ apt-key add mosquitto-repo.gpg.key
$ cd /etc/apt/sources.list.d/$ wget http://repo.mosquitto.org/debian/mosquitto-stretch.list
Now install the following:
$ cd~
$ wget http://security.debian.org/debian-security/pool/updates/main/o/openssl/libssl1.0.0_1.0.1t-1+deb8u11_armhf.deb
$ sudo dpkg -i libssl1.0.0_1.0.1t-1+deb8u11_armhf.deb
$ wget http://ftp.nz.debian.org/debian/pool/main/libw/libwebsockets/libwebsockets3_1.2.2-1_armhf.deb
$ sudo dpkg -i libwebsockets3_1.2.2-1_armhf.deb
The libss... latest version you can find here: http://security.debian.org/debian-security/pool/updates/main/o/openssl/
Install MQTT broker and mosquito clients.
$ sudo apt-get install mosquitto mosquitto-clients If you have a problem with the installation of MQTT, you can try:
$ npm install mqtt --save Reboot the Raspberry Pi. Open a terminal and verify the mosquito version:
$ mosquito -v You can start and stop the mosquito server:
$ sudo /etc/init.d/mosquitto start
$ sudo /etc/init.d/mosquitto stop
We verify the IP of the Raspberry Pi:
$ ifconfig g) Upload the sketch trashcan.ino, to the NodeMCU board. Verify next data:
- NodeMCU 1.0 board
- Serial Port
- Serial.begin(115200);
- const char* wifi_ssid = "ARRIS-WXYZ";
- const char* wifi_password = "XXXXXXXXXXXX";
- const char* mqtt_server = "192.168.0.12"; // RASPBERRY IP
- int trashcan = 25;// MY TRASHCAN HAS 25 CM OF LENGHT

h) Execute nodemcu_mqtt_mam.js, this script will store the data from the NodeMCU board to the Tangle.
$ nodemcu_mqtt_mam.js 
We are sending the following information:
- City: BERLIN
- Building: 7
- Date and Time (UTC): YEAR. MONTH, DAY, HOUR. MINUTES AND SECONDS
- Data: trashcan percentage.
 async function onMessageReceived(topic, message) {
   if (topic == SRF05_TOPIC) {
       const city = ('BERLIN');
       const building = ('7');
       const dateTime = moment().utc().format('YYYY/MM/DD hh:mm:ss');
       const data = `{${message}}`;
       const json = {"data": data, "dateTime": dateTime, "building": building, "city": city};
       const root = await publish(json);
       console.log(`City: ${json.city}, Building: ${json.building}, dateTime: ${json.dateTime} UTC, data: ${json.data}, root: ${root}`);
   }
}
i) Open another terminal and type: node mam_receiveArduino.js your_root and the stored sensor data is displayed. For example:

The code that manages the received data is:
// RECEIVE DATA FRON THE TANGLE
const executeDataRetrieval = async function(rootVal, keyVal) {
   let resp = await Mam.fetch(rootVal, MODE, keyVal, function(data) {
       let json = JSON.parse(iota.utils.fromTrytes(data));
   console.log(`City: ${json.city}, Building: ${json.building}, dateTime: ${json.dateTime} UTC, Data: ${json.data}`);
   });
   executeDataRetrieval(resp.nextRoot, keyVal);
}
On this occasion the available node was different: https://iotasalad.org/nodes
const iota = new IOTA({ provider: 'https://durian.iotasalad.org:14265' }); Test
Images


6. Conclusions
Indoor Air Quality Monitoring System v1:
This project has worked satisfactorily and we monitor the quality of the air inside of a building, as we can see in the results obtained. We simulate this project in a building that is located in Mexico City. This was a basic test using the DHT11 Humidity and Temperature sensor and the Raspberry Pi 3B board, Java Script code and the IOTA protocol.
According to the American Society of Heating, Refrigerating and Air-Conditioning Engineers (ASHRAE), the ideal humidity range for humans is between 30 to 60 percent relative humidity. The ideal is somewhere around 45-55%. The average normal body temperature is generally accepted as 98.6°F (37°C). Some studies have shown that the "normal" body temperature can have a wide range, from 97°F (36.1°C) to 99°F (37.2°C). A temperature over 100.4°F (38°C) most often means you have a fever caused by an infection or illness.
Indoor Air Quality Monitoring System v2:
In this project we have used the DHT11, MQ-2 (LPG) and MQ-7 (CO) Sensors. On this occasion. we simulate capturing the data in a building localed in New York City, and we send this data using Arduino UNO and Raspberry Pi boards, to IOTA Tangle using Masked Authenticated Messaging (MAM). This was a practical and quick way to add more sensors. This version can be used in smart buildings and in industries where LP gas is used and where carbon monoxide is produced by fires.
LPG gas can ignite in the presence of a flame if it´s concentration in local air lies between 2–10%. Regarding the effects of CO on health, most people don´t suffer any symptoms from prolonged exposure to CO levels between approximately 1 and 70 ppm, but if CO levels increase and remain above 70 ppm, symptoms may include headache, fatigue and nausea. When the concentration of CO remains above 150 and 200 ppm, disorientation, loss of consciousness and death are possible.
Garbage Monitoring System:
The goal of this project is to take control of the garbage deposit in a smart building located in Berlin city or any District. The accumulation of garbage, can produce bad smells of products in decomposition, but now we can know, how long has a trashboat with refuse and the percentage of this garbage.
When garbage decomposes in an anaerobic environment it creates biogas, which is part of why garbage smells. Biogas in high concentrations is a health hazard for a multiple reasons- it is explosive, it doesn't contain oxygen so there is a suffocation hazard, and if it isn't properly treated it is a source of air pollution. But to get high concentrations of biogas, you literally need tons of trash. Possible physical illnesses caused by bad smell: dizziness, headache, respiratory distress, and psychological alterations.
 |
| × | 1 | |||
 |
| × | 1 | |||
 |
| × | 1 | |||
 |
| × | 1 | |||
 |
| × | 1 | |||
| × | 1 | ||||
 |
| × | 1 | |||
| × | 1 | ||||
| × | 1 | ||||
 |
| × | 1 | |||
 |
| × | 1 | |||
| × | 1 |


1. Introduction
Building automation is the automatic centralized control of a building's heating, ventilation and air conditioning, lighting and other systems through a building management system or building automation system (BAS). The objectives of building automation are improved occupant comfort, efficient operation of building systems, reduction in energy consumption and operating costs, and improved life cycle of utilities.
Building automation is an example of a distributed control system – the computer networking of electronic devices designed to monitor and control the mechanical, security, fire and flood safety, lighting, HVAC and humidity control and ventilation systems in a building.
IOTA is an open source distributed accounting technology, whose objective is to securely exchange information and value in the Internet of Things. One of the main innovations of IOTA is that, instead of the traditional Blockchain, it uses its own architecture (Tangle) based on a mathematical concept called Directed Acyclic Graph (DAG). This architecture makes it possible that there are no commissions, that the latency of the network is low and better perspectives of scalability. IOTA is currently under development and it is expected that, throughout 2019, the technology will be ready to be adopted on a large scale.
The project is supervised by the IOTA Foundation, a non-profit organization located in Germany, which is responsible for the development of technology and to encourage its adoption. One of the main objectives of the Foundation is to increase the adoption of the protocol in order to make it a standard
The specs for the Raspberry Pi 3 B include:
- CPU: Quad-core 64-bit ARM Cortex A53 clocked at 1.2 GHz.
- GPU: 400MHz VideoCore IV multimedia.
- Memory: 1GB LPDDR2-900 SDRAM (i.e. 900MHz)
- USB ports: 4.
- Video outputs: HDMI, composite video (PAL and NTSC) via 3.5 mm jack.
- Network: 10/100 Mbps Ethernet and 802.11n Wireless LAN.
Features of the Arduino UNO board:
- Microcontroller: ATmega328.
- Operating Voltage: 5V.
- Input Voltage (recommended): 7-12V.
- Input Voltage (limits): 6-20V.
- Digital I/O Pins: 14 (of which 6 provide PWM output)
- Analog Input Pins: 6.
- DC Current per I/O Pin: 40 mA.
- DC Current for 3.3V Pin: 50 mA.
NodeMCU, features:
- Finally, programable WiFi module.
- Arduino-like (software defined) hardware IO.
- Can be programmed with the Arduino IDE.
- USB-TTL included, plug & play.
- 10 GPIOs D0-D10, PWM functionality, IIC and SPI communication, 1-Wire and ADC A0 etc. all in one board.
This project is divided into three versions. For a better understanding of the project we have divided it into the following chapters:
- 1. Introduction
- 2. Software Installation
- 3. Indoor Air Quality Monitoring System v1
- 4. Indoor Air Quality Monitoring System v2
- 5. Garbage Monitoring System
- 6. Conclusions
2. Software Installation
a) Install Raspbian on the Raspberry PI 3 B
I installed NOOBS, the download link and the instructions are in: https://www.raspberrypi.org/downloads/
b) Install Node.JS
$ curl -sL https://deb.nodesource.com/setup_8.x | sudo -E bash -
$ sudo apt-get install -y nodejs
c) Download and build the BCM2835 library on the Raspberry Pi. This library helps us to work with the DHT11 sensor.
$ wget http://www.airspayce.com/mikem/bcm2835/bcm2835-1.56.tar.gz
$ tar zxvf bcm2835-1.56.tar.gz
$ cd bcm2835-1.56
$ ./configure
$ make
$ sudo make check
$ sudo make install
d) Download and install the indoor-air-quality-iota project on the Raspberry Pi
$ cd ~
$ git clone https://github.com/guillengap/indoor-air-quality-and-garbage-monitoring-system.git
$ cd indoor-air-quality-and-garbage-monitoring-system
$ npm install
e) Download and install serialport
$ nmp install serialport
f) Download and install Arduino IDE:
https://www.arduino.cc/en/Main/Software
3. Indoor Air Quality Monitoring System v1
The DHT11 sensor data is read and published to the Tangle using MAM.
How does it work?
a) The indoor-air-quality-iota project has 3 java script files:
- sensor.js: The DHT11 sensor data is read and displayed: temperature and humidity.
- mam_sensor.js: The DHT11 sensor data is read and published to the IOTA Tangle using MAM.
- mam_receive.js: Extract the stored data from the IOTA Tangle using MAM and display the data.
b) The full node end point and side key are both hardcoded in the javascript files. To stop a script from running, press CTRL+Z.
c) Connect to the Arduino UNO board, the DHT11 sensor.
d) Execute nodesensor.js to check if the Raspberry Pi can read temperature and humidity data from the DHT11 sensor module.
$ node sensor.js
Here we can see the humidity and temperature data captured by the DHT11 sensor. If all is well, then we go to the next step.
e) Execute node mam_sensor.js. This script will store the temperature and humidity data from the DHT11 sensor module to the Tangle.
$ node mam_sensor.js
We tested with three nodes and had better results with: https://potato.iotasalad.org:14265
//const iota = new IOTA({ provider: 'https://nodes.testnet.iota.org:443' });
const iota = new IOTA({ provider: 'https://potato.iotasalad.org:14265' });
//const iota = new IOTA({ provider: 'https://peanut.iotasalad.org:14265' });
You can consult some available nodes in: https://iotasalad.org/nodes
We are sending the following information:
- City: MEXICO
- Building: 65
- Date and Time (UTC): YEAR. MONTH, DAY, HOUR. MINUTES AND SECONDS
- Data: Temperature in degrees Celsius and Fahrenheit and Relative Humidity Percentage
function readSensor(){
sensor.read(SENSORTYPE, GPIOPIN, async function(err, temperature, humidity) {
if (!err) {
const city = ('MEXICO');
const building = ('65');
const dateTime = moment().utc().format('YYYY/MM/DD hh:mm:ss');
const data = `{Temperature: ${temperature.toFixed(1)}°C (${(temperature.toFixed(1)*1.8)+32}°F), Humidity: ${humidity.toFixed(1)}%}`;
const json = {"data": data, "dateTime": dateTime, "building": building, "city": city};
const root = await publish(json);
console.log(`City: ${json.city}, Building: ${json.building}, Time: ${json.dateTime} UTC, Data: ${json.data}, root: ${root}`);
} else {
console.log(err);
}
});
}
f) Open another terminal and type: node mam_receive.js your_root and the stored sensor data are displayed. For example:
$ node mam_receive.js AMBTIKZKEVEEQFCUGIDUOLDOXL9OZQ9GOMNBFYHVRAUCAMHDQQJBSNAMFZYRLTUVAHFDINHTTFKIPELIG
The code that manages the received data is:
// RECEIVE DATA FROM THE TANGLE
const executeDataRetrieval = async function(rootVal, keyVal) {
let resp = await Mam.fetch(rootVal, MODE, keyVal, function(data) {
let json = JSON.parse(iota.utils.fromTrytes(data));
console.log(`City: ${json.city}, Building: ${json.building}, Time: ${json.dateTime} UTC, Data: ${json.data}`);
});
}
Test
Images
4. Indoor Air Quality Monitoring System v2
The DHT11, MQ-2, and MQ-7 sensors data are read and published to the Tangle using MAM
How does it work?
a) The indoor-air-quality-iota project has 5 files:
- sensorArduino.ino: This code is to capture the data of the three sensors: DHT11 humidity and temperature sensor, MQ-2 LPG gas sensor, and MQ-7 CO gas sensor.
- listportsArduino.ino: It shows us the available ports of the Arduino UNO board.
- sensorArduino.js: The DHT11, MQ-2 and MQ-7 sensors data are read and displayed.
- mam_sensorArduino.js: The DHT11, MQ-2, and MQ-7 sensors data are read and published to the Tangle using MAM.
- mam_receiveArduino.js: Extract the stored data from the Tangle using MAM and display the data.
b) The full node end point and side key are both hardcoded in the javascript files. To stop a script from running, press CTRL+Z.
c) Connect to the Arduino UNO board, the sensors: DHT11, MQ-2 and MQ-7.
d) In the "sensorArduino" folder, which is found in the indoor-air-quality-iota project, we have the sensor libraries: DHT11, MQ-2 and MQ7. We must install them in the Arduino libraries.
e) Upload the sketch sensorArduino.ino, to the Arduino UNO board and run it. Select the communication port with the Arduino UNO board, in my case it is: Tools> Port> / dev / ttyACM0
f) Open a terminal and execute node listportsArduino.js to verify that our port is active.
$ node listportsArduino.js
g) Execute node mam_sensorArduino.js. This script will store the data from the Arduino UNO board to the Tangle.
$ node mam_sensorArduino.js
We are sending the following information:
- City: NY
- Building: 13
- Date and Time (UTC): YEAR. MONTH, DAY, HOUR. MINUTES AND SECONDS
- Data: LPG gas in ppm, CO gas in ppm, Temperature in degrees Celsius, Relative Humidity Percentage,
async function readSerialData(data){
let json = {};
const time = moment().utc().format('YYYY/MM/DD hh:mm:ss');
const city = ('NY');
const building = ('13');
json['time'] = time;
json['city'] = `${city}`;
json['building'] = `${building}`;
json['data'] = `{${data}}`;
console.log('json = ',json);
const root = await publish(json);
}
h) Open another terminal and type: node mam_receiveArduino.js your_root and the stored sensor data is displayed. For example:
The code that manages the received data is:
// RECEIVE DATA FROM THE TANGLE
const executeDataRetrieval = async function(rootVal, keyVal) {
let resp = await Mam.fetch(rootVal, MODE, keyVal, function(data) {
let json = JSON.parse(iota.utils.fromTrytes(data));
console.log(`City: ${json.city}, Building: ${json.building}, Time: ${json.time} UTC, Data: ${json.data}`);
});
executeDataRetrieval(resp.nextRoot, keyVal);
}
Test
Images
5. Garbage Monitoring System
Send SRF05 sensor data using NodeMCU and MQTT to IOTA Tangle using MAM
How does it work?
a) This project has 3 files:
- trashcan.ino: This code calculates the amount of garbage, inside a trashcan in %. Then, send the data to the Raspberry Pi 3B board, using the MQTT protocol.
- nodemcu_mqtt_mam.js: The SRF05 sensor data are read and published to the Tangle using MAM.
- nodemcu_mam_receive.js: Extract the stored data from the Tangle using MAM and display the data.
b) The full node end point and side key are both hardcoded in the javascript files. To stop a script from running, press CTRL+Z.
c) Connect to the NodeMCUboard, the SRF05 ultrasonic sensors.
d) Install esp8266 packages using the Boards Manager. Open the Arduino IDE preferences window and enter in the Additional Board Manager URLs field: http://arduino.esp8266.com/stable/package_esp8266com_index.json
Select menu: Tools > Board > Board Manager... In the search field, type: esp8266 and install the latest version.
e) Now lets make the NodeMCU communicate with a mosquitto server. First begin by adding the PubSubClient library to the Arduino IDE. This library is for MQTT messaging and it supports NodeMCU.
- Select menu: Sketch > Include Library > Manage Libraries
- Search for: PubSub
- Select PubSubClient (Nick O'Leary) and install the latest version
f) Next install Mosquitto (MQTT) on the RaspberryPi 3B. The MQTT protocol provides a lightweight method of carrying out messaging using a publish/subscribe model. This makes it suitable for Internet of Things messaging such as with low power sensors or mobile devices such as phones, embedded computers or microcontrollers. Log into your Raspberry Pi, open a terminal and type:
$ cd~
$ wget http://repo.mosquitto.org/debian/mosquitto-repo.gpg.key
$ apt-key add mosquitto-repo.gpg.key
$ cd /etc/apt/sources.list.d/$ wget http://repo.mosquitto.org/debian/mosquitto-stretch.list
Now install the following:
$ cd~
$ wget http://security.debian.org/debian-security/pool/updates/main/o/openssl/libssl1.0.0_1.0.1t-1+deb8u11_armhf.deb
$ sudo dpkg -i libssl1.0.0_1.0.1t-1+deb8u11_armhf.deb
$ wget http://ftp.nz.debian.org/debian/pool/main/libw/libwebsockets/libwebsockets3_1.2.2-1_armhf.deb
$ sudo dpkg -i libwebsockets3_1.2.2-1_armhf.deb
The libss... latest version you can find here: http://security.debian.org/debian-security/pool/updates/main/o/openssl/
Install MQTT broker and mosquito clients.
$ sudo apt-get install mosquitto mosquitto-clients
If you have a problem with the installation of MQTT, you can try:
$ npm install mqtt --save
Reboot the Raspberry Pi. Open a terminal and verify the mosquito version:
$ mosquito -v
You can start and stop the mosquito server:
$ sudo /etc/init.d/mosquitto start
$ sudo /etc/init.d/mosquitto stop
We verify the IP of the Raspberry Pi:
$ ifconfig
g) Upload the sketch trashcan.ino, to the NodeMCU board. Verify next data:
- NodeMCU 1.0 board
- Serial Port
- Serial.begin(115200);
- const char* wifi_ssid = "ARRIS-WXYZ";
- const char* wifi_password = "XXXXXXXXXXXX";
- const char* mqtt_server = "192.168.0.12"; // RASPBERRY IP
- int trashcan = 25;// MY TRASHCAN HAS 25 CM OF LENGHT
h) Execute nodemcu_mqtt_mam.js, this script will store the data from the NodeMCU board to the Tangle.
$ nodemcu_mqtt_mam.js
We are sending the following information:
- City: BERLIN
- Building: 7
- Date and Time (UTC): YEAR. MONTH, DAY, HOUR. MINUTES AND SECONDS
- Data: trashcan percentage.
async function onMessageReceived(topic, message) {
if (topic == SRF05_TOPIC) {
const city = ('BERLIN');
const building = ('7');
const dateTime = moment().utc().format('YYYY/MM/DD hh:mm:ss');
const data = `{${message}}`;
const json = {"data": data, "dateTime": dateTime, "building": building, "city": city};
const root = await publish(json);
console.log(`City: ${json.city}, Building: ${json.building}, dateTime: ${json.dateTime} UTC, data: ${json.data}, root: ${root}`);
}
}
i) Open another terminal and type: node mam_receiveArduino.js your_root and the stored sensor data is displayed. For example:
The code that manages the received data is:
// RECEIVE DATA FRON THE TANGLE
const executeDataRetrieval = async function(rootVal, keyVal) {
let resp = await Mam.fetch(rootVal, MODE, keyVal, function(data) {
let json = JSON.parse(iota.utils.fromTrytes(data));
console.log(`City: ${json.city}, Building: ${json.building}, dateTime: ${json.dateTime} UTC, Data: ${json.data}`);
});
executeDataRetrieval(resp.nextRoot, keyVal);
}
On this occasion the available node was different: https://iotasalad.org/nodes
const iota = new IOTA({ provider: 'https://durian.iotasalad.org:14265' });
Test
Images
6. Conclusions
Indoor Air Quality Monitoring System v1:
This project has worked satisfactorily and we monitor the quality of the air inside of a building, as we can see in the results obtained. We simulate this project in a building that is located in Mexico City. This was a basic test using the DHT11 Humidity and Temperature sensor and the Raspberry Pi 3B board, Java Script code and the IOTA protocol.
According to the American Society of Heating, Refrigerating and Air-Conditioning Engineers (ASHRAE), the ideal humidity range for humans is between 30 to 60 percent relative humidity. The ideal is somewhere around 45-55%. The average normal body temperature is generally accepted as 98.6°F (37°C). Some studies have shown that the "normal" body temperature can have a wide range, from 97°F (36.1°C) to 99°F (37.2°C). A temperature over 100.4°F (38°C) most often means you have a fever caused by an infection or illness.
Indoor Air Quality Monitoring System v2:
In this project we have used the DHT11, MQ-2 (LPG) and MQ-7 (CO) Sensors. On this occasion. we simulate capturing the data in a building localed in New York City, and we send this data using Arduino UNO and Raspberry Pi boards, to IOTA Tangle using Masked Authenticated Messaging (MAM). This was a practical and quick way to add more sensors. This version can be used in smart buildings and in industries where LP gas is used and where carbon monoxide is produced by fires.
LPG gas can ignite in the presence of a flame if it´s concentration in local air lies between 2–10%. Regarding the effects of CO on health, most people don´t suffer any symptoms from prolonged exposure to CO levels between approximately 1 and 70 ppm, but if CO levels increase and remain above 70 ppm, symptoms may include headache, fatigue and nausea. When the concentration of CO remains above 150 and 200 ppm, disorientation, loss of consciousness and death are possible.
Garbage Monitoring System:
The goal of this project is to take control of the garbage deposit in a smart building located in Berlin city or any District. The accumulation of garbage, can produce bad smells of products in decomposition, but now we can know, how long has a trashboat with refuse and the percentage of this garbage.
When garbage decomposes in an anaerobic environment it creates biogas, which is part of why garbage smells. Biogas in high concentrations is a health hazard for a multiple reasons- it is explosive, it doesn't contain oxygen so there is a suffocation hazard, and if it isn't properly treated it is a source of air pollution. But to get high concentrations of biogas, you literally need tons of trash. Possible physical illnesses caused by bad smell: dizziness, headache, respiratory distress, and psychological alterations.
Indoor Air Quality and Garbage Monitoring System


Code to test the DHT11 sensor