IR Remote with Arduino © GPL3+
DESCRIPTION
What are infrared signals?
Remote controls such as those used for your TV, DVD/Blu-ray or Cable box use infrared transmitters and receivers. The transmitter is basically nothing more than a flashlight that emits a light beam at a frequency that is lower than the human eye can detect.
Video
What we are going to do?
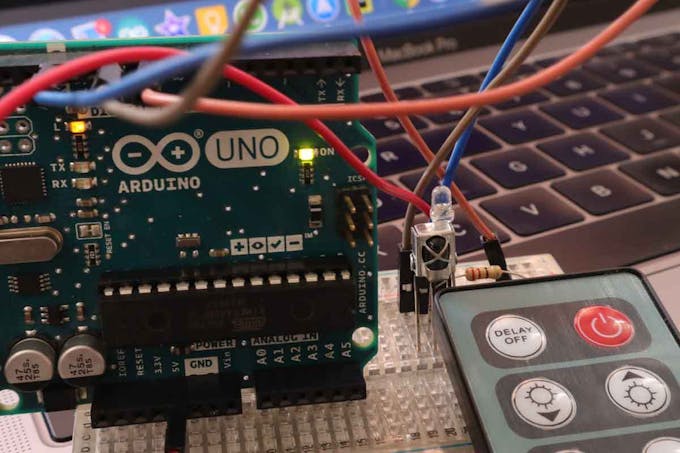
- Connecting an IR receiver with Arduino UNO (you can use any Arduino).
- Using an example program to decode the IR signals from an IR remote.
- Save the decoded results and write code to perform a different operation from different IR signals

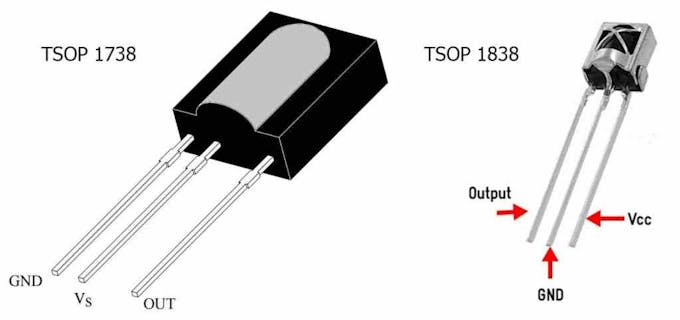
IR Sensor Pinout
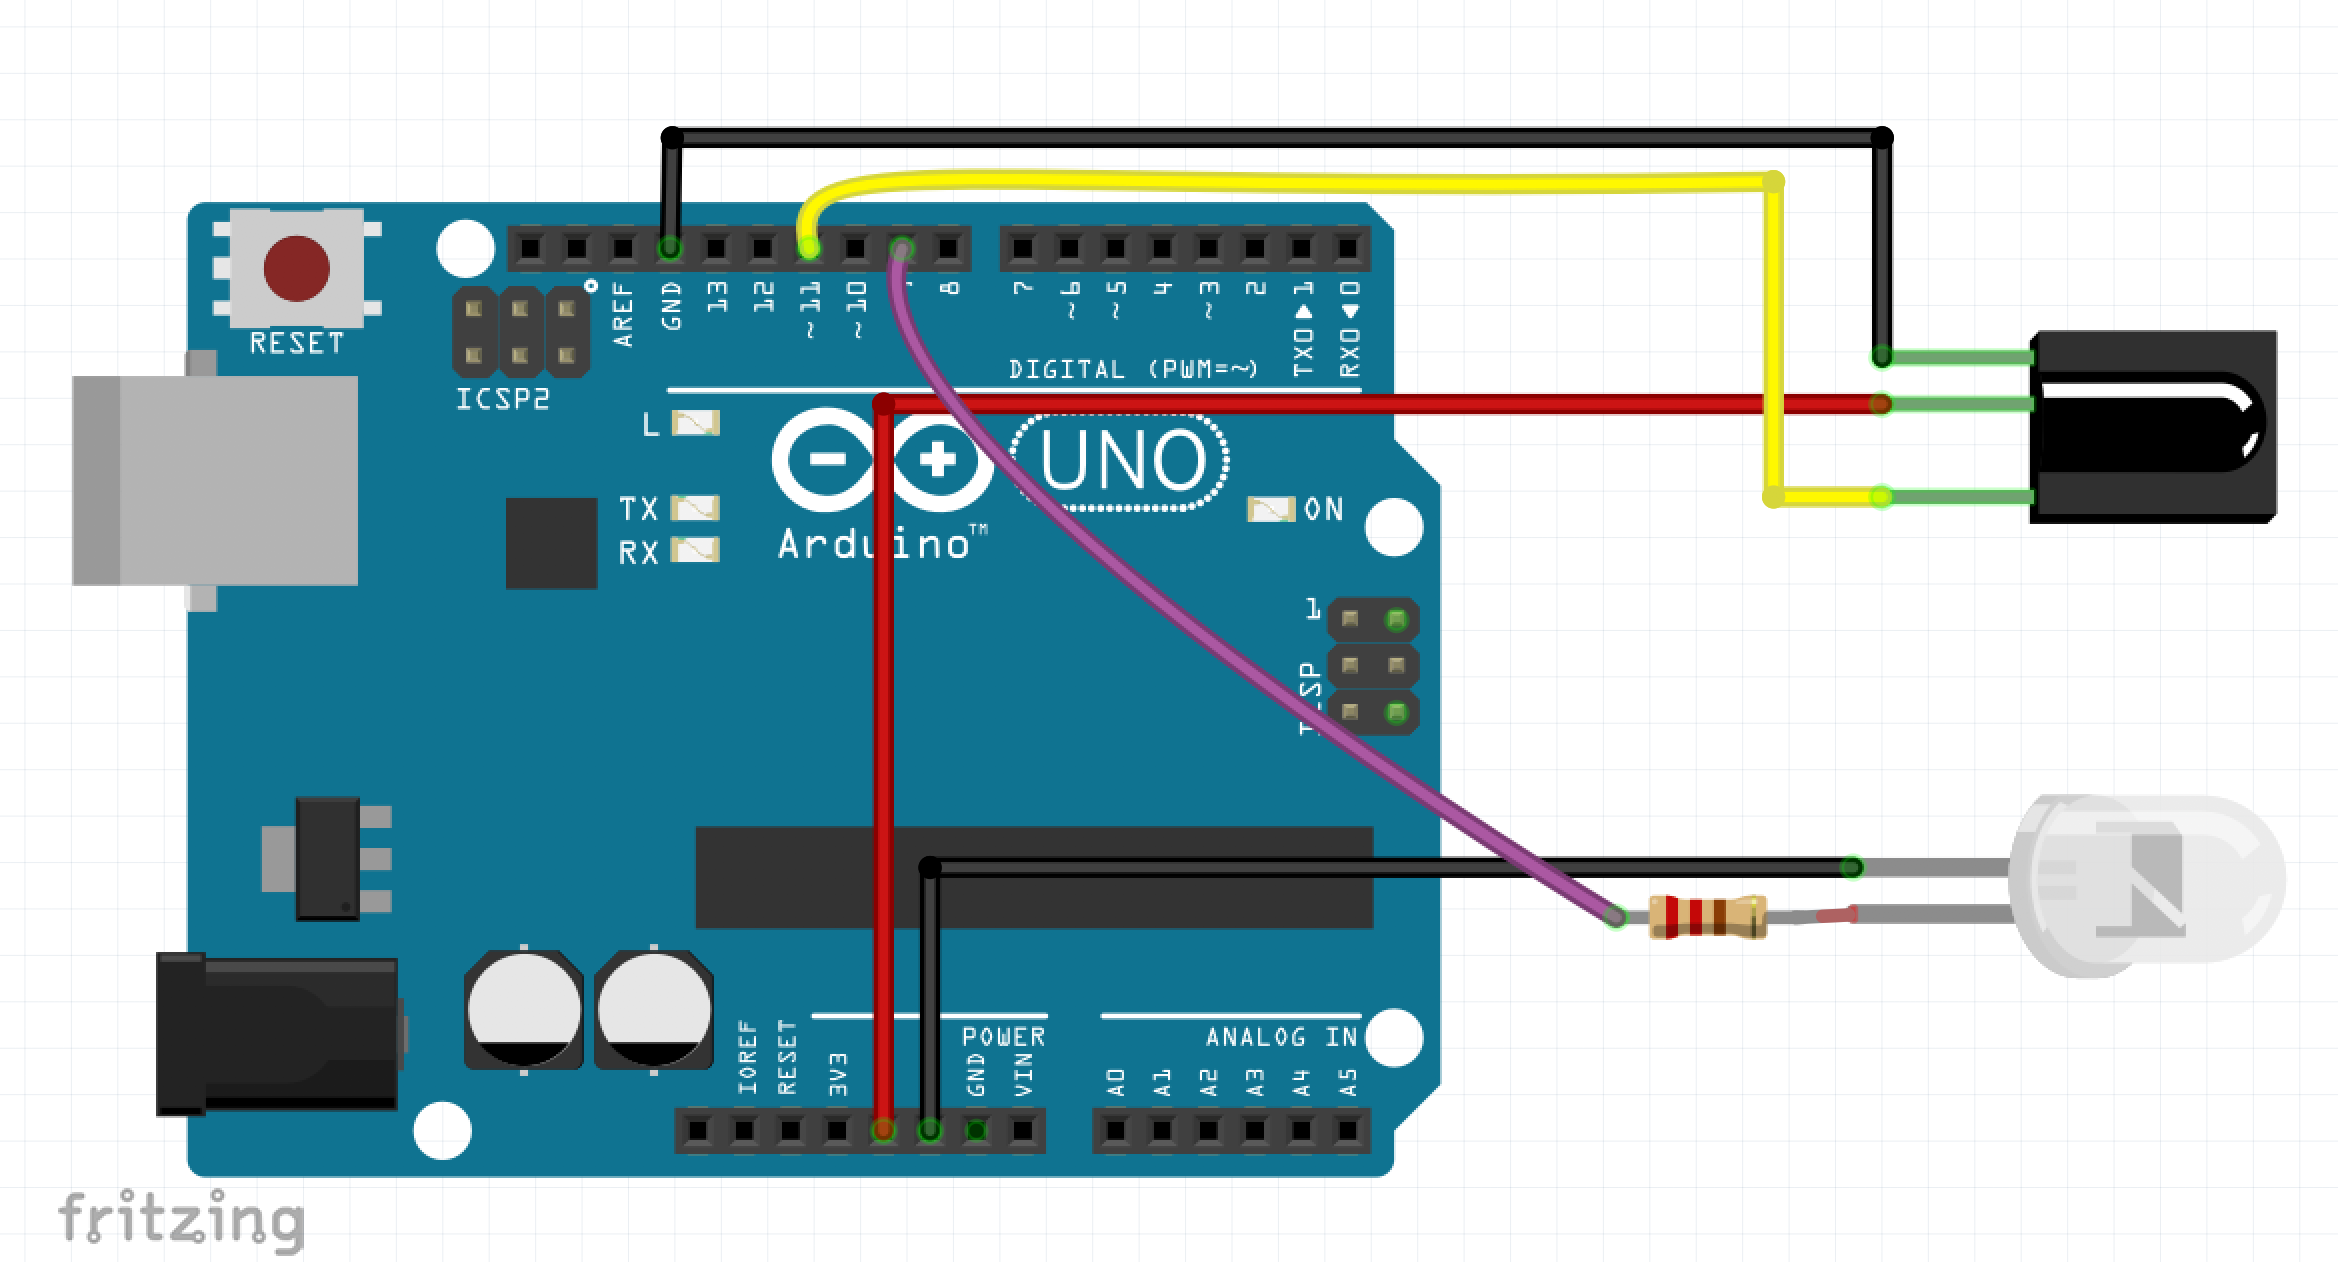
Circuit


Note that there is a lot of different types of IR receivers so be careful when giving the connections, the pin(VCC, GND, OUT) might be shuffled in the model you are using.
Software & Libraries Needed
- https://github.com/z3t0/Arduino-IRremote - Download library
- Install The Library
- Then from Arduino IDE go to File -> Examples -> IRremote and open IRrecvDemo

Example Code
/*
* IRremote: IRrecvDemo - demonstrates receiving IR codes with IRrecv
* An IR detector/demodulator must be connected to the input RECV_PIN.
* Version 0.1 July, 2009
* Copyright 2009 Ken Shirriff
* http://arcfn.com
*/

#include <IRremote.h>

int RECV_PIN = 11;

IRrecv irrecv(RECV_PIN);

decode_results results;

void setup()
{
Serial.begin(9600);
// In case the interrupt driver crashes on setup, give a clue
// to the user what's going on.
Serial.println("Enabling IRin");
irrecv.enableIRIn(); // Start the receiver
Serial.println("Enabled IRin");
}

void loop() {
if (irrecv.decode(&results)) {
Serial.println(results.value, HEX);
irrecv.resume(); // Receive the next value
}
delay(100);
}- Now go to tools and upload the code.
- Open the serial monitor and check if the decoded results are printing when pressing buttons on the IR remote.
- The output will be printed in HEX format as shown below

Now let’s connect an LED to one of the digital pins of Arduino and edit the above example to turn ON/OFF the LED using the IR remote.
Circuit With LED


Changes needed to make in the example code are:
- In the 29th line Serial.println(results.value, HEX); change HEX to DEC Serial.println(results.value, DEC);, because the decimal value is easy to work with while programming.
- Then upload the code and open the serial monitor and press any two buttons of your IR remote that you needed to function as the switch for the LED and note the values generated.
- Then we need to declare two integer constant called codeON and codeOFF for saving the values which we noted in the above step.
- Now declare a variable called code to save the live receiving values from the sensor.
- Then make the pin at which LED is connected as OUTPUT using the pinMode() function
- Then use an if else if block to check whether the received value is equal to the values saved in the constant codeONor codeOFF
- If the value in code is equal to the value in codeON then make the LED pin HIGH
- If the value in code is equal to the value in codeOFF then make the LED pin LOW
Code
/*
IRremote: IRrecvDemo - demonstrates receiving IR codes with IRrecv
An IR detector/demodulator must be connected to the input RECV_PIN.
Version 0.1 July, 2009
Copyright 2009 Ken Shirriff
http://arcfn.com
*/

#include <IRremote.h>

int RECV_PIN = 11;

int codeON = 16744575;
int codeOFF = 16711935;

int code;

int LED = 9;

IRrecv irrecv(RECV_PIN);

decode_results results;

void setup()
{
Serial.begin(9600);
// In case the interrupt driver crashes on setup, give a clue
// to the user what's going on.
Serial.println("Enabling IRin");
irrecv.enableIRIn(); // Start the receiver
Serial.println("Enabled IRin");
pinMode(LED, OUTPUT); digitalWrite(LED, LOW);
}

void loop() {
if (irrecv.decode(&results)) {
Serial.println(results.value, DEC);
code = results.value, DEC;
irrecv.resume(); // Receive the next value
}

if (code == codeON)
digitalWrite(LED, HIGH);
else if (code == codeOFF)
digitalWrite(LED, LOW);

delay(100);
}
Tags: Home Automation, IR, Remote Control


What are infrared signals?
Remote controls such as those used for your TV, DVD/Blu-ray or Cable box use infrared transmitters and receivers. The transmitter is basically nothing more than a flashlight that emits a light beam at a frequency that is lower than the human eye can detect.
Video
What we are going to do?
- Connecting an IR receiver with Arduino UNO (you can use any Arduino).
- Using an example program to decode the IR signals from an IR remote.
- Save the decoded results and write code to perform a different operation from different IR signals
IR Sensor Pinout
Circuit
Note that there is a lot of different types of IR receivers so be careful when giving the connections, the pin(VCC, GND, OUT) might be shuffled in the model you are using.
Software & Libraries Needed
- https://github.com/z3t0/Arduino-IRremote - Download library
- Install The Library
- Then from Arduino IDE go to File -> Examples -> IRremote and open IRrecvDemo
Example Code
/*
* IRremote: IRrecvDemo - demonstrates receiving IR codes with IRrecv
* An IR detector/demodulator must be connected to the input RECV_PIN.
* Version 0.1 July, 2009
* Copyright 2009 Ken Shirriff
* http://arcfn.com
*/

#include <IRremote.h>

int RECV_PIN = 11;

IRrecv irrecv(RECV_PIN);

decode_results results;

void setup()
{
Serial.begin(9600);
// In case the interrupt driver crashes on setup, give a clue
// to the user what's going on.
Serial.println("Enabling IRin");
irrecv.enableIRIn(); // Start the receiver
Serial.println("Enabled IRin");
}

void loop() {
if (irrecv.decode(&results)) {
Serial.println(results.value, HEX);
irrecv.resume(); // Receive the next value
}
delay(100);
}- Now go to tools and upload the code.
- Open the serial monitor and check if the decoded results are printing when pressing buttons on the IR remote.
- The output will be printed in HEX format as shown below
Now let’s connect an LED to one of the digital pins of Arduino and edit the above example to turn ON/OFF the LED using the IR remote.
Circuit With LED
Changes needed to make in the example code are:
- In the 29th line Serial.println(results.value, HEX); change HEX to DEC Serial.println(results.value, DEC);, because the decimal value is easy to work with while programming.
- Then upload the code and open the serial monitor and press any two buttons of your IR remote that you needed to function as the switch for the LED and note the values generated.
- Then we need to declare two integer constant called codeON and codeOFF for saving the values which we noted in the above step.
- Now declare a variable called code to save the live receiving values from the sensor.
- Then make the pin at which LED is connected as OUTPUT using the pinMode() function
- Then use an if else if block to check whether the received value is equal to the values saved in the constant codeONor codeOFF
- If the value in code is equal to the value in codeON then make the LED pin HIGH
- If the value in code is equal to the value in codeOFF then make the LED pin LOW
Code
/*
IRremote: IRrecvDemo - demonstrates receiving IR codes with IRrecv
An IR detector/demodulator must be connected to the input RECV_PIN.
Version 0.1 July, 2009
Copyright 2009 Ken Shirriff
http://arcfn.com
*/

#include <IRremote.h>

int RECV_PIN = 11;

int codeON = 16744575;
int codeOFF = 16711935;

int code;

int LED = 9;

IRrecv irrecv(RECV_PIN);

decode_results results;

void setup()
{
Serial.begin(9600);
// In case the interrupt driver crashes on setup, give a clue
// to the user what's going on.
Serial.println("Enabling IRin");
irrecv.enableIRIn(); // Start the receiver
Serial.println("Enabled IRin");
pinMode(LED, OUTPUT); digitalWrite(LED, LOW);
}

void loop() {
if (irrecv.decode(&results)) {
Serial.println(results.value, DEC);
code = results.value, DEC;
irrecv.resume(); // Receive the next value
}

if (code == codeON)
digitalWrite(LED, HIGH);
else if (code == codeOFF)
digitalWrite(LED, LOW);

delay(100);
}
Tags: Home Automation, IR, Remote Control