Make an Arduino Temperature Sensor (thermistor tutorial) © LGPL
DESCRIPTION
A THERMISTOR WORKS
Thermistors are variable resistors that change their resistance with temperature. They are classified by the way their resistance responds to temperature changes. In Negative Temperature Coefficient (NTC) thermistors, resistance decreases with an increase in temperature. In Positive Temperature Coefficient (PTC) thermistors, resistance increases with an increase in temperature.
NTC thermistors are the most common, and that’s the type we’ll be using in this tutorial. NTC thermistors are made from a semiconducting material (such as a metal oxide or ceramic) that’s been heated and compressed to form a temperature sensitive conducting material.
The conducting material contains charge carriers that allow current to flow through it. High temperatures cause the semiconducting material to release more charge carriers. In NTC thermistors made from ferric oxide, electrons are the charge carriers. In nickel oxide NTC thermistors, the charge carriers are electron holes.
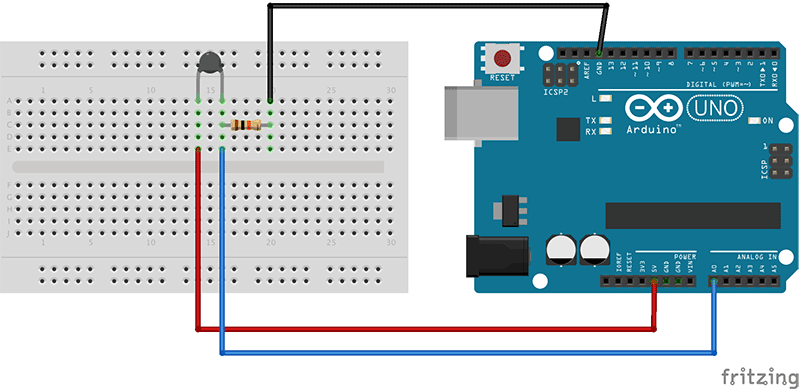
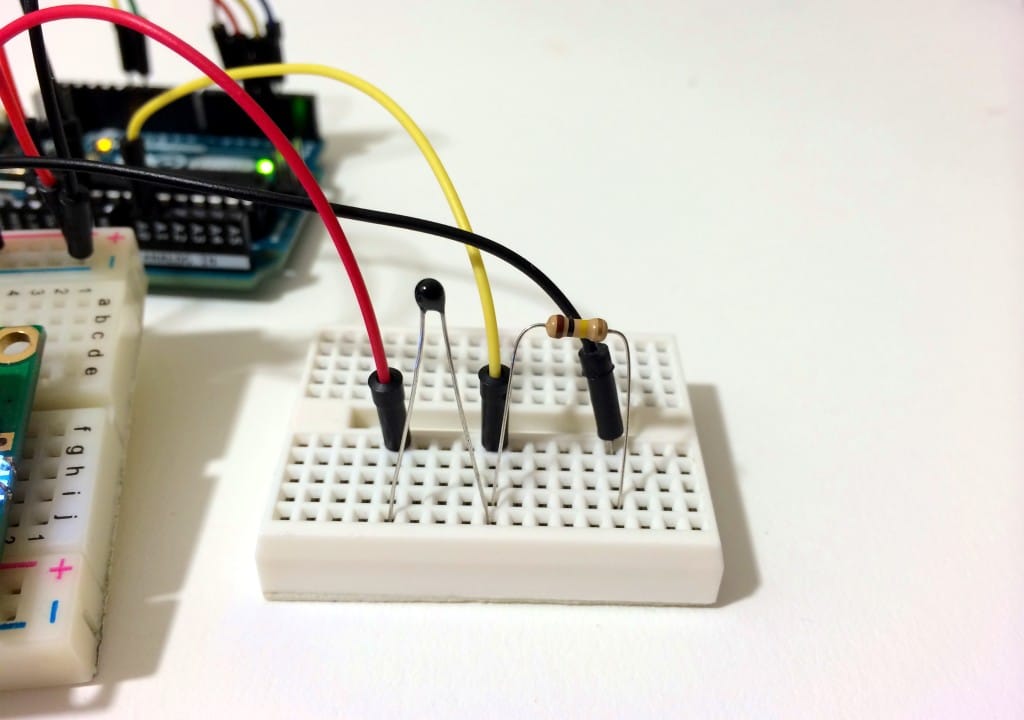
Let’s build a basic thermistor circuit to see how it works, so you can apply it to other projects later.
Since the thermistor is a variable resistor, we’ll need to measure the resistance before we can calculate the temperature. However, the Arduino can’t measure resistance directly, it can only measure voltage.
The Arduino will measure the voltage at a point between the thermistor and a known resistor. This is known as a voltage divider. The equation for a voltage divider is:

In terms of the voltage divider in a thermistor circuit, the variables in the equation above are:

This equation can be rearranged and simplified to solve for R2, the resistance of the thermistor:

Finally, the Steinhart-Hart equation is used to convert the resistance of the thermistor to a temperature reading.
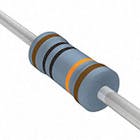
The value of the resistor should be roughly equal to the resistance of your thermistor. In this case, the resistance of my thermistor is 100K Ohms, so my resistor is also 100K Ohms.
The manufacturer of the thermistor might tell you it’s resistance, but if not, you can use a multimeter to find out. If you don’t have a multimeter, you can make an Ohm meter with your Arduino by following our Arduino Ohm Meter tutorial. You only need to know the magnitude of your thermistor. For example, if your thermistor resistance is 34, 000 Ohms, it is a 10K thermistor. If it’s 340, 000 Ohms, it’s a 100K thermsitor.


A THERMISTOR WORKS
Thermistors are variable resistors that change their resistance with temperature. They are classified by the way their resistance responds to temperature changes. In Negative Temperature Coefficient (NTC) thermistors, resistance decreases with an increase in temperature. In Positive Temperature Coefficient (PTC) thermistors, resistance increases with an increase in temperature.
NTC thermistors are the most common, and that’s the type we’ll be using in this tutorial. NTC thermistors are made from a semiconducting material (such as a metal oxide or ceramic) that’s been heated and compressed to form a temperature sensitive conducting material.
The conducting material contains charge carriers that allow current to flow through it. High temperatures cause the semiconducting material to release more charge carriers. In NTC thermistors made from ferric oxide, electrons are the charge carriers. In nickel oxide NTC thermistors, the charge carriers are electron holes.
Let’s build a basic thermistor circuit to see how it works, so you can apply it to other projects later.
Since the thermistor is a variable resistor, we’ll need to measure the resistance before we can calculate the temperature. However, the Arduino can’t measure resistance directly, it can only measure voltage.
The Arduino will measure the voltage at a point between the thermistor and a known resistor. This is known as a voltage divider. The equation for a voltage divider is:
In terms of the voltage divider in a thermistor circuit, the variables in the equation above are:
This equation can be rearranged and simplified to solve for R2, the resistance of the thermistor:
Finally, the Steinhart-Hart equation is used to convert the resistance of the thermistor to a temperature reading.
The value of the resistor should be roughly equal to the resistance of your thermistor. In this case, the resistance of my thermistor is 100K Ohms, so my resistor is also 100K Ohms.
The manufacturer of the thermistor might tell you it’s resistance, but if not, you can use a multimeter to find out. If you don’t have a multimeter, you can make an Ohm meter with your Arduino by following our Arduino Ohm Meter tutorial. You only need to know the magnitude of your thermistor. For example, if your thermistor resistance is 34, 000 Ohms, it is a 10K thermistor. If it’s 340, 000 Ohms, it’s a 100K thermsitor.