Otto DIY Humanoid Robot (alike) © CC BY-SA
DESCRIPTION
PLEASE NOTE THAT HUMANOID IS AN ADVANCED ROBOT compared to the simple biped Otto, IT WILL REQUIRE YOU TO HAVE SOME EXPERIENCE BUILDING ROBOTS AND MORE TIME, WE RECOMMEND YOU TO FIRST BUILD THE BASIC Otto DIY AT LEAST, OTHERWISE TAKE IT AS A CHALLENGE :D
Background information:
Otto is truly Opensource; it means the hardware is easily discerned so that others can make it, Arduino compatible, 3D printable and customizable, the perfect opportunity to build and have your very first robot, learn robotics and have fun, you will learn the logical connection between code and action, and by assembling it, you will understand how its components and electronics work. Visit www.ottodiy.com for more detailed info.
Build Your Own Robot
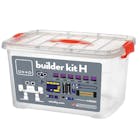
Otto DIY Humanoid can be made with Builder Kit Humanoid (full with 3D printed parts) and Maker Kit Humanoid (only electronics) or create your own project with this open source content.
How it Works
Humanoid Otto is the evolution to a more advanced robot but most importantly easy to replicate so that more people is empower to make robots anywhere in the world. Thanks to all Otto builders that continue collaborating in this project from the start.
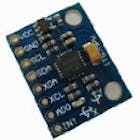
Otto Humanoid walks, dances, makes sounds and avoids obstacles, like the basic but also has 2 arms, one LED matrix to express emotions and a gyroscope to measure orientation and movement for interactions.
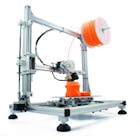
3D Printing
If you bought a Builder kit you can skip ahead but if you have the Maker kit you have to 3D print the parts but Otto is very well designed for 3D printing, so wont give you trouble if you follow this common parameters:
- Recommended to use a FDM 3D printer with PLA material.
- No need supports or rafts.
- Resolution: 0.20mm
- Fill density 20%
It should take around 12 hours (or even less) to 3D print a full set of parts for one Otto Humanoid.
Software
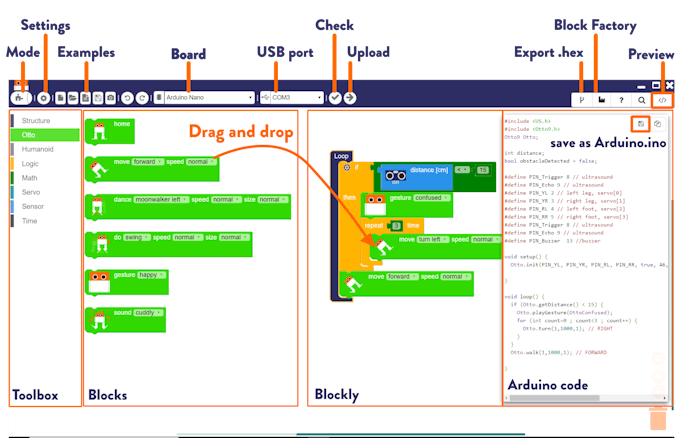
Download from our website here (https://www.ottodiy.com/#blockly)
- Unzip and install.
- Open an example.
- Connect your Otto robot.
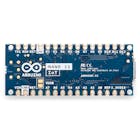
- Select Arduino nano, USB port where Otto is connected.
- Check the code.
- Upload and yes is that easy!
If your computer did not recognize the USB device you should install the driver CH340 for your Operative System find it here: https://sparks.gogo.co.nz/ch340.html
For more advanced Arduino programming try to follow our coding guide from the files tab folder, it will allow you to really exploit the potential of your robot.
- Download the software for free here: Arduino IDE (version 1.8.5) https://www.arduino.cc/en/Main/OldSoftwareReleases#previous
- Install Arduino IDE software.
- Download all the libraries from the files tab and unzip in your libraries folder (for example C:\Users\user\Documents\Arduino\libraries)
- Connect your Arduino Nano through USB make sure the driver CH340 is installed in your computer by checking is in COM#
- Open one of the code examples in the code files tab folder
- Upload the code and check that everything is working.
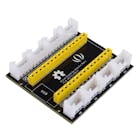
Electronics
Before inserting the AA batteries you should check your connections and test your robot with the USB cable connected to a computer.
As a good practice you should check your electronics and software in your computer, before assembling all robot to avoid having to disassemble the whole robot to fix something. You can do this by just connecting at least all the servos, in the place indicated in the wring below and upload any code that makes Otto move with Otto Blockly or Arduino.

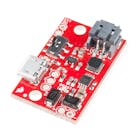
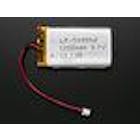
If you are ready for Batteries you can also check if your power source works, depending of the type of cells you have there can be 2 options:


There are actually plenty options to power your Otto robot in multiple ways, we explore in more detail in this blog post article: https://www.ottodiy.com/blog/power
Assembly Instructions
Gather all the off the shelf hardware parts that you'll need for this assembly, or start with our full kits which come with all parts needed. Kits available from www.ottodiy.com
Legs are actually the same part for the arms!"
Before starting the assembly, download and read carefully from the instruction manual files tab folder.

If you see some misalignment in the movements check that you centered your servos before assembly but if you want more precise walk and movements then you can do some electronic calibration as we explain in this blog post article: https://www.ottodiy.com/blog/calibration
Here you can find some complimentary tutorials for beginners to quickly get started with Arduino for each component:
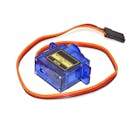
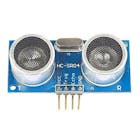
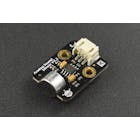
- Servo Motor Tutorial: https://arduinogetstarted.com/tutorials/arduino-servo-motor - Ultrasonic Sensor Tutorial: https://arduinogetstarted.com/tutorials/arduino-ultrasonic-sensor
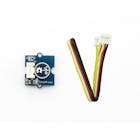
-Touch Sensor Tutorial: https://arduinogetstarted.com/tutorials/arduino-touch-sensor
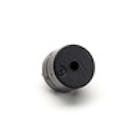
- Buzzer Tutorial: https://arduinogetstarted.com/tutorials/arduino-piezo-buzzer
Bluetooth APP
- Unzip an copy Otto libraries into your Arduino IDE folder (for example: C:\Users\Camilo\Documents\Arduino\libraries)
- Upload the APP sketch code to Otto with the Bluetooth disconnected.
- Download and Install the APP in your smartphone. Google Play Store (https://play.google.com/store/apps/details?id=com.ottodiy)
- Now you can connect the Bluetooth module to Otto.
- In settings Enable Bluetooth in your phone, search and pair with the module 1234 as password.
- Back in the APP Touch anywhere to find and connect with Otto.
- Done!, you should be able now to use the APP to control Otto.
Join the Otto Builder community!
Follow us, subscribe, give us a like and share your creativity.
- Join us in Wikifactory & check our Forum for questions.
- Group in Facebook. to share and ask for help in the community and like our Facebook page
- YouTube channel for more how to videos and tutorials.
- Instagram to share #Otto DIY
- Twitter to share #OttoDIY
You could be featured here by share your robot in any social media; Just mention @OttoDIY
Be a part of this friendly community of robot builders, teachers and makers!
Welcome to our Otto Builder community!


PLEASE NOTE THAT HUMANOID IS AN ADVANCED ROBOT compared to the simple biped Otto, IT WILL REQUIRE YOU TO HAVE SOME EXPERIENCE BUILDING ROBOTS AND MORE TIME, WE RECOMMEND YOU TO FIRST BUILD THE BASIC Otto DIY AT LEAST, OTHERWISE TAKE IT AS A CHALLENGE :D
Background information:
Otto is truly Opensource; it means the hardware is easily discerned so that others can make it, Arduino compatible, 3D printable and customizable, the perfect opportunity to build and have your very first robot, learn robotics and have fun, you will learn the logical connection between code and action, and by assembling it, you will understand how its components and electronics work. Visit www.ottodiy.com for more detailed info.
Build Your Own Robot
Otto DIY Humanoid can be made with Builder Kit Humanoid (full with 3D printed parts) and Maker Kit Humanoid (only electronics) or create your own project with this open source content.
How it Works
Humanoid Otto is the evolution to a more advanced robot but most importantly easy to replicate so that more people is empower to make robots anywhere in the world. Thanks to all Otto builders that continue collaborating in this project from the start.
Otto Humanoid walks, dances, makes sounds and avoids obstacles, like the basic but also has 2 arms, one LED matrix to express emotions and a gyroscope to measure orientation and movement for interactions.
3D Printing
If you bought a Builder kit you can skip ahead but if you have the Maker kit you have to 3D print the parts but Otto is very well designed for 3D printing, so wont give you trouble if you follow this common parameters:
- Recommended to use a FDM 3D printer with PLA material.
- No need supports or rafts.
- Resolution: 0.20mm
- Fill density 20%
It should take around 12 hours (or even less) to 3D print a full set of parts for one Otto Humanoid.
Software
Download from our website here (https://www.ottodiy.com/#blockly)
- Unzip and install.
- Open an example.
- Connect your Otto robot.
- Select Arduino nano, USB port where Otto is connected.
- Check the code.
- Upload and yes is that easy!
If your computer did not recognize the USB device you should install the driver CH340 for your Operative System find it here: https://sparks.gogo.co.nz/ch340.html
For more advanced Arduino programming try to follow our coding guide from the files tab folder, it will allow you to really exploit the potential of your robot.
- Download the software for free here: Arduino IDE (version 1.8.5) https://www.arduino.cc/en/Main/OldSoftwareReleases#previous
- Install Arduino IDE software.
- Download all the libraries from the files tab and unzip in your libraries folder (for example C:\Users\user\Documents\Arduino\libraries)
- Connect your Arduino Nano through USB make sure the driver CH340 is installed in your computer by checking is in COM#
- Open one of the code examples in the code files tab folder
- Upload the code and check that everything is working.
Electronics
Before inserting the AA batteries you should check your connections and test your robot with the USB cable connected to a computer.
As a good practice you should check your electronics and software in your computer, before assembling all robot to avoid having to disassemble the whole robot to fix something. You can do this by just connecting at least all the servos, in the place indicated in the wring below and upload any code that makes Otto move with Otto Blockly or Arduino.
If you are ready for Batteries you can also check if your power source works, depending of the type of cells you have there can be 2 options:
There are actually plenty options to power your Otto robot in multiple ways, we explore in more detail in this blog post article: https://www.ottodiy.com/blog/power
Assembly Instructions
Gather all the off the shelf hardware parts that you'll need for this assembly, or start with our full kits which come with all parts needed. Kits available from www.ottodiy.com
Legs are actually the same part for the arms!"
Before starting the assembly, download and read carefully from the instruction manual files tab folder.
If you see some misalignment in the movements check that you centered your servos before assembly but if you want more precise walk and movements then you can do some electronic calibration as we explain in this blog post article: https://www.ottodiy.com/blog/calibration
Here you can find some complimentary tutorials for beginners to quickly get started with Arduino for each component:
- Servo Motor Tutorial: https://arduinogetstarted.com/tutorials/arduino-servo-motor - Ultrasonic Sensor Tutorial: https://arduinogetstarted.com/tutorials/arduino-ultrasonic-sensor
-Touch Sensor Tutorial: https://arduinogetstarted.com/tutorials/arduino-touch-sensor
- Buzzer Tutorial: https://arduinogetstarted.com/tutorials/arduino-piezo-buzzer
Bluetooth APP
- Unzip an copy Otto libraries into your Arduino IDE folder (for example: C:\Users\Camilo\Documents\Arduino\libraries)
- Upload the APP sketch code to Otto with the Bluetooth disconnected.
- Download and Install the APP in your smartphone. Google Play Store (https://play.google.com/store/apps/details?id=com.ottodiy)
- Now you can connect the Bluetooth module to Otto.
- In settings Enable Bluetooth in your phone, search and pair with the module 1234 as password.
- Back in the APP Touch anywhere to find and connect with Otto.
- Done!, you should be able now to use the APP to control Otto.
Join the Otto Builder community!
Follow us, subscribe, give us a like and share your creativity.
- Join us in Wikifactory & check our Forum for questions.
- Group in Facebook. to share and ask for help in the community and like our Facebook page
- YouTube channel for more how to videos and tutorials.
- Instagram to share #Otto DIY
- Twitter to share #OttoDIY
You could be featured here by share your robot in any social media; Just mention @OttoDIY
Be a part of this friendly community of robot builders, teachers and makers!
Welcome to our Otto Builder community!
Libraries repo
3D print parts
