Programming ATmega8 Using Arduino IDE © GPL3+
DESCRIPTION
“I’ve written my code for Arduino UNO board. Is it possible to upload my sketch to an AVR microcontroller except ATmega328? I think it’s the most common question of Arduino lovers. This may have different reasons such as:
- Using a cheaper AVR microcontroller
- Require an AVR microcontroller with more or even less pins than ATmega328
- You have all kinds of AVR except ATmega328 :D
In this tutorial you will learn how to program an ATmega8 using Arduino IDE. It’s not restricted to ATmega8 only and can be generalized to other cores which are available at MCUDude’s GitHub. It consists of two parts. In part one, Installing Arduino bootloader on ATmega8 is described. Part two shows how to program an ATmega8 using Arduino IDE and a USB to TTL convertor.
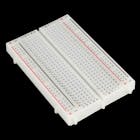
Part one: Installing Arduino BootloaderIn this part, we add ATmega8 support to Arduino IDE. Then we set up the breadboard and connect ATmega8 to Arduino UNO board.
Step One: Adding ATmega8 Support to Arduino IDE Using Board ManagerThere are different types of cores available on MCUDude’s GitHub repository. MiniCore is used for ATmega8 microcontroller. Supported microcontrollers in this core are:
- ATmega8
- ATmega48
- ATmega88
- ATmega168
- ATmega328
Follow steps below to install MiniCore in your Arduino IDE.
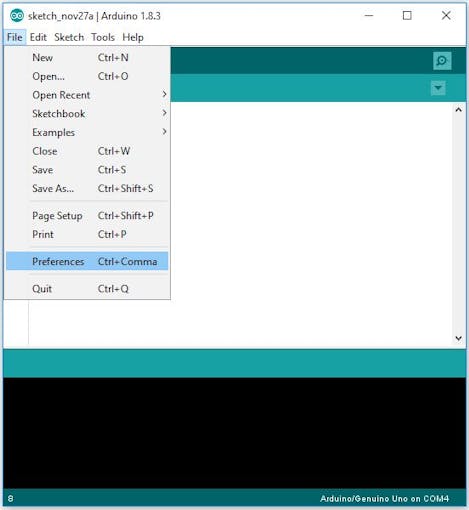
- In File menu, click on Preferences.
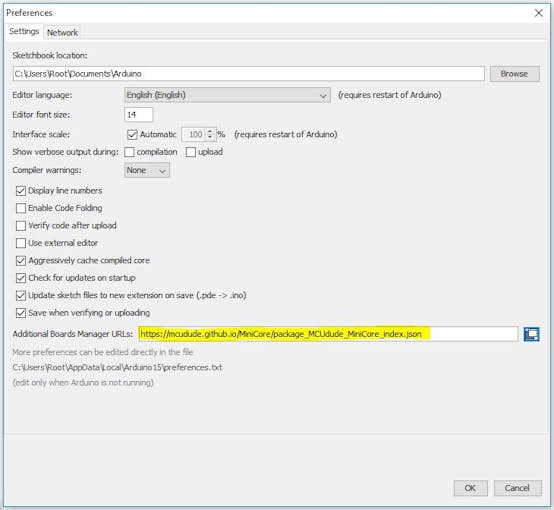
- Now in Additional Boards Manger URLs, enter the following URL:
https://mcudude.github.io/MiniCore/package_MCUdude_MiniCore_index.json
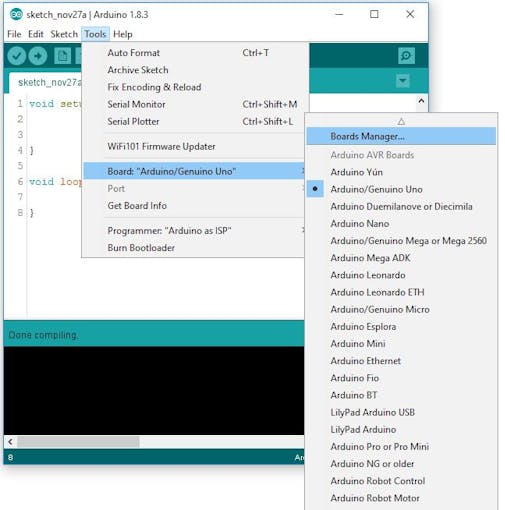
- Go to Tools menu and then select Board > Boards Manager
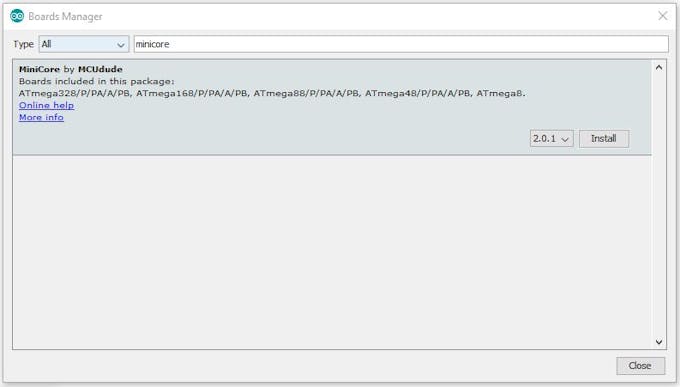
- In Boards Manager window, search for MiniCore and then install the latest version.
The above steps are shown graphically here:
ATmega8 pinout is shown in the following figure.

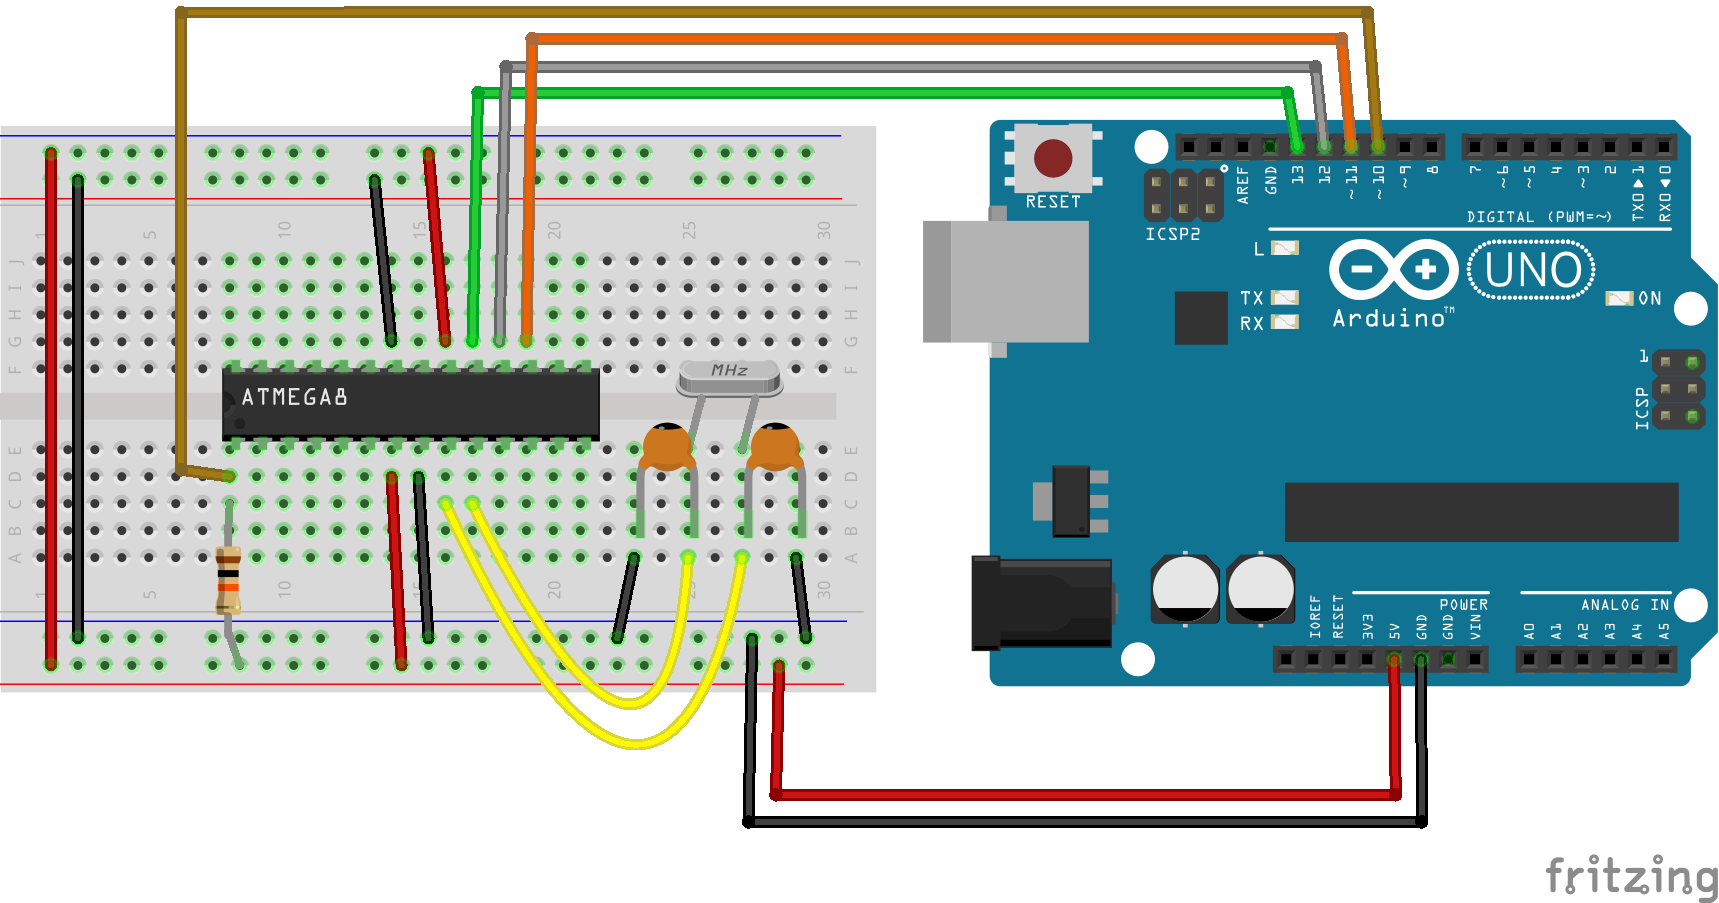
To burn Arduino bootloader, we need to make our Arduino UNO as an ISP. There’s a sketch named ArduinoISP in the built-in examples of Arduino IDE. Follow these steps to program your Arduino UNO as an ISP.
- Open File > Examples > 11.ArduinoISP > ArduinoISP
- Upload this sketch to your Arduino UNO.
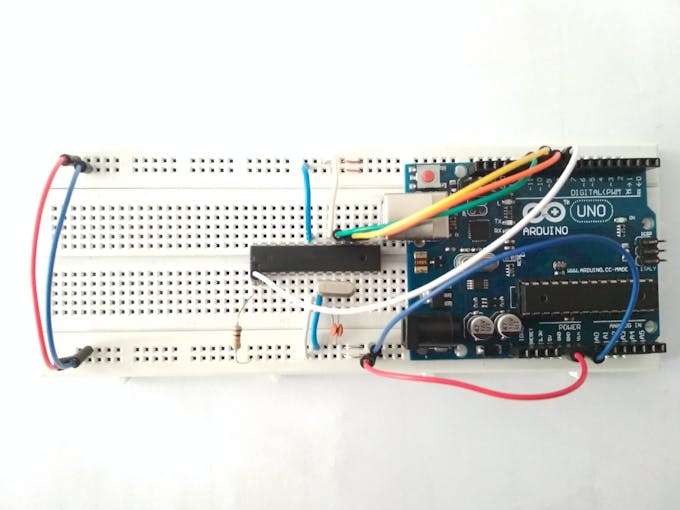
- Connect Arduino to ATmega8 as below.
Arduino ----------ATmega8
SCK / Pin 13 ----------SCK / PB5
MISO / Pin 12 ----------MISO / PB4
MOSI / Pin 11 ----------MOSI / PB3
SSN / Pin 10 ----------RESET

- Go to Tools > Board and select ATmega8. You can also select your clock type and frequency in Tools menu.
- Select programmer type in Tools > Programmer: as “Arduino as ISP”.
- Now in Tools menu, click on the Burn Bootloader.
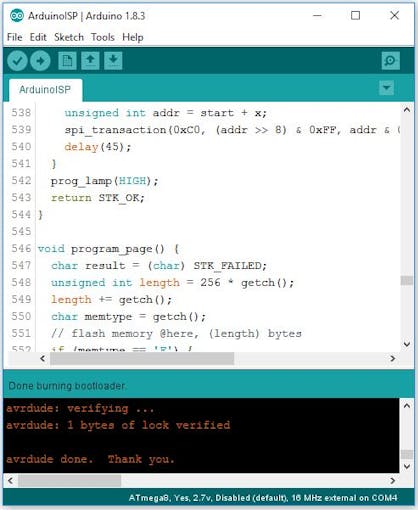
If the operation was successful, it says “Done burning bootloader”. Congratulations! You have done it.
Part Two: Programming ATmega8 Using Arduino IDE and a USB to TTL ConvertorHere we have an ATmega8 with Arduino bootloader. As you know, there is a USB to TTL convertor on all Arduino boards. It acts as a bridge between microcontroller and Arduino IDE. We use CH340 USB to TTL convertor module to upload the sketch to ATmega8.
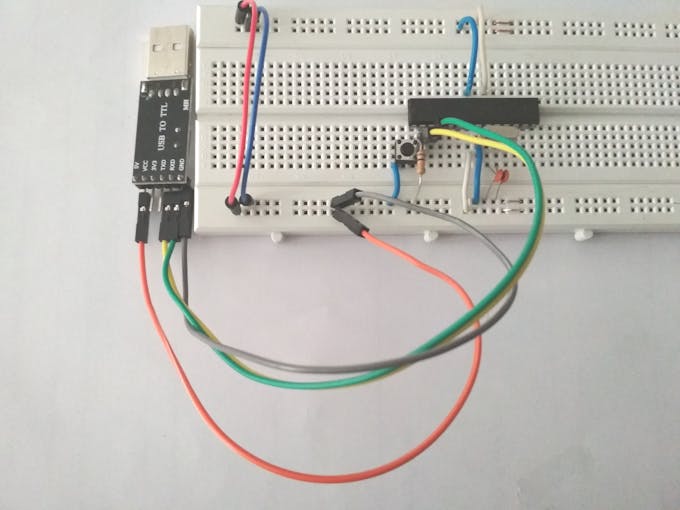
Step Four: Setting up the ConnectionsConnect components as shown below.
CH340 ---------- ATmega8
VCC ---------- VCC
GND ---------- GND
Tx ---------- RX / PD0
Rx ---------- Tx / PD1

Press and hold the reset pushbutton. Now click on upload in IDE. Hold the pushbutton until it says “Uploading…”on the IDE status bar. Release the button after uploading process begins. It’s because microcontroller should be in the RESET state when the uploading process starts.
Note: If the process was unsuccessful, place a 100nF capacitor at Vcc and GND of microcontroller as close as possible.
Note: Some USB to TTL convertor modules have a pin named DTR. If yours has this pin too, you can connect it to the RESET pin of ATmega8 and there’s no need to use the pushbutton to manually reset the microcontroller.


“I’ve written my code for Arduino UNO board. Is it possible to upload my sketch to an AVR microcontroller except ATmega328? I think it’s the most common question of Arduino lovers. This may have different reasons such as:
- Using a cheaper AVR microcontroller
- Require an AVR microcontroller with more or even less pins than ATmega328
- You have all kinds of AVR except ATmega328 :D
In this tutorial you will learn how to program an ATmega8 using Arduino IDE. It’s not restricted to ATmega8 only and can be generalized to other cores which are available at MCUDude’s GitHub. It consists of two parts. In part one, Installing Arduino bootloader on ATmega8 is described. Part two shows how to program an ATmega8 using Arduino IDE and a USB to TTL convertor.
Part one: Installing Arduino BootloaderIn this part, we add ATmega8 support to Arduino IDE. Then we set up the breadboard and connect ATmega8 to Arduino UNO board.
Step One: Adding ATmega8 Support to Arduino IDE Using Board ManagerThere are different types of cores available on MCUDude’s GitHub repository. MiniCore is used for ATmega8 microcontroller. Supported microcontrollers in this core are:
- ATmega8
- ATmega48
- ATmega88
- ATmega168
- ATmega328
Follow steps below to install MiniCore in your Arduino IDE.
- In File menu, click on Preferences.
- Now in Additional Boards Manger URLs, enter the following URL:
https://mcudude.github.io/MiniCore/package_MCUdude_MiniCore_index.json
- Go to Tools menu and then select Board > Boards Manager
- In Boards Manager window, search for MiniCore and then install the latest version.
The above steps are shown graphically here:
ATmega8 pinout is shown in the following figure.
To burn Arduino bootloader, we need to make our Arduino UNO as an ISP. There’s a sketch named ArduinoISP in the built-in examples of Arduino IDE. Follow these steps to program your Arduino UNO as an ISP.
- Open File > Examples > 11.ArduinoISP > ArduinoISP
- Upload this sketch to your Arduino UNO.
- Connect Arduino to ATmega8 as below.
Arduino ----------ATmega8
SCK / Pin 13 ----------SCK / PB5
MISO / Pin 12 ----------MISO / PB4
MOSI / Pin 11 ----------MOSI / PB3
SSN / Pin 10 ----------RESET
- Go to Tools > Board and select ATmega8. You can also select your clock type and frequency in Tools menu.
- Select programmer type in Tools > Programmer: as “Arduino as ISP”.
- Now in Tools menu, click on the Burn Bootloader.
If the operation was successful, it says “Done burning bootloader”. Congratulations! You have done it.
Part Two: Programming ATmega8 Using Arduino IDE and a USB to TTL ConvertorHere we have an ATmega8 with Arduino bootloader. As you know, there is a USB to TTL convertor on all Arduino boards. It acts as a bridge between microcontroller and Arduino IDE. We use CH340 USB to TTL convertor module to upload the sketch to ATmega8.
Step Four: Setting up the ConnectionsConnect components as shown below.
CH340 ---------- ATmega8
VCC ---------- VCC
GND ---------- GND
Tx ---------- RX / PD0
Rx ---------- Tx / PD1
Press and hold the reset pushbutton. Now click on upload in IDE. Hold the pushbutton until it says “Uploading…”on the IDE status bar. Release the button after uploading process begins. It’s because microcontroller should be in the RESET state when the uploading process starts.
Note: If the process was unsuccessful, place a 100nF capacitor at Vcc and GND of microcontroller as close as possible.
Note: Some USB to TTL convertor modules have a pin named DTR. If yours has this pin too, you can connect it to the RESET pin of ATmega8 and there’s no need to use the pushbutton to manually reset the microcontroller.