Programming ATtiny13 with Arduino Uno © GPL3+
DESCRIPTION
Tested with Arduino 1.8.0 on Ubuntu 17.10.
0. Turn the Arduino into a AVRISP
(AVR is a family of microcontrollers. ISP means In System Programmer)
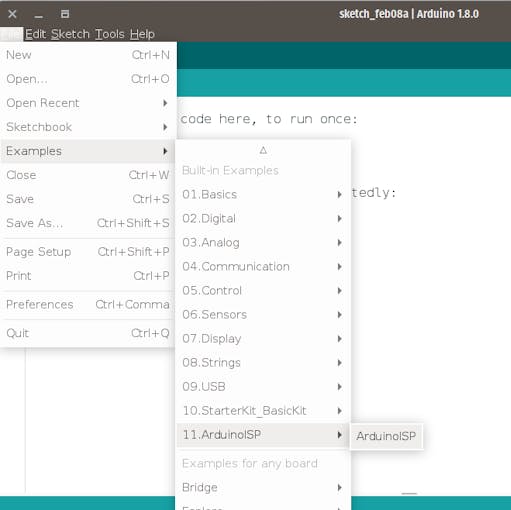
Open Arduino IDE -> File -> Examples -> 11.ArduinoISP ->ArduinoISP and upload to Arduino
1. Install hardware package for ATtiny13
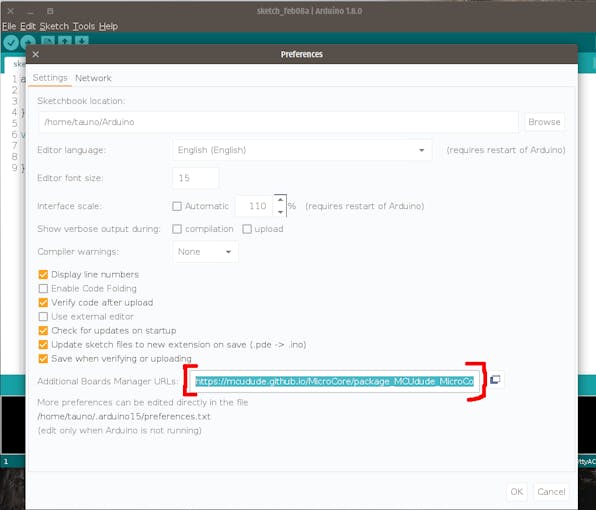
1.1 Open Arduino IDE -> File -> Preferences go to Additional Boards Manager URLs and copy this:
https://mcudude.github.io/MicroCore/package_MCUdude_MicroCore_index.json Ok.
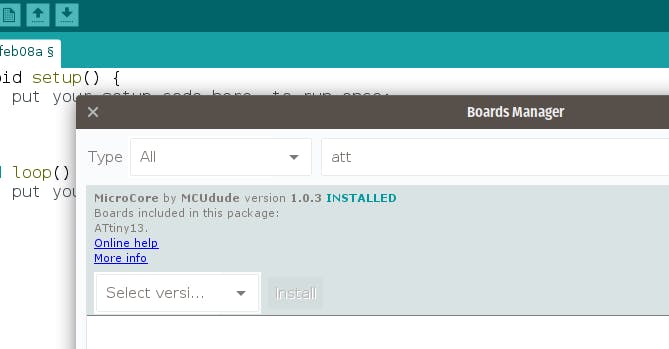
1.2 Open Arduino IDE -> Tools -> Board -> Boards manager. Find MicroCore and click Install.
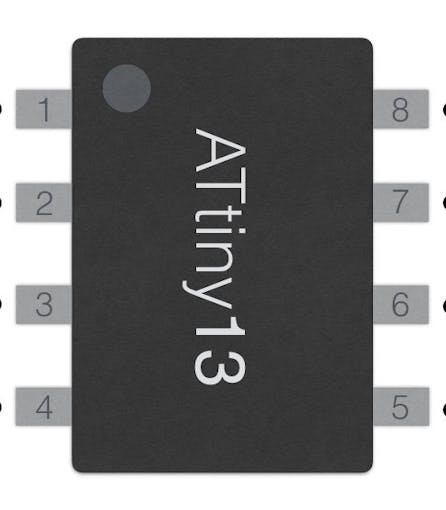
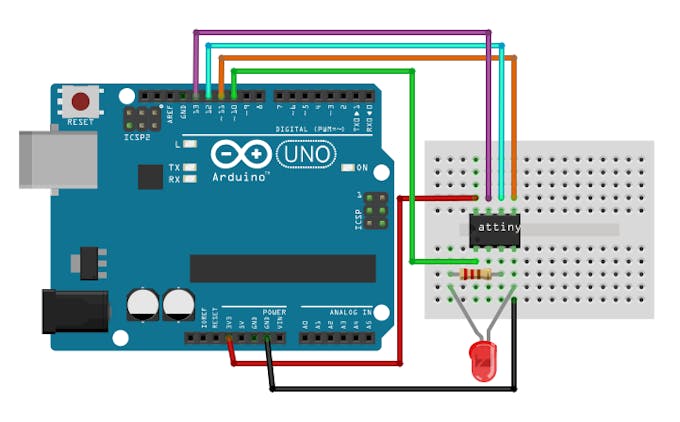
2. Connect the hardware
- ATtiny13A leg 1 -> Arduino 10
- ATtiny13A leg 5 -> Arduino 11
- ATtiny13A leg 6 -> Arduino 12
- ATtiny13A leg 7 -> Arduino 13
- ATtiny13A leg 8 -> 5v
- ATtiny13A leg 4 -> Ground (GND)
LED and resistor is needed only for testing to see does uploaded example code works or not.
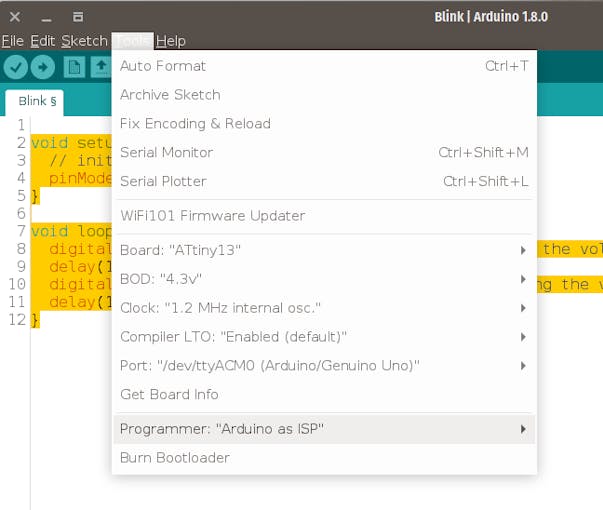
3. Arduino IDE settings
Go to Arduino IDE -> Tools and select:
- Board: ATtiny 13
- BOD: 4.3v
- Clock: 1.2 MHz internal osc.
- Compiler LTO: Enable
- Port: (Your Arduino port)
- Programmer: Arduino as ISP
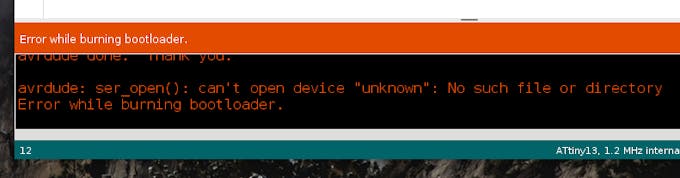
4. Burn Bootloader
(You only need to do this once per chip)
Go to Arduino IDE -> Tools -> Burn Bootloader
You might see an error, but ignore it.
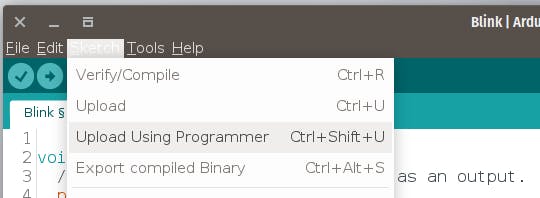
5. Upload sketch
Copy Blink sketch:
void setup() {
 // initialize pin 4 (ATtiny leg 3) as an output.
 pinMode(4, OUTPUT);
}
void loop() {
 digitalWrite(4, HIGH);   // turn the LED on (HIGH is the voltage level)
 delay(1000);             // wait for a second
 digitalWrite(4, LOW);    // turn the LED off by making the voltage LOW
 delay(1000);             // wait for a second
}
Go to: Arduino IDE -> Sketch -> Upload Using Programmer
6. Demo
If all works, the LED should blink now:
7. More info
- https://github.com/MCUdude/MicroCore
- Łukasz Podkalicki blog: http://blog.podkalicki.com/100-projects-on-attiny13/


Tested with Arduino 1.8.0 on Ubuntu 17.10.
0. Turn the Arduino into a AVRISP
(AVR is a family of microcontrollers. ISP means In System Programmer)
Open Arduino IDE -> File -> Examples -> 11.ArduinoISP ->ArduinoISP and upload to Arduino
1. Install hardware package for ATtiny13
1.1 Open Arduino IDE -> File -> Preferences go to Additional Boards Manager URLs and copy this:
https://mcudude.github.io/MicroCore/package_MCUdude_MicroCore_index.json
Ok.
1.2 Open Arduino IDE -> Tools -> Board -> Boards manager. Find MicroCore and click Install.
2. Connect the hardware
- ATtiny13A leg 1 -> Arduino 10
- ATtiny13A leg 5 -> Arduino 11
- ATtiny13A leg 6 -> Arduino 12
- ATtiny13A leg 7 -> Arduino 13
- ATtiny13A leg 8 -> 5v
- ATtiny13A leg 4 -> Ground (GND)
LED and resistor is needed only for testing to see does uploaded example code works or not.
3. Arduino IDE settings
Go to Arduino IDE -> Tools and select:
- Board: ATtiny 13
- BOD: 4.3v
- Clock: 1.2 MHz internal osc.
- Compiler LTO: Enable
- Port: (Your Arduino port)
- Programmer: Arduino as ISP
4. Burn Bootloader
(You only need to do this once per chip)
Go to Arduino IDE -> Tools -> Burn Bootloader
You might see an error, but ignore it.
5. Upload sketch
Copy Blink sketch:
void setup() {
// initialize pin 4 (ATtiny leg 3) as an output.
pinMode(4, OUTPUT);
}
void loop() {
digitalWrite(4, HIGH); // turn the LED on (HIGH is the voltage level)
delay(1000); // wait for a second
digitalWrite(4, LOW); // turn the LED off by making the voltage LOW
delay(1000); // wait for a second
}
Go to: Arduino IDE -> Sketch -> Upload Using Programmer
6. Demo
If all works, the LED should blink now:
7. More info
- https://github.com/MCUdude/MicroCore
- Łukasz Podkalicki blog: http://blog.podkalicki.com/100-projects-on-attiny13/