Trybotics Logo

Rail Road Model IR Remote Control (REMOTINO NANO)

DESCRIPTION

Notes on the English version: I am Italian and speak little English. All this text is the result of Google Translate. If you find serious errors in the translation and want to report them, I thank you in advance. Send notes to lpautas AT gmail.com. Thank you

REMOTINO NANO

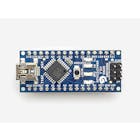
A dear friend of mine told me: my railroad model does not satisfy me: I find it difficult to have to stay at the console to control the various actions of the trains, rather than being able to move around it: could you make a wireless remote control? The main actions are to decide train speed and speed on the main line, and to command four exchanges to decide in which circuit the train model should pass.I did these things using an ARDUINO NANO, an IR remote control and some other components.

--------------------------------------------------------------------------------------

We have 4 modes of work, that can be programmed at startup.

  • Mode A, 8 rele monostable (4 scambi)
  • Mode B, 8 bistable ON/OFF (attuatori generici)
  • Mode C - RELE 1, 2 bistable ON/OFF (attuatori generici), RELE' 3, 4, 5, 6, 7, 8 monostable (3 scambi)
  • Mode D - RELE 1, 2, 3, 4 bistable ON/OFF (attuatori generici), RELE' 5 6 7 8 monostable (2 scambi)

To move the train, press MotorOn (GO button)

Afterwards with the up / down arrows you increase / decrease speed, or you reverse direction of travel.

Keys 1 to 8 operate the 8 relays in the selected mode: monostable (for exchanges) or bistable (for accessory on / off)

The 0 key makes a slow station-type stop

The keys A, B, C, D are preset speeds, equal to 25, 50, 75 and 100% of the speed. max, and act on the current direction of travel

If I am stopped, I press CH + active forward direction, then I press A slowly and automatically reaches 25% of the speed

If I am stopped, I press CH + active forward direction, then I press B slowly and automatically reaches 50% of the speed

If I am stopped, I press CH + active forward direction, then I press C slowly and automatically reaches 75% of the speed

If I am stopped, I press CH + active forward direction, then I press D slowly and automatically reaches 100% of the speed

If they are already moving, I press A, the train moves at 25% speed automatically.

The red power button immediately stops the train (emergency stop), removing power. It is also active during slow braking or when 4 preset speeds are reached.

remote button -> actions

  • 0 -> slow stop to simulate a normal station stop
  • 1 -> relay 1
  • 2 -> relay 2
  • 3 -> relay 3
  • 4 -> relay 4
  • 5 -> relay 5
  • 6 -> relay 6
  • 7 -> relay 7
  • 8 -> relay 8
  • 9 -> free
  • A -> 25% speed
  • B -> 50% speed
  • C -> 75% speed
  • D -> 100% speed
  • GO -> motor on
  • OFF -> immediate emergency stop, stop all autom.
  • CH + -> drive forward slowly if pressed (first motor on GO needed)
  • CH- -> backwards slowly if pressed (first motor on GO needed)
  • VOL + -> forward travel quickly if pressed (first motor on GO needed)
  • VOL- -> backward quickly if pressed (first motor on GO needed)
  • OK -> BOOST at 100% speed
Video REMOTINO NANO with Processing display

XXXXXXXXXXXXXXXXXXXXXXXXXXXXXXXXXXXXXXXXXXXXXXXXXXXXXXX

REMOTINO NANO (ITALIAN LANGUAGE)

Un mio caro amico mi ha detto: il mio plastico ferroviario non mi soddisfa: trovo complicato dover rimanere alla console per comandare le varie azioni dei treni, anzichè potermi muovere intorno ad esso: si potrebbe fare un telecomando wireless? Le azioni principali sono decidere dirfezione e velocità del treno sulla linea principale, e comandare quattro scambi per decidere in quale circuito deve passare il modellino del treno.

Ho fatto queste cose usando un ARDUINO NANO, un telecomando IR ed alcuni altri componenti.

--------------------------------------------------------------------------------------

Sono disponibili 4 modalità di funzionamento, programmabili a piacimento all power-on:

  • Mode A, 8 rele monostable (4 scambi)
  • Mode B, 8 bistable ON/OFF (attuatori generici)
  • Mode C - RELE 1, 2 bistable ON/OFF (attuatori generici), RELE' 3, 4, 5, 6, 7, 8 monostable (3 scambi)
  • Mode D - RELE 1, 2, 3, 4 bistable ON/OFF (attuatori generici), RELE' 5 6 7 8 monostable (2 scambi)

Per muovere il treno è necessario premere MotorOn (tasto GO)

Dopo con le frecce alta/bassa si aumenta/diminuisce velocità, o si inverte senso di marcia.

I tasti da 1 a 8 azionano gli 8 rele nella modalità selezionata: monostabile (per gli scambi) o bistabile (per on/off di accessori)

Il tasto 0 fa una fermata lenta tipo stazione

I tasti A, B, C, D sono velocità preimpostate, pari al 25, 50, 75 e 100% della vel. max, ed agiscono sulla direzione di marcia corrente

Se sono fermo, premo CH+ attivo direzione in avanti, poi premo A raggiunge lentamente e automaticamente il 25% della velocità

Se sono fermo, premo CH+ attivo direzione in avanti, poi premo B raggiunge lentamente e automaticamente il 50% della velocità

Se sono fermo, premo CH+ attivo direzione in avanti, poi premo C raggiunge lentamente e automaticamente il 75% della velocità

Se sono fermo, premo CH+ attivo direzione in avanti, poi premo D raggiunge lentamente e automaticamente il 100% della velocità

Se sono già in movimento, premo A, il treno si porta alla velocità del 25% automaticamente.

Il tasto 0 inizia una fermata lenta del treno.

Il tasto rosso power ferma immediatamente il treno (fermata di emergenza), togliendo corrente. E' attivo anche durante le frenate lente o il raggiungimento delle 4 velocità preimpostae.

tasto -> azioni

  • 0 -> fermata lenta tipo stazione
  • 1 -> relay 1
  • 2 -> relay 2
  • 3 -> relay 3
  • 4 -> relay 4
  • 5 -> relay 5
  • 6 -> relay 6
  • 7 -> relay 7
  • 8 -> relay 8
  • 9 -> free
  • A -> mode A velocità al 25%
  • B -> modo B velocità al 50%
  • C -> mode C velocità al 75%
  • D -> mode D velocità al 100%
  • GO -> motor on
  • OFF -> fermata immediata di emergenza, ferma ogni processo autom.
  • CH+ -> marcia avanti lentamente se premuto (serve prima motor on GO)
  • CH- -> marcia indietro lentamente se premuto (serve prima motor on GO)
  • VOL+ -> marcia avanti rapidamente se premuto (serve prima motor on GO)
  • VOL- -> marcia indietro rapidamente se premuto (serve prima motor on GO)
  • OK -> BOOST al 100% della velocità
Description:

Ard nano
Arduino Nano R3
×1
09670 01
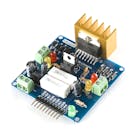
SparkFun Dual H-Bridge motor drivers L298
×1
2 Ports Relay module
You ca use other Relay boards, i.e. 1 x 8 Relais, or 2x4 relais, or 8 x 1 relay and more
×4
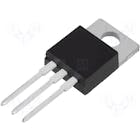
Stmicroelectronics l7805cv image
Linear Regulator (7805)
Add an heath synk to regulator
×1
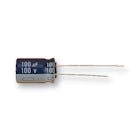
Panasonic eca2am101
Capacitor 100 µF
×2
Infrared Receiver Head Module LTM-8848-1 Liteon Semiconductors
×1
Infrared Remote Control RC5 SME002 Wallis Universal 21 key
This remote has a custom System Code to avoid consumer interference. If another Remote is used, you have to change key code table with new one
×1

Description:

Ide web
Arduino IDE
Processing3 logo
The Processing Foundation Processing
This is optionally used to have a Consolle Display on PC screen.

Description:

Notes on the English version: I am Italian and speak little English. All this text is the result of Google Translate. If you find serious errors in the translation and want to report them, I thank you in advance. Send notes to lpautas AT gmail.com. Thank you

REMOTINO NANO

A dear friend of mine told me: my railroad model does not satisfy me: I find it difficult to have to stay at the console to control the various actions of the trains, rather than being able to move around it: could you make a wireless remote control? The main actions are to decide train speed and speed on the main line, and to command four exchanges to decide in which circuit the train model should pass.I did these things using an ARDUINO NANO, an IR remote control and some other components.

--------------------------------------------------------------------------------------

We have 4 modes of work, that can be programmed at startup.

  • Mode A, 8 rele monostable (4 scambi)
  • Mode B, 8 bistable ON/OFF (attuatori generici)
  • Mode C - RELE 1, 2 bistable ON/OFF (attuatori generici), RELE' 3, 4, 5, 6, 7, 8 monostable (3 scambi)
  • Mode D - RELE 1, 2, 3, 4 bistable ON/OFF (attuatori generici), RELE' 5 6 7 8 monostable (2 scambi)

To move the train, press MotorOn (GO button)

Afterwards with the up / down arrows you increase / decrease speed, or you reverse direction of travel.

Keys 1 to 8 operate the 8 relays in the selected mode: monostable (for exchanges) or bistable (for accessory on / off)

The 0 key makes a slow station-type stop

The keys A, B, C, D are preset speeds, equal to 25, 50, 75 and 100% of the speed. max, and act on the current direction of travel

If I am stopped, I press CH + active forward direction, then I press A slowly and automatically reaches 25% of the speed

If I am stopped, I press CH + active forward direction, then I press B slowly and automatically reaches 50% of the speed

If I am stopped, I press CH + active forward direction, then I press C slowly and automatically reaches 75% of the speed

If I am stopped, I press CH + active forward direction, then I press D slowly and automatically reaches 100% of the speed

If they are already moving, I press A, the train moves at 25% speed automatically.

The red power button immediately stops the train (emergency stop), removing power. It is also active during slow braking or when 4 preset speeds are reached.

remote button -> actions

  • 0 -> slow stop to simulate a normal station stop
  • 1 -> relay 1
  • 2 -> relay 2
  • 3 -> relay 3
  • 4 -> relay 4
  • 5 -> relay 5
  • 6 -> relay 6
  • 7 -> relay 7
  • 8 -> relay 8
  • 9 -> free
  • A -> 25% speed
  • B -> 50% speed
  • C -> 75% speed
  • D -> 100% speed
  • GO -> motor on
  • OFF -> immediate emergency stop, stop all autom.
  • CH + -> drive forward slowly if pressed (first motor on GO needed)
  • CH- -> backwards slowly if pressed (first motor on GO needed)
  • VOL + -> forward travel quickly if pressed (first motor on GO needed)
  • VOL- -> backward quickly if pressed (first motor on GO needed)
  • OK -> BOOST at 100% speed
Video REMOTINO NANO with Processing display

XXXXXXXXXXXXXXXXXXXXXXXXXXXXXXXXXXXXXXXXXXXXXXXXXXXXXXX

REMOTINO NANO (ITALIAN LANGUAGE)

Un mio caro amico mi ha detto: il mio plastico ferroviario non mi soddisfa: trovo complicato dover rimanere alla console per comandare le varie azioni dei treni, anzichè potermi muovere intorno ad esso: si potrebbe fare un telecomando wireless? Le azioni principali sono decidere dirfezione e velocità del treno sulla linea principale, e comandare quattro scambi per decidere in quale circuito deve passare il modellino del treno.

Ho fatto queste cose usando un ARDUINO NANO, un telecomando IR ed alcuni altri componenti.

--------------------------------------------------------------------------------------

Sono disponibili 4 modalità di funzionamento, programmabili a piacimento all power-on:

  • Mode A, 8 rele monostable (4 scambi)
  • Mode B, 8 bistable ON/OFF (attuatori generici)
  • Mode C - RELE 1, 2 bistable ON/OFF (attuatori generici), RELE' 3, 4, 5, 6, 7, 8 monostable (3 scambi)
  • Mode D - RELE 1, 2, 3, 4 bistable ON/OFF (attuatori generici), RELE' 5 6 7 8 monostable (2 scambi)

Per muovere il treno è necessario premere MotorOn (tasto GO)

Dopo con le frecce alta/bassa si aumenta/diminuisce velocità, o si inverte senso di marcia.

I tasti da 1 a 8 azionano gli 8 rele nella modalità selezionata: monostabile (per gli scambi) o bistabile (per on/off di accessori)

Il tasto 0 fa una fermata lenta tipo stazione

I tasti A, B, C, D sono velocità preimpostate, pari al 25, 50, 75 e 100% della vel. max, ed agiscono sulla direzione di marcia corrente

Se sono fermo, premo CH+ attivo direzione in avanti, poi premo A raggiunge lentamente e automaticamente il 25% della velocità

Se sono fermo, premo CH+ attivo direzione in avanti, poi premo B raggiunge lentamente e automaticamente il 50% della velocità

Se sono fermo, premo CH+ attivo direzione in avanti, poi premo C raggiunge lentamente e automaticamente il 75% della velocità

Se sono fermo, premo CH+ attivo direzione in avanti, poi premo D raggiunge lentamente e automaticamente il 100% della velocità

Se sono già in movimento, premo A, il treno si porta alla velocità del 25% automaticamente.

Il tasto 0 inizia una fermata lenta del treno.

Il tasto rosso power ferma immediatamente il treno (fermata di emergenza), togliendo corrente. E' attivo anche durante le frenate lente o il raggiungimento delle 4 velocità preimpostae.

tasto -> azioni

  • 0 -> fermata lenta tipo stazione
  • 1 -> relay 1
  • 2 -> relay 2
  • 3 -> relay 3
  • 4 -> relay 4
  • 5 -> relay 5
  • 6 -> relay 6
  • 7 -> relay 7
  • 8 -> relay 8
  • 9 -> free
  • A -> mode A velocità al 25%
  • B -> modo B velocità al 50%
  • C -> mode C velocità al 75%
  • D -> mode D velocità al 100%
  • GO -> motor on
  • OFF -> fermata immediata di emergenza, ferma ogni processo autom.
  • CH+ -> marcia avanti lentamente se premuto (serve prima motor on GO)
  • CH- -> marcia indietro lentamente se premuto (serve prima motor on GO)
  • VOL+ -> marcia avanti rapidamente se premuto (serve prima motor on GO)
  • VOL- -> marcia indietro rapidamente se premuto (serve prima motor on GO)
  • OK -> BOOST al 100% della velocità
Description:

Sketch REMOTINO NANO V19C/C++
Compile with Arduino IDE and upload on Arduino NANO
/*
  
  remotino nano v19
  
  sketch by Pautasso Luciano, Turin Italy  [email protected]
 

*/

//Remote Control SME002 Wallis Universal key table


#define key_0     0x700
#define key_1     0x701
#define key_2     0x702
#define key_3     0x703
#define key_4     0x704
#define key_5     0x705
#define key_6     0x706
#define key_7     0x707
#define key_8     0x708
#define key_9     0x709

#define key_a     0x72b
#define key_b     0x72c
#define key_c     0x72d
#define key_d     0x72e

#define key_go    0x738
#define key_off   0x70C
#define key_chp   0x720
#define key_chm   0x721
#define key_volp  0x710
#define key_volm  0x711
#define key_ok    0x717


#define BOARD_NANO


//xxxxxxxxxxxxxxxxxxxxxxxxxxxxxxxxxxxxxxxxxxxxxxxxxxxxxxxxxxxxxxxxxxxx
//
// TIPO DI TELECOMANDO

#define TLC_SME002
//xxxxxxxxxxxxxxxxxxxxxxxxxxxxxxxxxxxxxxxxxxxxxxxxxxxxxxxxxxxxxxxxxxxx


#include <IRremote.h>

#include <EEPROM.h>
//indirizzi EEProm
int EEPROMaddr = 10; // 10 = Mode


#ifdef BOARD_NANO
int RECV_PIN = 10; // UNO input IR pin  11
#endif


IRrecv irrecv(RECV_PIN);

decode_results results;

String inputString = "";         // a string to hold incoming data
boolean stringComplete = false;  // whether the string is complete

int UltimaMarcia = 0;  // vale 0, 25, 50, 75, 100   , 0 = no marce
int CodeReceived;
int KeyPressed = 255;
int TempToggle;
int Togglelast = 0;
bool ProtocolOK;
char Mode = 'a' ; // vale "a" "b" "c" "d", letto da eeprom, decide modalità di funzionamento
bool Debug = false;
bool DebugMillis = false ;
bool FlagKeyPressed = false;
bool FlagFirstRun = true;
bool ChangeModeInProgress = false;
unsigned long TimeLastKeyPressed;
unsigned long TimeBlink;
int Temp;
bool CodiceIrValido = false ; // Si mette true quando un codice IR è ricevuto

int Pin_PWM_Mot1 = 9; //  canale pwm1
unsigned char PWM1 = 0; // Valore attuale della PWM del motore1
unsigned char PWM2 = 0; // Valore attuale della PWM del motore2
bool DIREZIONE1 = true; // Direzione attuale Motore 1 False indietro, Trua Avanti
bool DIREZIONE2 = true; // Direzione attuale Motore 2 False indietro, Trua Avanti
bool MOTORON = false; // Stato del motor on

/*

  //accelerazione veloce
  unsigned char Accelera = 20; // incremento di velocità
  unsigned char Rallenta = 20; // decremeto per rallenta
  unsigned char Fermata = 10; // decremento per
*/
unsigned char Accelera = 5; // incremento di velocità
unsigned char Rallenta = 5; // decremeto per rallenta
unsigned char Fermata = 3; // decremento per


int ContaIR = 0; // si conta ogni IR valido ricevuto e solo entro i primi 5 è possibile cambiare modo
bool ModeCambiabile = true; // dopo due ir ricevuti diventa false


int ContaFrames = 0;
unsigned long  Debug1 = 0;
unsigned long  Debug2 = 0;
unsigned long  Debug3 = 0;

//xxxxxxxxxxxxxxxxxxxxxxxxxxxxxxxxxxxxxxxxxxxxxxxxxxxxxxxxxxxxxxxxxxxxxxxxxx


#ifdef BOARD_NANO
// #define NumeroRele 8
#define NumeroRele 9
#endif


int TimeOut = 140; 

bool ReleStatus[NumeroRele]; // ARRAY, Contiene lo stato del relè, True = Chiuso, False = Aperto

bool ReleType[NumeroRele];  // ARRAY, Contiene il tipo del relè, True = Bistabile , False = Monostabile

int RelePin[NumeroRele];   // ARRAY, Contiene i pin relativi ai vari relè

bool ReleToggle[NumeroRele];   // ARRAY, Contiene il prossimo stato del relè che è oggetto di toggle


//*******************************************************************


//**************************************************************************************

//Dichiarazione di funzione che punta all'indirizzo zero
void(* Riavvia)(void) = 0;

void setup()
{

  //XXXXXXXXXXXXXXXXXXXXXXXXXXXXXXXXXXXXXXXXXXXXXXXXXXXXXXXX
  // COLLEGA I RELE AI PIN


#ifdef BOARD_NANO
#define RELE1 2
#define RELE2 3
#define RELE3 4
#define RELE4 5
#define RELE5 6
#define RELE6 7
#define RELE7 8
#define RELE8 11

  RelePin[0] = RELE1;
  RelePin[1] = RELE2;
  RelePin[2] = RELE3;
  RelePin[3] = RELE4;
  RelePin[4] = RELE5;
  RelePin[5] = RELE6;
  RelePin[6] = RELE7;
  RelePin[7] = RELE8;


#endif


  //riempie gli array
  for (int indice = 0; indice < (NumeroRele); indice++)
  {
    ReleStatus[indice] = true; //true bistabili toggle
    ReleType[indice] = true; // tutti bistabili toggle
    ReleToggle[indice] = false; //decide se attiva o disattiva al keypress, invertito dal loop al timeout


  }


  //XXXXXXXXXXXXXXXXXXXXXXXXXXXXXXXXXXXXXXXXXXXXXXXXXXX
  // IMPOSTA I BIT RELE COME OUTPUT

#ifdef BOARD_NANO
  pinMode(RELE1, OUTPUT);
  pinMode(RELE2, OUTPUT);
  pinMode(RELE3, OUTPUT);
  pinMode(RELE4, OUTPUT);
  pinMode(RELE5, OUTPUT);
  pinMode(RELE6, OUTPUT);
  pinMode(RELE7, OUTPUT);
  pinMode(RELE8, OUTPUT);

  // IMPOSTA I BIT MOTORI COME OUTPUT

#define MOT1_AVANTI 12
#define MOT1_INDIETRO 13


#endif


  Serial.begin(115200);

  // reserve 200 bytes for the inputString:
  inputString.reserve(200);

  irrecv.enableIRIn(); // Start the receiver


  EEPROMaddr = 10; // 10 = Mode
  Mode = EEPROM.read(EEPROMaddr);


  Serial.print("Modehex ");
  Serial.println(Mode, HEX);

  #define ReleBistabile true
  #define ReleMonostabile false 
  
  // cambia il mode scrivendo nell'array i valori
  switch (Mode) {
    case 'b': 
      //  Modo B , 8 bistabili ON/OFF , ogni volta inverte lo stato
      for (int indice = 0; indice < (NumeroRele); indice++)
      {
        ReleType[indice] = ReleBistabile; // tutti bistabili toggle
      }
      break;

    case 'c':    //
      // Modo C - RELE 1,2 BISTABILE , RELE' 3,4,5,6,7,8 MONOSTABILI SCAMBIO  TIMEOUT 140ms
      for (int indice = 0; indice < (NumeroRele); indice++)
      {
        ReleType[indice] = ReleMonostabile; 
      }
      ReleType[0] = ReleBistabile;
      ReleType[1] = ReleBistabile;
      break;

    case 'd':    //
      // Modo D - RELE 1,2,3,4 BISTABILI, RELE' 5 6 7 8 MONOSTABILI SCAMBIO
      for (int indice = 0; indice < (NumeroRele); indice++)
      {
        ReleType[indice] = ReleMonostabile; 
      }
      
      for (int indice = 0; indice < (4); indice++)
      {
        ReleType[indice] = ReleBistabile; 
      }


      //questi di seguito i monostabili, lascia solo 1 e 2 bistabili


#ifdef BOARD_NANO
#endif


      break;

    default:
      // Modo A , 8 rele monostabili, 140msec , ReleMonostabile false   
      for (int indice = 0; indice < (NumeroRele); indice++)
      {
        ReleType[indice] = ReleMonostabile; //false  monostabili
      }
      TimeOut = 140;
  }


  delay(500);

  if (( Mode < 'a' ) || ( Mode > 'd' )) {
    Serial.println("PASS-E2?");
    delay(200);


    while (Serial.available() == 0) {
    }


    if (Serial.read() == 'p') {
      EEPROMaddr = 10; // 10 = Mode
      EEPROM.write(EEPROMaddr, 'a');
    }
    else  {
      Serial.println("Reset!!");
      delay(1000);
      Riavvia();
    }


  }


#ifdef BOARD_NANO
  Serial.println("Board NANO");
#endif


  PrintStatus();

  //AggiornaStatoRele();
  OpenAllRele();
}
//xxxxxxxxxxxxxxxxxxxxxxxxxxxxxxxxxxxxxxxxxxxxxxxxxxxxxxxxxxxxxxxxxxx
void PrintStatus3() {


  Serial.print("ARRAY 012345678 -> ReleType ");
  for (int indice = 0; indice < (NumeroRele); indice++)
  {
    if (ReleType[indice] == true) {
      Serial.print("1");
    } else {
      Serial.print("0");
    }
  }

  Serial.print("   ReleToggle ");
  for (int indice = 0; indice < (NumeroRele); indice++)
  {
    if (ReleToggle[indice] == true) {
      Serial.print("1");
    } else {
      Serial.print("0");
    }
  }

  Serial.print("   ReleStatus ");
  for (int indice = 0; indice < (NumeroRele); indice++)
  {
    if (ReleStatus[indice] == true) {
      Serial.print("1");
    } else {
      Serial.print("0");
    }
  }

  Serial.println(" ");
  Serial.print("Pinout RelePin ");
  for (int indice = 0; indice < (NumeroRele); indice++)
  {
    Serial.print(indice);
    Serial.print(":r");
    Serial.print(RelePin[indice]);
    Serial.print(", ");
  }

  AggiornaStatoMotori();


}


void AggiornaStatoRele() {

  Debug = true;

  if (Debug == true)
  {
    //stampa lo stato dei rele
    Serial.print("123456789.. STA:");
    for (int indice = 0; indice < (NumeroRele); indice++)
    {
      if (ReleStatus[indice]) {
        Serial.print("1");
      } else {
        Serial.print("0");
      }
    }

    Serial.print("; TYP:");
    for (int indice = 0; indice < (NumeroRele); indice++)
    {
      if (ReleType[indice]) {
        Serial.print("1");
      } else {
        Serial.print("0");
      }
    }

    Serial.print("; TGL:");
    for (int indice = 0; indice < (NumeroRele); indice++)
    {
      if (ReleToggle[indice]) {
        Serial.print("1");
      } else {
        Serial.print("0");
      }
    }
    
    Serial.println("");


  }


// attua i comandi
if (KeyPressed < NumeroRele) {  //EVITA ERRORE FUORI ARRAY
  for (int indice = 0; indice < (NumeroRele); indice++)
  {
    if (ReleStatus[indice]) {
      digitalWrite(RelePin[indice], HIGH);
    } else {
      digitalWrite(RelePin[indice], LOW);
    }
  }
}


}

//xxxxxxxxxxxxxxxxxxxxxxxxxxxxxxxxxxxxxxxxxxxxxxxxxxxxxxxxxxxxxxxxxxx
void OpenAllRele() {
  //Serial.println("open all rele ");


  for (int indice = 0; indice < (NumeroRele); indice++)
  {
    ReleStatus[indice] = false;
  }

  AggiornaStatoRele();
}

// xxxxxxxxxxxxxxxxxxxxxxxxxxxxxxxxxxxxxxxxxxxxxxxxxxxxxxxxxxxxxxxxxxxxxxxxxxxxxxxxxxxx


void PreProcessaTasto() {
  if (CodiceIrValido == true)
  {
    CodiceIrValido == false;

    ProcessaTasto(CodeReceived);
  }
}


//xxxxxxxxxxxxxxxxxxxxxxxxxxxxxxxxxxxxxxxxxxxxxxxxxxxxxxxxxxxxxx
void ProcessaComandoSeriale() {
  String a1, b1, c1;
  long KeySerial;


  inputString.trim();  //ELIMINA SPAZI PRIMA E DOPO
  a1 = (inputString.substring(0, 1));
  b1 = (inputString.substring(1, 2));
  c1 = (inputString.substring(2, 3));


  if ((a1 == "R") || (a1 == "r")) { // se è un comando R
    //    if (isDigit(b1)) {   // se è un numero (da 0 a 9
    KeySerial = b1.toInt();

    Debug1 = millis();

    //decrementa di uno perchè i rele vanno da 1 a 8 per nano ma la matrice va da 0 a 7
    KeySerial--;

    if (c1 == "1") {
      AttivaRele(KeySerial);
      TimeLastKeyPressed = ( millis() + TimeOut );
      Serial.print("Serial ON RL");
      Serial.println(KeySerial);
    }

    if (c1 == "0") {
      DisAttivaRele(KeySerial);
      TimeLastKeyPressed = ( millis() + TimeOut );
      Serial.print("Serial OFF RL");
      Serial.println(KeySerial);
    }
    //    }
  } else if (a1 == "?") {
    PrintStatus();
    PrintStatus3();
  } else if ((a1 == "M") || (a1 == "m")) { // se è un comando Motore


    b1.toLowerCase();

    if (b1 == "a") {
      Serial.println("Vel 100");
      ImpostaVelocita(100);
    }
    if (b1 == "b") {
      Serial.println("Vel 150");
      ImpostaVelocita(150);
    }
    if (b1 == "c") {
      Serial.println("Vel 200");
      ImpostaVelocita(200);
    }
    if (b1 == "d") {
      Serial.println("Vel 255");
      ImpostaVelocita(255);
    }

    if (b1 == "8") {
      Serial.println("Pwm1Up");
      Pwm1Up();
    }
    if (b1 == "2") {
      Serial.println("Pwm1Down");
      Pwm1Down();
    }
    if (b1 == "4") {
      Serial.println("Pwm2Down");
      Pwm2Down();
    }
    if (b1 == "6") {
      Serial.println("Pwm2Up");
      Pwm2Up();
    }
    if (b1 == "0") {
      Serial.println("Frenata Lenta");
      ImpostaVelocita(0);
    }
    if (b1 == "5") {
      Serial.println("GoMotorOn");
      GoMotorOn();
    }

    AggiornaStatoMotori();


  } else {
    Serial.println("invalid CMD");
  }


}
//xxxxxxxxxxxxxxxxxxxxxxxxxxxxxxxxxxxxxxxxxxxxxxxxxxxxxxxxxxxxxxxxxxx
void ChangeMode(int NewMode) {
  // NewMode vale 10, 11, 12, 13
  //Serial.print("Changing Mode ");
  switch (NewMode) {
    case 11:    //
      Mode = 'b';
      break;

    case 12:    //
      Mode = 'c';
      break;

    case 13:    //
      Mode = 'd';
      break;

    default:
      Mode = 'a';

  }

  EEPROMaddr = 10; // 10 = Mode
  EEPROM.write(EEPROMaddr, Mode);
  setup();
  PrintStatus();

  //ora azzeraq tutti i rele
  OpenAllRele();

  for (int i = 1; i > 0; i--) {
    Serial.print("Riavvio tra ");
    Serial.print(i);
    Serial.println(" sec.");
    delay(1000);
  }
  
  //reset via software
  Serial.println("Reset!!");
  delay(1000);
  Riavvia();


}


//xxxxxxxxxxxxxxxxxxxxxxxxxxxxxxxxxxxxxxxxxxxxxxxxxxxxxxxxxxxxxxxxxxx
void PrintStatus() {
  // Serial.println("STATUS");
  Mode = EEPROM.read(EEPROMaddr);

  Serial.print("Modehex ");
  Serial.println(Mode, HEX);

  Serial.println("ver: IrBoardRele_17-univ2");
  //Serial.print("Mode EEPROM  cancellarlo ");
  Serial.print("Mode ");
  Serial.println(Mode);

  Serial.print("Numero Rele ");
  Serial.println(NumeroRele);

#ifdef BOARD_NANO
  Serial.println("Board NANO");
#endif


  // Mode
  // Modo A , 8 rele monostabili, 140msec , ReleMonostabile false TIMEOUT 140ms
  // Modo B , 8 bistabili ON/OFF , ogni volta inverte lo stato   
  // Modo C - RELE 1,2 BISTABILE , RELE' 3,4,5,6,7,8 MONOSTABILI SCAMBIO
  // Modo D - RELE 1,2,3,4 BISTABILI, RELE' 5 6 7 8 MONOSTABILI SCAMBIO

  switch (Mode) {  //stampa la descrizione del Mode
    case 'a':
      Serial.println("Mode A: 8 relais monostabili");
      break;
    case 'b':
      Serial.println("Mode B: 8 relais bistabili/toggle");
      break;
    case 'c':
      Serial.println("Mode C: relais 1,2 bistabili, relais 3,4,5,6,7,8 monostabili");
      break;
    case 'd':
      Serial.println("Mode D: relais 1,2,3,4 bistabili, relais 5,6,7,8 monostabili");
      break;
    default:
      Serial.println("Error in Mode selection");
  }


}
//xxxxxxxxxxxxxxxxxxxxxxxxxxxxxxxxxxxxxxxxxxxxxxxxxxxxxxxxxxxxxxxxxxx
void DisAttivaRele(int KeyPressed) {
  if (KeyPressed < NumeroRele) {  //EVITA ERRORE FUORI ARRAY

    ReleStatus[KeyPressed] = false ;
    AggiornaStatoRele();
    Serial.print("RLOF=");
    Serial.println(KeyPressed);

   }
}
//xxxxxxxxxxxxxxxxxxxxxxxxxxxxxxxxxxxxxxxxxxxxxxxxxxxxxxxxxxxxxxxxxxx
void AttivaRele(int KeyPressed) {
  if (KeyPressed < NumeroRele) {  //EVITA ERRORE FUORI ARRAY

    ReleStatus[KeyPressed] = true ;
    AggiornaStatoRele();
    Serial.print("RLON=");
    Serial.println(KeyPressed);
  }
}

//xxxxxxxxxxxxxxxxxxxxxxxxxxxxxxxxxxxxxxxxxxxxxxxxxxxxxxxxxxxxxxxxxxx
// VelMax vale 25, 50, 75 e 100% della velocità max, ovvero 64, 128, 192, 255
// il ciclo continua all'interno della procedura fino a che PWM1 vale MaxVel
void ImpostaVelocita(int VelMax)
{
  bool ExitLoopMaxVel = false ; // quando vale true si esce dal ciclo
  int CicliMaxVel = 0; //solo per debug
  int QuantoManca = 0; // differenza tra obiettivo e velocità attuale
  int Correzione = 0;  // valore della prosima correzione necessaria per raggiungere l'obiettivo

#define DeltaVel 3
  //DeltaVel è l'incremento/decremento di velocità da applicare ad ogni step

  while (ExitLoopMaxVel == false) {
    CicliMaxVel ++ ;

    //se motoroff non fa nulla
    if (MOTORON == true) {

      // qui siamo in motoron, possiamo correggere la velocità
      QuantoManca = VelMax - PWM1;


      if (QuantoManca == 0) {
        Serial.print("QuantoManca=0 - ");
        Correzione = 0;
        ExitLoopMaxVel = true;
      }

      // due casi
      if (QuantoManca > 0) {
        Serial.print("QuantoManca>0 - ");
        // caso 1  valori positivi   VelMax = 128, PWM1 = 100 , QuantoManca = 28
        if (QuantoManca > DeltaVel) {
          Correzione = DeltaVel;
          // QuantoManca = 20 , DeltaVel = 3, Correggo di 3
        } else {
          Correzione = (VelMax - PWM1);      // QuantoManca = 2 , DeltaVel = 3, Correggo di 2
          ExitLoopMaxVel = true;
        }
      } else {
        Serial.print("QuantoManca<0 - ");
        // caso 2  valori negativi   VelMax = 128, PWM1 = 140, QuantoManca = -12
        QuantoManca = PWM1 - VelMax; // lavoro con segno positivo per evitare errori di programmazione
        if (QuantoManca > DeltaVel) {
          Correzione = -DeltaVel ;                 // QuantoManca = 20 , DeltaVel = 3, Correggo di -3
        } else {
          Correzione = -(PWM1 - VelMax);      // QuantoManca = 2 , DeltaVel = 3, Correggo di -2
          ExitLoopMaxVel = true;
        }
      }


      // eseguo la correzione
      PWM1 = PWM1 + Correzione;


      delay(200); //ritardo di regolazione velocità
      AggiornaStatoMotori();

      // controlla se è stato premuto lo 0 per uno stop immediato di emergenza
      if (CheckCodiceIr() == true) {
        if (CodeReceived == key_off) {
          EmergencyStop();
          //  PWM1 = 0; // fermata di emergenza
          //  Serial.println( "Emergency STOP");
          ExitLoopMaxVel = true;
        }

      }

    } else {
      Serial.println("NON ESEGUITO - Motor OFF");
      ExitLoopMaxVel = true;
    }

    // esce al ciclo di while
  }

}
//xxxxxxxxxxxxxxxxxxxxxxxxxxxxxxxxxxxxxxxxxxxxxxx


//xxxxxxxxxxxxxxxxxxxxxxxxxxxxxxxxxxxxxxxxxxxxxxxxxxxxxxxxxxxxxxxxxxx

void ProcessaTasto(int FuCodeReceived)
{
  // dato il tasto premuto scrive KeyPressed che è l'indice dell'array relè


  FlagKeyPressed = true;
  KeyPressed = 255; //valore di default per non fare altre azioni
  switch (FuCodeReceived)
  {
    // caso mappa standard
    // nano collego tasti da 1 a 8 ai rele nell'array da 0 a 7

    case key_0:    //   0
      ImpostaVelocita(0);
      break;

    case key_1:    //   1
      KeyPressed = 0;
      break;

    case key_2:    //   2
      KeyPressed = 1;
      break;

    case key_3:    //   3
      KeyPressed = 2;
      break;

    case key_4:    //   4
      KeyPressed = 3;
      break;

    case key_5:    //   5
      KeyPressed = 4;
      break;

    case key_6:    //   6
      KeyPressed = 5;
      break;

    case key_7:    //   7
      KeyPressed = 6;
      break;

    case key_8:    //   8
      KeyPressed = 7;
      break;

    case key_9:    //   9
      break;

    case key_a:    //   A
      ImpostaVelocita(100);
      ChangeMode2('a'); 
      break;

    case key_b:    //   B
      ChangeMode2('b'); 
      ImpostaVelocita(150);
      break;

    case key_c:    //   C
      ImpostaVelocita(200);
      ChangeMode2('c'); 
      break;

    case key_d:    //   D
      ImpostaVelocita(255);
      ChangeMode2('d'); 
      break;

    case key_go:    //   GO
      GoMotorOn();
      break;

    case key_off:    //   OFF
      EmergencyStop();
      break;

    case key_chp:    //   CH+
      Pwm1Up();
      break;

    case key_chm:    //   CH-
      Pwm1Down();
      break;

    case key_volp:    //   VOL+
      Pwm2Up();
      break;

    case key_volm:    //   VOL-
      Pwm2Down();
      break;

    case key_ok:    //   OK
      Boost130();
      break;

    default:      //   NESSUN TASTO VALIDO
      FlagKeyPressed = false;


      // QUI SI COMPATTA LA TASTIERA SE MANCANO OUTPUT

  }


  AggiornaStatoMotori();

  // controlla che l'indice (keypressed) sia entro i limiti della lunghezza array, altrimenti non fa niente

  if (KeyPressed < NumeroRele) {


    TimeLastKeyPressed = millis();
    Debug1 = TimeLastKeyPressed;
    TimeLastKeyPressed = TimeLastKeyPressed + TimeOut;
    Debug2 = TimeLastKeyPressed;


    if (ReleType[KeyPressed] == false)
    {
      //Serial.println("#F ");
      AttivaRele(KeyPressed); // Monostabile
    }
    else
    {

      if (ReleToggle[KeyPressed] == false)
      {
        //Serial.println("#G "); //Bistabile
        AttivaRele(KeyPressed);
      }
      else
      {
        //Serial.println("#H "); //Bistabile
        DisAttivaRele(KeyPressed);
      }


    }
  }

}

//xxxxxxxxxxxxxxxxxxxxxxxxxxxxxxxxxxxxxxxxxxxxxxxxxxxxxxxxxxxxxx


void ChangeMode2(char NewMode){
  // qui si controlla se è richiesto un cambio di Mode, fattibile solo i primi 5 codici ricevuti
  //  if (ContaIR < 6){
  if (ModeCambiabile == true) {
    //Serial.print("Changing2 Mode2 ");
    switch (NewMode) {
      case 'a':    // A
        Mode = 'a';
        break;
      case 'b':    // B
        Mode = 'b';
        break;
      case 'c':    // C
        Mode = 'c';
        break;
      case 'd':    // D
        Mode = 'd';
        break;
      default:
        Mode = 'a';
    }


    EEPROMaddr = 10; // 10 = Mode
    EEPROM.write(EEPROMaddr, Mode);
    setup();
    PrintStatus();

    //ora azzeraq tutti i rele
    OpenAllRele();


    for (int i = 1; i > 0; i--) {
      Serial.print("Riavvio tra ");
      Serial.print(i);
      Serial.println(" sec.");
      delay(1000);
    }
  
    Serial.println("Reset!!");
    delay(1000);
    Riavvia();

  
  }  
}


//xxxxxxxxxxxxxxxxxxxxxxxxxxxxxxxxxxxxxxxxxxxxxxxxxxxxxxxxxxxxxxxxxxxxxxxxxxxxxxxxxxxxxxxxxxxxxxxxxxxxxx
// un codice IR è stato ricevuto
// si filtra e se è valido RC5 si mette CodiceIrValido = True

void dump(decode_results *results) {
  Debug = false;
  // Dumps out the decode_results structure.
  // Call this after IRrecv::decode()
  int count = results->rawlen;

  ProtocolOK = false;
  CodiceIrValido = false;

  if (results->decode_type == UNKNOWN) {
    Serial.print("IR Inval. ");
  }
  else if (results->decode_type == NEC) {
    Serial.print("Decoded NEC: ");
  }
  else if (results->decode_type == SONY) {
    Serial.print("Decoded SONY: ");
  }
  else if (results->decode_type == RC5) {
    ProtocolOK = true;

    ContaIR = ContaIR + 1;
    if (ContaIR > 2) {
      ContaIR = 2; // satura il valore a 6 per evitare overflow
      ModeCambiabile = false;
    }


    if (Debug == true)
    {
      Serial.print("IR RC5 ");
    }


  }
  else if (results->decode_type == RC6) {
    Serial.print("Decoded RC6: ");
  }
  else if (results->decode_type == PANASONIC) {
    Serial.print("Decoded PANASONIC - Address: ");
    Serial.print(results->address, HEX);
    Serial.print(" Value: ");
  }
  else if (results->decode_type == LG) {
    Serial.print("Decoded LG: ");
  }
  else if (results->decode_type == JVC) {
    Serial.print("Decoded JVC: ");
  }
  else if (results->decode_type == AIWA_RC_T501) {
    Serial.print("Decoded AIWA RC T501: ");
  }
  else if (results->decode_type == WHYNTER) {
    Serial.print("Decoded Whynter: ");
  }


  if (ProtocolOK == true)
  {

    if (Debug == true)
    {
      //qui si decodifica il trasto premuto
      Serial.print(results->value, HEX);
      Serial.print(" (");
    }

    CodeReceived = results->value;
    //il toggle è  il bit 7  (0x703 0xF03)
    bitClear(CodeReceived, 11);   //azzera il bit Toggle
    CodiceIrValido = true;

    if (Debug == true)
    {
      Serial.print(CodeReceived, HEX);
      Serial.println(" filt)");
    }
  }
  else
  {
    Serial.println("prot-error");
  }

  ProtocolOK = false;
  results->decode_type = UNKNOWN;
}
// xxxxxxxxxxxxxxxxxxxxxxxxxxxxxxxxxxxxxxxxxxxxxxxxxxxxxxxxxxxxxxxxxxxxxxxxxxxxxxxxxxxx
//verifica se è presente un codice IR
//Ritorna true se disponibile
bool CheckCodiceIr() {
  if (irrecv.decode(&results)) {
    dump(&results);
    irrecv.resume(); // Receive the next value
    return true;
  } else {
    return false;
  }
}
//---------------------------------------------------------------

void loop() {

  if (DebugMillis)
  {
    if (Debug3 > 0)
    {
      Serial.print(" dbg1 ");
      Serial.println(Debug1);
      Serial.print(" dbg2 ");
      Serial.println(Debug2);
      Serial.print(" dbg3 ");
      Serial.println(Debug3);
      Debug1 = 0;
      Debug2 = 0;
      Debug3 = 0;
    }
  }


  // print the string when a newline arrives:
  if (stringComplete) {
    // Serial.println(inputString);
    ProcessaComandoSeriale();
    // clear the string:
    inputString = "";
    stringComplete = false;
    AggiornaStatoMotori();
  }

  if (FlagKeyPressed) {  //FlagKeyPressed == true


    if (DebugMillis)
    {
      Serial.println(millis());
      Serial.print(" dbg1 ");
      Serial.println(Debug1);
      Serial.print(" dbg2 ");
      Serial.println(Debug2);
      Serial.print(" dbg3 ");
      Serial.println(Debug3);
    }


    //------------- blinka built led per segnalare live
    if ( TimeBlink < millis() ) {
      TimeBlink = millis();
    }


    if ( millis() > TimeLastKeyPressed )
    { //      - IF ( (Millis + TimeoutB) > TimeLastKeyPressed )
      Debug3 = millis();
      FlagKeyPressed = false;

      //Serial.println("#A ");

      if (ReleType[KeyPressed] == true) //true bistabile toggle
      {
        //Serial.println("#B ");

        // ReleType  true =   bistabile
        if (ReleToggle[KeyPressed] == true)
        {
          //Serial.println("#C ");
          ReleToggle[KeyPressed] = false;
        }
        else
        {
          //Serial.println("#D ");
          ReleToggle[KeyPressed] = true;
        }
      }
      else
      {
        //ReleType false = MONOSTABILE
        DisAttivaRele(KeyPressed);
        //Serial.println("#E ");

      }
    }
  }


  if (CheckCodiceIr() == true) {
    PreProcessaTasto();
  }


}


//xxxxxxxxxxxxxxxxxxxxxxxxxxxxxxxxxxxxxxxxxxxxxxxxxxxxxxxxxxxxx
void AggiornaStatoMotori() {
  //si inizia stampando gli stati

  if (DIREZIONE1) {
    digitalWrite(MOT1_AVANTI, HIGH);
    digitalWrite(MOT1_INDIETRO, LOW);
  }
  else {
    digitalWrite(MOT1_AVANTI, LOW);
    digitalWrite(MOT1_INDIETRO, HIGH);
  }
  analogWrite(Pin_PWM_Mot1, PWM1);

  Serial.println(" ");
  Serial.print("PWM1=");
  Serial.println(PWM1);

  Serial.print("DIR1=");
  Serial.println(DIREZIONE1);

  Serial.print("PWM2=");
  Serial.println(PWM2);

  Serial.print("DIR2=");
  Serial.println(DIREZIONE2);

  Serial.print("MOTN=");
  Serial.println(MOTORON);

}


//xxxxxxxxxxxxxxxxxxxxxxxxxxxxxxxxxxxxxxxxxxxxxxxxxxxxxxxxxxxxx


//ricevuto codice GO o seriale M5
void GoMotorOn() {

  // SOLO SE è IN MOTOR OFF SI ESEGUE
  if (MOTORON == false) {
    PWM1 = 0;
    Serial.println( "!!! PWM1 = 0");
    delay(100);
    MOTORON = true;
  }


}

// * * * * *

//ricevuto codice ^ o seriale M8 che aumenta velocità di PWM1 e DIREZIONE1 a true
void Pwm1Up() {

  if (MOTORON) {
    //se pwm1 è 0 regola la direzione
    if ( PWM1 == 0 ) {
      DIREZIONE1 = true;
    }

    if (DIREZIONE1) {
      //siamo già nella direzione giusta
      // controlla se PWM ha ancora capienza per sommare Accelera e non dare il giro oltre 255
      if ( (PWM1 + Accelera) > 255   ) {
        // da il giro, satura a 255
        PWM1 = 255;
      }
      else {
        //non da il giro, si somma
        PWM1 = PWM1 + Accelera;
      }

    }
    else {
      //siamo nella direzione sbagliata
      // controlla se PWM puo ancora essere decrementato di Accelera e non dare il giro sotto lo 0
      if ( (PWM1 - Accelera) <  1  ) {
        // da il giro, si satura a 0 e si inverte la direzione
        PWM1 = 0;
        Serial.println( "!!! PWM1 = 0");
        DIREZIONE1 = true;
      }
      else {
        // non da il giro, si sottrae
        PWM1 = PWM1 - Accelera;
      }


    } // DIREZIONE1 == false

  } //)MOTORON)

}


//ricevuto codice v o seriale M2 che diminuisce e inverte velocità di PWM1 e DIREZIONE1 a false
void Pwm1Down() {

  if (MOTORON) {
    //se pwm1 è 0 regola la direzione
    if ( PWM1 == 0 ) {
      DIREZIONE1 = false;
    }

    if (DIREZIONE1 == false) {
      //siamo già nella direzione giusta
      // controlla se PWM ha ancora capienza per sommare Accelera e non dare il giro oltre 255
      if ( (PWM1 + Accelera) > 255   ) {
        // da il giro, satura a 255
        PWM1 = 255;
      }
      else {
        //non da il giro, si somma
        PWM1 = PWM1 + Accelera;
      }

    }
    else {
      //siamo nella direzione sbagliata
      // controlla se PWM puo ancora essere decrementato di Accelera e non dare il giro sotto lo 0
      if ( (PWM1 - Accelera) <  1  ) {
        // da il giro, si satura a 0 e si inverte la direzione
        PWM1 = 0;
        Serial.println( "!!! PWM1 = 0");
        DIREZIONE1 = true;
      }
      else {
        // non da il giro, si sottrae
        PWM1 = PWM1 - Accelera;
      }


    } // DIREZIONE1 == false

  } //)MOTORON)

}


//xxxxxxxxxxxxxxxxxxxxxxxxxxxxxxxxxxxxxxxxxxxxxxxxxxxxxxxxxxxxx


void Pwm2Up() {};

//xxxxxxxxxxxxxxxxxxxxxxxxxxxxxxxxxxxxxxxxxxxxxxxxxxxxxxxxxxxxx


void Pwm2Down() {};

//xxxxxxxxxxxxxxxxxxxxxxxxxxxxxxxxxxxxxxxxxxxxxxxxxxxxxxxxxxxxx

void Boost130() {
  //v19, boost solo se in drvon
  if (MOTORON == true) {
    int SavePWM;
    Serial.println( "Boost1");// il quinto carattere accende e soegne la spia
    SavePWM = PWM1;
    PWM1 = 255;
    AggiornaStatoMotori();
    delay(100);
    PWM1 = SavePWM;
    AggiornaStatoMotori();
    Serial.println( "Boost0");
  }
}

//xxxxxxxxxxxxxxxxxxxxxxxxxxxxxxxxxxxxxxxxxxxxxxxxxxxxxxxxxxxxx

void EmergencyStop() {
  PWM1 = 0; // fermata di emergenza
  Serial.println( "Emergency STOP");
  MOTORON = false;
  AggiornaStatoMotori();
}

//xxxxxxxxxxxxxxxxxxxxxxxxxxxxxxxxxxxxxxxxxxxxxxxxxxxxxxxxxxxxx

/*
  SerialEvent occurs whenever a new data comes in the
  hardware serial RX.  This routine is run between each
  time loop() runs, so using delay inside loop can delay
  response.  Multiple bytes of data may be available.
*/
void serialEvent() {
  while (Serial.available()) {
    // get the new byte:
    char inChar = (char)Serial.read();
    // add it to the inputString:
    inputString += inChar;
    // if the incoming character is a newline, set a flag
    // so the main loop can do something about it:
    if (inChar == '\n') {
      stringComplete = true;
    }
  }
}

Description:

REMOTINO NANO Schematic Diagram
This is complete schematic of REMOTINO NANO
Nano tray bb v2 qbllurkuiw


YOU MIGHT ALSO LIKE