Simple MPU6050 IMU + Arduino bot
DESCRIPTION
Using a Gyro to control my projects was a big thing on my bucket list but apart from acquiring the IMU the rest was hard as nails. The lack of effective content on extracting yaw pitch and roll values bugged me for over a month. After numerous websites, countless libraries and problems I learned to get data from the gyro and use it in a simple project that beginners can easily do and save themselves a lot of trouble.
"It's gonna be LEGENDARY" - Swarley

Follow these steps to make use of the gyro angles from the MPU6050 sensor.
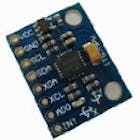
1. After getting yourself the 6-axis accelerometer-gyroscope sensor, there's a library to install.
Here's the link :
MPU6050 library
https://github.com/jarzebski/Arduino-MPU6050
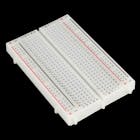
2. On installing the library go ahead and wire up the system as follows
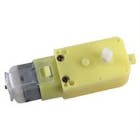
The connections to the motor driver are given in the code itself.
ena = 5;
enb = 6;
in1 = 7;
in2 = 4;
in3 = 9;
in4 = 8;
here anyway :)
The connections to the sensors are :
VCC - +5V
GND - GND
SDA - A4
SCL - A5
Note - From here on we call the robot Barney.


3. Upload the code and place your Barney on the floor to let the sensor calibrate
and set the orientation you placed it in as 0 degrees.
Time for Fun kids.....
Once it's done that, Barney may twitch side to side but it's fine. Now try and shove the bot in different directions but it will return to its original orientation.
Here's Barney demonstrating.


Using a Gyro to control my projects was a big thing on my bucket list but apart from acquiring the IMU the rest was hard as nails. The lack of effective content on extracting yaw pitch and roll values bugged me for over a month. After numerous websites, countless libraries and problems I learned to get data from the gyro and use it in a simple project that beginners can easily do and save themselves a lot of trouble.
"It's gonna be LEGENDARY" - Swarley
Follow these steps to make use of the gyro angles from the MPU6050 sensor.
1. After getting yourself the 6-axis accelerometer-gyroscope sensor, there's a library to install.
Here's the link :
MPU6050 library
https://github.com/jarzebski/Arduino-MPU6050
2. On installing the library go ahead and wire up the system as follows
The connections to the motor driver are given in the code itself.
ena = 5;
enb = 6;
in1 = 7;
in2 = 4;
in3 = 9;
in4 = 8;
here anyway :)
The connections to the sensors are :
VCC - +5V
GND - GND
SDA - A4
SCL - A5
Note - From here on we call the robot Barney.
3. Upload the code and place your Barney on the floor to let the sensor calibrate
and set the orientation you placed it in as 0 degrees.
Time for Fun kids.....
Once it's done that, Barney may twitch side to side but it's fine. Now try and shove the bot in different directions but it will return to its original orientation.
Here's Barney demonstrating.
