Soldering Iron Controller for Hakko 907 v.2 © GPL3+
DESCRIPTION
Non-expensive soldering controller
UPDATED 04/03/2019 schematics and description updated
UPDATED 02/18/2018: calibration procedure updated
UPDATED 8/1/2017: sketch bug fixed, sketch for lcd1602 added
UPDATED 7/31/2017: new hardware schematics implemented
UPDATED 4/7/2017: new features are implemented (see the description)
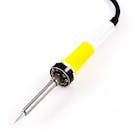
The controller deals with the hakko 907 soldering handles with replaceable tips and has built-in heater element and thermistor OR thermocouple to check the iron temperature. The handle has two independed electrical circuits for the iron heating and temperature checking. This controller can be used with another iron handle that has the similar architecture.
It is better to replace the plug on the iron handle with another one, for example, aviation plug GX16-5 or GX-12-5.
The key features of this controller are:
- The controller is suitable to work with a variety of hakko 907 handles, with thermocouple or with thermistor to check the temperature. You should choose the appropriate schematics.
- The PID algorithm is implemented to keep the temperature of the soldering iron. The iron raises the temperature in about 30 seconds and keeps it inside 1 -2 degrees of Celsius.
- The controller keeps the temperature in case of heavy usage because the PID algorithm is very sensitive and can quickly increase the supplied power.
- Three reference temperature points implemented in the soldering iron calibration procedure.
- The calibration procedure is automated by use of PID algorithm to keep the temperature near the reference point.
- The controller supports two working modes: keep the temperature and keep the power supplied.
- To keep the operation silent, the Timer1 high frequency interrupts are implemented in the controller. This allows the PWM frequency to be increased up to 31250 Hz instead of 490 Hz by built-in
analogWrite()function. - The controller implements accelerated rotary encoder. When the encoder is rotated slowly, the temperature setting is changed by 1 degree. When the encoder rotated quickly, the temperature setting is changed by 5 degrees.
- The temperature is stored in Arduino EEPROM after the soldering iron was used in case the temperature settings were changed.
- The controller supports Celcius or Farenheit units to be used for the displayed temperature value, preset temperature and calibration data.
- The controller has tune mode to simplify the initial setup procedure of the controller.
The Controller Menu
As I mentioned before, the controller has several modes:
- Standby mode
- Main working mode (keep the temperature)
- Power mode (keep the supplied power)
- Setup mode
- Calibration mode
- Tune mode (the initial setup procedure)
When the controller is just powered on, the standby mode is activated. In this mode the soldering iron is powered. The main display shows the following information:
- The preset temperature in the left side of the upper line (in units selected - Celsius or Fahrenheit);
- The 'OFF' message in the right side of the upper line indicating that the iron is powered off;
- The current temperature of the iron in the left side of the second line;
In case the iron is not connected to the controller, the message 'no iron' is displayed on the second line. When the iron become cold (after usage), the 'cold' message is displayed on the second line indicating that it is safe to touch the iron.
The preset temperature can be adjusted by rotating the encoder handle while the iron is off. To power on the soldering iron, push the encoder handle lightly. The controller will be switched to the main mode. Now the controller keeps the iron temperature near the preset temperature. When the iron is heavily used, the temperature can slightly deviate from the preset one.
In the main mode the display shows the following information:
- The preset temperature in the left side of the upper line (in units selected - Celsius or Fahrenheit)
- The 'ON' message in the right side of the upper line indicating that the iron is powered on and is still heating. When the iron reaches the preset temperature, the '
rdy' (ready) message will be displayed; - The current temperature of the iron is displayed in the left side of the second line;
- The power supplied to the iron (in percents of the maximum allowable power) is displayed in the right side of the screen;
By rotating the encoder it is possible to change the preset temperature. The message 'ON' would be showed again till the iron would reached the new preset temperature. To return to the standby mode, press the encoder handle lightly.
In the main mode, the controller checks that the iron is working properly. If in 10 seconds from start the temperature would not changed, the controller would switched off the power and the message 'Failed ' would be displayed on the screen. In this case, press the encoder button lightly to return to the standby mode.
The power mode can be switched on by long press the encoder while it is in the main mode. In the power mode, you can adjust the power supplied to the soldering iron manually by rotating encoder. In the power mode the screen shows the power supplied to the iron in the internal units and the iron temperature in human readable units. Light press of the encoder toggles on-off power in the power mode. Long press of rotary encoder handle will return the controller from power mode to the main mode.
To get to the setup mode, long press the encoder in standby mode. In the setup mode the configuration parameters can be adjusted. There are 7 menu entries in this mode:
- automatic power-off timeout (in minutes)
- temperature units (Celsius or Fahrenheit)
- the iron calibration ('calib.')
- initial setup procedure ('tune')
- save the changes
- cancel the changes
- restore default values
Rotate the handle to select the menu item. To change the selected item, press lightly the encoder handle. After adjusting the parameter, press the handle again to return to the setup menu. Long press of the encoder handle can be used to return back to standby mode and save the parameters in the EEPROM.
tip: You should load default parameters before first use of the controller or after new minor software release is flashed.
The sensor readings schematics
The schematics of sensor reading of this controller depends on the type of the soldering iron thermal sensor: thermistor or thermocouple. Both schematics are combined in one picture below.
In both schematics the accurate operating amplifier MCP602 that implements rail-to-rail technology is used. This amplifier significantly increases the accuracy of the temperature readings and produces near full voltage supplied to the output pin. So the interval of readings on the A0 pin is 0-1023. You can replace the mcp602 amplifier with its analog. Using accurate operating amplifier allows the controller to keep the temperature of the iron inside the smaller interval.
In case of thermocouple variant of the iron handle both jumpers JP1 and JP2 should be open and they should be closed in case of thermistor handle.
If the iron handle implements the thermistor, the resistance of the sensor increased from about 50 Ohm when it is cold to about 200 Ohm when the temperature of the soldering iron becomes 400 degrees of Celsius. If the iron handle implements the thermocouple, the generated voltage increased from zero at the ambient temperature to 9 mV when the soldering iron reaches 400 degrees of Celsius. In any case, another iron handle can have the different parameters, so I decided to use a multi-turn potentiometer to tune the amplifier MCP602. For the very first time this potentiometer should be tuned the following way: when the iron is 400 degree of Celsius, the output voltage should become near 5 volts (reading of A0 pin in the Arduino about 900). To simplify the initial setup procedure the tune mode is implemented in the controller software. The tune mode can be run from the settings menu.
Initial Setup of the Controller
You need external thermometer to calibrate the controller. Do not forget to load default parameter of the controller from the setup menu.
In the program sketch is assumed that the working temperature interval of soldering iron is 180 - 400 degrees of Celsius. It is possible to change this interval by editing constants in the program sketch before you plan to tune the controller.
The 500k multi-turn potentiometer has to be adjusted to get the operating amplifier the correct signal from the soldering iron. To simplify initial setup procedure of the controller, tune mode is implemented.
Select 'tune' menu item from the setup menu. The iron starts heating. The controller displays the temperature readings from A0 pin in the internal units (0-1023) in this mode. By rotating the encoder you can adjust the power to keep the iron temperature of 400 degrees of centigrade (use external thermometer). At the beginning you can increase the supplied power to the maximum value to speed up the iron heating, then decrease the power to keep the temperature at the 400 degrees. Now rotate the multi-turn potentiometer handle to get the sensor readings near 900. Ensure that this readings is not the maximum one, rotate the variable register and get 930-950, then return back to 900. It is important because the controller should be able to measure the temperature greater than 400 degrees of Centigrade.
When the variable register adjusted, press and hold the encoder handle for about 2 seconds. The initial setup procedure now is complete.
The soldering iron heater
The main feature of the second generation of the controller is high frequency PWM signal used to heat the iron. Unfortunately, managing high-frequency signal on MOSFET transistor requires extra elenents in the schematics. This forum thread explains the problem in details. In short, the MOSFET has capacitance in the gate that require time to charge or discharge. To increase the speed of the MOSFET (irfz44n), the two-transistor driver is implemented on bipolar transistors. You can use another bipolar transistor pair.
Zener diode (D2, 15V) is used to limit Gate voltage (Vgs) of the MOSFET while it is open because the power supply voltage is higher than maximum value of mosfet vgs voltage. The diode FR107 removes the power from the iron when the MOSFET is closed. You can replace this diode with another one, but you must use fast recoverable diode.
The resistance of the cold iron heater element is very low and some notebook power supply can refuse to work. The controller just resets and the iron remains cold in this case. To avoid this situation, the capacitor of 1000uF is implemented just after the 24v input (see complete controller schematics).
Calibrate the Soldering Iron
The controller reads the temperature in internal units (0-1023) by reading the voltage on A0 Arduino pin. It is convenient for us to use the human readable units like degrees of Celsius or Fahrenheit. The controller has default parameters that allow to translate internal temperature readings into human readable units. But the soldering iron could be different so the calibration procedure implemented in the controller. There are three reference points for soldering iron calibration: 200, 300 and 400 degrees of Celsius. The controller saves internal readings for these three reference points and uses them to convert the temperature from internal reading to human readable values.
Select 'calib.' menu item from the setup menu to start calibration process. Select desired calibration point from the menu list (200, 300 or 400) and switch-on the iron by pressing the encoder handle. The soldering iron starts heating. The PID algorithm allows reach the desired temperature in short time. When the reference point temperature would be reached, the controller 'beeps' indicating it is ready to check the temperature by external sensor. Wait a little allowing the temperature to stabilize then check the real temperature of the soldering iron by external sensor (thermocouple). Then, rotate the handle of the rotary encoder and select real temperature of the iron. Press the encoder handle slightly. The controller saves the real temperature for the reference point. Select the next reference temperature and repeat the procedure. You can calibrate the reference temperature one more time by selecting desired reference point. You can setup any reference point multiple times. Every time, you save real temperature for reference point, the controller updates translation formula. This allows you calibrate the iron more accurate. When you finish the calibration, long press the rotary encoder handle. Now the controller saved new values for all reference temperatures you have selected.
Automatic Power-off Feature
The automatic switch-off feature has been implemented in the second generation of the controller. This was a great challenge because the iron handle has no shock sensor or other way to verify correctly the iron is in use now or just is laying down on the table. The main idea was to use the value of supplied power to the iron. In the idle state, the controller decreased the power to the minimum value to keep the preset temperature. Unfortunately, the math dispersions of the temperature and the supplied power are not constant in the idle state and can periodically deviate. Tuning the PID algorithm parameters, i have stabilized the readings and minimized both dispersions. Now the controller in the idle state keeps the temperature dispersion as low as possible. The criteria of the iron usage is the power has been incremented slightly from the smallest value registered. This algorithm has been tested for a while and proved could be used for automatic power-off feature.
This solution is not very reliable so you can disable this feature if something will be going wrong. Also, the sketch contains the class for debug and tune the PID parameters manually.
You can implement another iron handle in your version of the controller, the handle can have the shock sensor or similar to surely distinguish the idle state.
Sketch for 1602 display
There are the some difficulties to get 0802 display in some countries. So another sketch was released to support 1602 display. The sketch is available in the github distribution. Or you can use another brilliant project from Manoj, who created schematics in Eagle editor and created PCB to simplify the soldering process.
About temperature translation and different sensor types
To display the temperature in human readable units (Celsius or Fahrenheit) IRON_CFG::tempHuman() is implemented in the sketch. As was stated above, the controller reads the iron temperature in the internal units (voltage on A0 analog pin). The calibration procedure allows measure the real temperature around three reference points (200, 300 and 400 degrees Celsius). The mentioned method (tempHuman()) uses linear temperature interpolation using two reference points that lower and higher current iron temperature readings. But, there is yet another not calibrated point: ambient temperature. When iron temperature is lower than 200 degrees Celsius, the controller interpolates the actual temperature by two points: ambient temperature and 200 degrees. The ambient temperature is defined at lines #244 and #245 of the sketch. These values can be adjusted to your very own case. As you can see, these values assumes that you use thermistor as iron temperature sensor (the ambient temperature is 350 in internal units). Surely, if you are using the iron with thermocouple, you would change this value to 0.
Conclusion
It is the great pleasure to use controlled soldering iron. It is heating quickly and keeps the temperature suitable for the situation. This version is silent.
 |
|
Non-expensive soldering controller
UPDATED 04/03/2019 schematics and description updated
UPDATED 02/18/2018: calibration procedure updated
UPDATED 8/1/2017: sketch bug fixed, sketch for lcd1602 added
UPDATED 7/31/2017: new hardware schematics implemented
UPDATED 4/7/2017: new features are implemented (see the description)
The controller deals with the hakko 907 soldering handles with replaceable tips and has built-in heater element and thermistor OR thermocouple to check the iron temperature. The handle has two independed electrical circuits for the iron heating and temperature checking. This controller can be used with another iron handle that has the similar architecture.
It is better to replace the plug on the iron handle with another one, for example, aviation plug GX16-5 or GX-12-5.
The key features of this controller are:
- The controller is suitable to work with a variety of hakko 907 handles, with thermocouple or with thermistor to check the temperature. You should choose the appropriate schematics.
- The PID algorithm is implemented to keep the temperature of the soldering iron. The iron raises the temperature in about 30 seconds and keeps it inside 1 -2 degrees of Celsius.
- The controller keeps the temperature in case of heavy usage because the PID algorithm is very sensitive and can quickly increase the supplied power.
- Three reference temperature points implemented in the soldering iron calibration procedure.
- The calibration procedure is automated by use of PID algorithm to keep the temperature near the reference point.
- The controller supports two working modes: keep the temperature and keep the power supplied.
- To keep the operation silent, the Timer1 high frequency interrupts are implemented in the controller. This allows the PWM frequency to be increased up to 31250 Hz instead of 490 Hz by built-in
analogWrite()function. - The controller implements accelerated rotary encoder. When the encoder is rotated slowly, the temperature setting is changed by 1 degree. When the encoder rotated quickly, the temperature setting is changed by 5 degrees.
- The temperature is stored in Arduino EEPROM after the soldering iron was used in case the temperature settings were changed.
- The controller supports Celcius or Farenheit units to be used for the displayed temperature value, preset temperature and calibration data.
- The controller has tune mode to simplify the initial setup procedure of the controller.
The Controller Menu
As I mentioned before, the controller has several modes:
- Standby mode
- Main working mode (keep the temperature)
- Power mode (keep the supplied power)
- Setup mode
- Calibration mode
- Tune mode (the initial setup procedure)
When the controller is just powered on, the standby mode is activated. In this mode the soldering iron is powered. The main display shows the following information:
- The preset temperature in the left side of the upper line (in units selected - Celsius or Fahrenheit);
- The 'OFF' message in the right side of the upper line indicating that the iron is powered off;
- The current temperature of the iron in the left side of the second line;
In case the iron is not connected to the controller, the message 'no iron' is displayed on the second line. When the iron become cold (after usage), the 'cold' message is displayed on the second line indicating that it is safe to touch the iron.
The preset temperature can be adjusted by rotating the encoder handle while the iron is off. To power on the soldering iron, push the encoder handle lightly. The controller will be switched to the main mode. Now the controller keeps the iron temperature near the preset temperature. When the iron is heavily used, the temperature can slightly deviate from the preset one.
In the main mode the display shows the following information:
- The preset temperature in the left side of the upper line (in units selected - Celsius or Fahrenheit)
- The 'ON' message in the right side of the upper line indicating that the iron is powered on and is still heating. When the iron reaches the preset temperature, the '
rdy' (ready) message will be displayed; - The current temperature of the iron is displayed in the left side of the second line;
- The power supplied to the iron (in percents of the maximum allowable power) is displayed in the right side of the screen;
By rotating the encoder it is possible to change the preset temperature. The message 'ON' would be showed again till the iron would reached the new preset temperature. To return to the standby mode, press the encoder handle lightly.
In the main mode, the controller checks that the iron is working properly. If in 10 seconds from start the temperature would not changed, the controller would switched off the power and the message 'Failed ' would be displayed on the screen. In this case, press the encoder button lightly to return to the standby mode.
The power mode can be switched on by long press the encoder while it is in the main mode. In the power mode, you can adjust the power supplied to the soldering iron manually by rotating encoder. In the power mode the screen shows the power supplied to the iron in the internal units and the iron temperature in human readable units. Light press of the encoder toggles on-off power in the power mode. Long press of rotary encoder handle will return the controller from power mode to the main mode.
To get to the setup mode, long press the encoder in standby mode. In the setup mode the configuration parameters can be adjusted. There are 7 menu entries in this mode:
- automatic power-off timeout (in minutes)
- temperature units (Celsius or Fahrenheit)
- the iron calibration ('calib.')
- initial setup procedure ('tune')
- save the changes
- cancel the changes
- restore default values
Rotate the handle to select the menu item. To change the selected item, press lightly the encoder handle. After adjusting the parameter, press the handle again to return to the setup menu. Long press of the encoder handle can be used to return back to standby mode and save the parameters in the EEPROM.
tip: You should load default parameters before first use of the controller or after new minor software release is flashed.
The sensor readings schematics
The schematics of sensor reading of this controller depends on the type of the soldering iron thermal sensor: thermistor or thermocouple. Both schematics are combined in one picture below.
In both schematics the accurate operating amplifier MCP602 that implements rail-to-rail technology is used. This amplifier significantly increases the accuracy of the temperature readings and produces near full voltage supplied to the output pin. So the interval of readings on the A0 pin is 0-1023. You can replace the mcp602 amplifier with its analog. Using accurate operating amplifier allows the controller to keep the temperature of the iron inside the smaller interval.
In case of thermocouple variant of the iron handle both jumpers JP1 and JP2 should be open and they should be closed in case of thermistor handle.
If the iron handle implements the thermistor, the resistance of the sensor increased from about 50 Ohm when it is cold to about 200 Ohm when the temperature of the soldering iron becomes 400 degrees of Celsius. If the iron handle implements the thermocouple, the generated voltage increased from zero at the ambient temperature to 9 mV when the soldering iron reaches 400 degrees of Celsius. In any case, another iron handle can have the different parameters, so I decided to use a multi-turn potentiometer to tune the amplifier MCP602. For the very first time this potentiometer should be tuned the following way: when the iron is 400 degree of Celsius, the output voltage should become near 5 volts (reading of A0 pin in the Arduino about 900). To simplify the initial setup procedure the tune mode is implemented in the controller software. The tune mode can be run from the settings menu.
Initial Setup of the Controller
You need external thermometer to calibrate the controller. Do not forget to load default parameter of the controller from the setup menu.
In the program sketch is assumed that the working temperature interval of soldering iron is 180 - 400 degrees of Celsius. It is possible to change this interval by editing constants in the program sketch before you plan to tune the controller.
The 500k multi-turn potentiometer has to be adjusted to get the operating amplifier the correct signal from the soldering iron. To simplify initial setup procedure of the controller, tune mode is implemented.
Select 'tune' menu item from the setup menu. The iron starts heating. The controller displays the temperature readings from A0 pin in the internal units (0-1023) in this mode. By rotating the encoder you can adjust the power to keep the iron temperature of 400 degrees of centigrade (use external thermometer). At the beginning you can increase the supplied power to the maximum value to speed up the iron heating, then decrease the power to keep the temperature at the 400 degrees. Now rotate the multi-turn potentiometer handle to get the sensor readings near 900. Ensure that this readings is not the maximum one, rotate the variable register and get 930-950, then return back to 900. It is important because the controller should be able to measure the temperature greater than 400 degrees of Centigrade.
When the variable register adjusted, press and hold the encoder handle for about 2 seconds. The initial setup procedure now is complete.
The soldering iron heater
The main feature of the second generation of the controller is high frequency PWM signal used to heat the iron. Unfortunately, managing high-frequency signal on MOSFET transistor requires extra elenents in the schematics. This forum thread explains the problem in details. In short, the MOSFET has capacitance in the gate that require time to charge or discharge. To increase the speed of the MOSFET (irfz44n), the two-transistor driver is implemented on bipolar transistors. You can use another bipolar transistor pair.
Zener diode (D2, 15V) is used to limit Gate voltage (Vgs) of the MOSFET while it is open because the power supply voltage is higher than maximum value of mosfet vgs voltage. The diode FR107 removes the power from the iron when the MOSFET is closed. You can replace this diode with another one, but you must use fast recoverable diode.
The resistance of the cold iron heater element is very low and some notebook power supply can refuse to work. The controller just resets and the iron remains cold in this case. To avoid this situation, the capacitor of 1000uF is implemented just after the 24v input (see complete controller schematics).
Calibrate the Soldering Iron
The controller reads the temperature in internal units (0-1023) by reading the voltage on A0 Arduino pin. It is convenient for us to use the human readable units like degrees of Celsius or Fahrenheit. The controller has default parameters that allow to translate internal temperature readings into human readable units. But the soldering iron could be different so the calibration procedure implemented in the controller. There are three reference points for soldering iron calibration: 200, 300 and 400 degrees of Celsius. The controller saves internal readings for these three reference points and uses them to convert the temperature from internal reading to human readable values.
Select 'calib.' menu item from the setup menu to start calibration process. Select desired calibration point from the menu list (200, 300 or 400) and switch-on the iron by pressing the encoder handle. The soldering iron starts heating. The PID algorithm allows reach the desired temperature in short time. When the reference point temperature would be reached, the controller 'beeps' indicating it is ready to check the temperature by external sensor. Wait a little allowing the temperature to stabilize then check the real temperature of the soldering iron by external sensor (thermocouple). Then, rotate the handle of the rotary encoder and select real temperature of the iron. Press the encoder handle slightly. The controller saves the real temperature for the reference point. Select the next reference temperature and repeat the procedure. You can calibrate the reference temperature one more time by selecting desired reference point. You can setup any reference point multiple times. Every time, you save real temperature for reference point, the controller updates translation formula. This allows you calibrate the iron more accurate. When you finish the calibration, long press the rotary encoder handle. Now the controller saved new values for all reference temperatures you have selected.
Automatic Power-off Feature
The automatic switch-off feature has been implemented in the second generation of the controller. This was a great challenge because the iron handle has no shock sensor or other way to verify correctly the iron is in use now or just is laying down on the table. The main idea was to use the value of supplied power to the iron. In the idle state, the controller decreased the power to the minimum value to keep the preset temperature. Unfortunately, the math dispersions of the temperature and the supplied power are not constant in the idle state and can periodically deviate. Tuning the PID algorithm parameters, i have stabilized the readings and minimized both dispersions. Now the controller in the idle state keeps the temperature dispersion as low as possible. The criteria of the iron usage is the power has been incremented slightly from the smallest value registered. This algorithm has been tested for a while and proved could be used for automatic power-off feature.
This solution is not very reliable so you can disable this feature if something will be going wrong. Also, the sketch contains the class for debug and tune the PID parameters manually.
You can implement another iron handle in your version of the controller, the handle can have the shock sensor or similar to surely distinguish the idle state.
Sketch for 1602 display
There are the some difficulties to get 0802 display in some countries. So another sketch was released to support 1602 display. The sketch is available in the github distribution. Or you can use another brilliant project from Manoj, who created schematics in Eagle editor and created PCB to simplify the soldering process.
About temperature translation and different sensor types
To display the temperature in human readable units (Celsius or Fahrenheit) IRON_CFG::tempHuman() is implemented in the sketch. As was stated above, the controller reads the iron temperature in the internal units (voltage on A0 analog pin). The calibration procedure allows measure the real temperature around three reference points (200, 300 and 400 degrees Celsius). The mentioned method (tempHuman()) uses linear temperature interpolation using two reference points that lower and higher current iron temperature readings. But, there is yet another not calibrated point: ambient temperature. When iron temperature is lower than 200 degrees Celsius, the controller interpolates the actual temperature by two points: ambient temperature and 200 degrees. The ambient temperature is defined at lines #244 and #245 of the sketch. These values can be adjusted to your very own case. As you can see, these values assumes that you use thermistor as iron temperature sensor (the ambient temperature is 350 in internal units). Surely, if you are using the iron with thermocouple, you would change this value to 0.
Conclusion
It is the great pleasure to use controlled soldering iron. It is heating quickly and keeps the temperature suitable for the situation. This version is silent.


