SomfyDuino IO © GPL3+
DESCRIPTION
Ideation
Hi there,
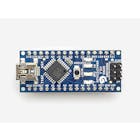
I just tried to implement a USB to Somfy IO Adapter with an Arduino Nano to include my roller shutters in the living room. I wanted to connect to my DIY home automation system without having to get any cloud based hardware from the original supplier - and hey! IT WORKED - using just a simple IO remote.
You need:
- A Somfy IO Remote - I used the GX037.
- Almost any Arduino with a USB connector will do - but soft serial also works.
- A seven core flat cable and a shrink hose for neat packing.
Wiring according to the attachments. The remote is powered through the Arduino - it uses about 20mA while sending, so you should be super fine. So make sure you remove the battery.
Concerning the code:
If you want to connect the whole contraption to e.g. a RPi, you might want to consider removing all Serial.print items - it is way easier to communicate with the Arduino if it just listens and shuts up.
How to send commands is explained in the code.
Have fun - comments are welcome!
Cheers,
Bjoern
P.S. - I used a one channel remote. It basically uses the same layout as the 5 channel remote, but some parts (as the additional LEDs) are missing. I wonder if it will jump to different channels if SELECT is triggered. I have not tried yet because I was just glad I got one channel to work, but I'll keep this updated
P.P.S. just checked - the select button unfortunately has now effect - won't change channels but won't screw up the remote either.
 |
|
Ideation
Hi there,
I just tried to implement a USB to Somfy IO Adapter with an Arduino Nano to include my roller shutters in the living room. I wanted to connect to my DIY home automation system without having to get any cloud based hardware from the original supplier - and hey! IT WORKED - using just a simple IO remote.
You need:
- A Somfy IO Remote - I used the GX037.
- Almost any Arduino with a USB connector will do - but soft serial also works.
- A seven core flat cable and a shrink hose for neat packing.
Wiring according to the attachments. The remote is powered through the Arduino - it uses about 20mA while sending, so you should be super fine. So make sure you remove the battery.
Concerning the code:
If you want to connect the whole contraption to e.g. a RPi, you might want to consider removing all Serial.print items - it is way easier to communicate with the Arduino if it just listens and shuts up.
How to send commands is explained in the code.
Have fun - comments are welcome!
Cheers,
Bjoern
P.S. - I used a one channel remote. It basically uses the same layout as the 5 channel remote, but some parts (as the additional LEDs) are missing. I wonder if it will jump to different channels if SELECT is triggered. I have not tried yet because I was just glad I got one channel to work, but I'll keep this updated
P.P.S. just checked - the select button unfortunately has now effect - won't change channels but won't screw up the remote either.


No document.