ToF 10120 Laser Rangefinder to Measure Distance + LCD © GPL3+
DESCRIPTION
Hey everyone, and welcome to this tutorial, it’s about the ToF 10120 (Time-of-Flight) LASER Range sensor, the ToF sensors have become very popular due to their reliability and easy use, the most known ones are the Ultrasounds like HC-SR04 (there are a lot of variations), JSN SR-04…, you can find Infrareds too.

But today we are about a LASER one, they all have the same principle (Send signal (Ultrasound-Laser wave-Infrared), and wait for it to return back) the duration between sending and receiving is called the Time of Flight: Speed is known before, Duration is calculated and divided by 2 -> We can find the distance.
The advantage of the LASER ones is that they are very small like the one we’re using, and can be used for high frequency applications such as camera AF…

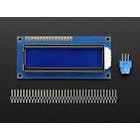
The module has 6 pins (GND-VCC) then (RX-TX) for UART and (SDA-SCL) for i²c, in this tutorial we gonna use the i²c interface to wire it with Arduino also I’ll add a LCD i²c screen to see the measure in (mm) you can convert it if you want just simple calculations.
You can add LCD i²c screen as I did or whatever you prefer
Tests:
To use this module is straight forward, wire and upload the codes, in its datasheet the max range is 1.8 meter, but as you can see I could measure up to 2 meters:


That’s all folks … comment if you have any problem.

Hey everyone, and welcome to this tutorial, it’s about the ToF 10120 (Time-of-Flight) LASER Range sensor, the ToF sensors have become very popular due to their reliability and easy use, the most known ones are the Ultrasounds like HC-SR04 (there are a lot of variations), JSN SR-04…, you can find Infrareds too.
But today we are about a LASER one, they all have the same principle (Send signal (Ultrasound-Laser wave-Infrared), and wait for it to return back) the duration between sending and receiving is called the Time of Flight: Speed is known before, Duration is calculated and divided by 2 -> We can find the distance.
The advantage of the LASER ones is that they are very small like the one we’re using, and can be used for high frequency applications such as camera AF…
The module has 6 pins (GND-VCC) then (RX-TX) for UART and (SDA-SCL) for i²c, in this tutorial we gonna use the i²c interface to wire it with Arduino also I’ll add a LCD i²c screen to see the measure in (mm) you can convert it if you want just simple calculations.
You can add LCD i²c screen as I did or whatever you prefer
Tests:
To use this module is straight forward, wire and upload the codes, in its datasheet the max range is 1.8 meter, but as you can see I could measure up to 2 meters:
That’s all folks … comment if you have any problem.
LCD_i²c NewLiquidCrystal library
