Trybotics Logo

Universal Power Variator © GPL3+

DESCRIPTION

This project is a continuous variator of supplied power for 220V/110V power tools, lights or heating. It works for AC as well as for DC power supply, that is why it is named Universal. Compared to existing built-in speed variator if the power tool has one, our solution using 600V CoolMos C7 makes less EMI and noise. Moreover, it works for controlling AC or DC power supply with the same hardware. It is useful because of you can add new functionaliies to low-end electrical equipment.

To vary the supplied power, two 600V CoolMos C7 are tied back-to-back, then together are put in series with the load. The pack of two CoolMos C7 controls the supplied power by controlling the supplied current. The pack in turn is controlled by an Arduino which PWM modulates the supply current passing through the two CoolMos C7.

The circuit and components are not galvanic isolated. Using a Wireless shield this power variator can be remotely controlled.

One use case is to vary the speed of low-end power tools such as drills, saws, and which don't have speed variation. Many times, we would need the tool to run at lower speed to avoid damaging the part we are working on, or sometimes just to reduce the noise for neighbors.

Another use case is to fine tune the electrical heater's temperature, and automatically switch it on/off depending on the ambient temperature.

Another use case is to control a fan's speed and stop it as a function of ambient temperature.

Description:

male main power plug
×1
female main power plug
×1
600V CoolMos C7 Gold
×2
A000066 iso both
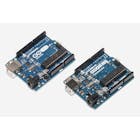
Arduino UNO & Genuino UNO
×1

Description:

This project is a continuous variator of supplied power for 220V/110V power tools, lights or heating. It works for AC as well as for DC power supply, that is why it is named Universal. Compared to existing built-in speed variator if the power tool has one, our solution using 600V CoolMos C7 makes less EMI and noise. Moreover, it works for controlling AC or DC power supply with the same hardware. It is useful because of you can add new functionaliies to low-end electrical equipment.

To vary the supplied power, two 600V CoolMos C7 are tied back-to-back, then together are put in series with the load. The pack of two CoolMos C7 controls the supplied power by controlling the supplied current. The pack in turn is controlled by an Arduino which PWM modulates the supply current passing through the two CoolMos C7.

The circuit and components are not galvanic isolated. Using a Wireless shield this power variator can be remotely controlled.

One use case is to vary the speed of low-end power tools such as drills, saws, and which don't have speed variation. Many times, we would need the tool to run at lower speed to avoid damaging the part we are working on, or sometimes just to reduce the noise for neighbors.

Another use case is to fine tune the electrical heater's temperature, and automatically switch it on/off depending on the ambient temperature.

Another use case is to control a fan's speed and stop it as a function of ambient temperature.

Description:

Varying DC power supplyArduino
This code periodically and endlessly increase then decrease the supplied DC power. When used on AC power, only half of the cycle is passed, consequently the max power is only half of the max of supplied power.
int G1 = 9;           // the PWM pin connected to gate of CoolMos-1
int G2 = 6;           // the PWM pin connected to gate of CoolMos-2
int S = 7;            // the digital out of '0' connected to the Driver Source of both CoolMos-1,2
int brightness = 0;   // how much power on the load (e.g. lamp)
int increase = 5;     // how many points to increase the power by

// the setup routine runs once when you press reset:
void setup() {
  // declare pin 9/6/7 to be an output:
  pinMode(G1, OUTPUT);
  pinMode(G2, OUTPUT);
  pinMode(S, OUTPUT);
}

// the loop routine runs over and over again forever:
void loop() {
  G2 = 0;
  S=0;
  
  // set the brightness of pin 9:
  analogWrite(G1, brightness);

  // change the brightness for next time through the loop:
  brightness = brightness + increase;

  // reverse the direction of the fading at the ends of the fade:
  if (brightness <= 0 || brightness >= 255) {
    increase = -increase;
  }
  // wait for 30 milliseconds to see the dimming effect
  delay(30);
}
Varying AC power supplyArduino
This code cycles the supplied power between minimum and maximum with one incrementation or decrementation per second
int G1 = 9;           // the PWM pin D9 connected to gate of CoolMos-1
int G2 = 6;           // the PWM pin D6 connected to gate of CoolMos-2
int S = 7;            // D7 with '0'level is connected to the Driver Source of both CoolMos-1,2
int LINE = 0; // Analog input A0 is used to sense zero crossing
int brightness = 0;   // how much power on the load (e.g. lamp)
int increase = 5;     // how many points to increase the power by
int ac = 0;           // 0: negative half-cycle;  1: positive half-cycle
float v=0;
int cmd = 1;          // current command to turn on or off the power. 1: turn-on; 0: turn-off.
int newcmd = 1;       // new command to turn on or off the power. 1: turn-on; 0: turn-off.

// the setup routine runs once when you press reset:
void setup() {
  // declare pin 9/6/7 to be an output:
  pinMode(G1, OUTPUT);
  pinMode(G2, OUTPUT);
  pinMode(S, OUTPUT);
  pinMode(LINE, INPUT);

  G1 = 0;
  G2 = 0;
  S=0;

}

void turnOff() {
    G1 = 0;
    G2 = 0;
    S=0;  
}

void turnOnNextCycle() {
  // wait for zerocrossing
  if (ac=0) { // currently in negative cycle
    while (v<0.5) {
      v = analogRead(LINE)*5.0/1024.0;
      if (v<0.5) continue;  // no crossing
      delay(1); // 1ms
      v = analogRead(LINE)*5.0/1024.0;
      if (v<0.5) continue;  // no crossing
      break; 
    }
    ac = 1; // zero crossed, now in positive cycle
  } else { // currently in positive cycle
    while (v>=0.5) {
      v = analogRead(LINE)*5.0/1024.0;
      if (v>=0.5) continue;  // no crossing
      delay(1); // 1ms
      v = analogRead(LINE)*5.0/1024.0;
      if (v>=0.5) continue;  // no crossing
      break; 
    }    
    ac = 0; // zero crossed, now in negative cycle
  }

  if (ac == 1) {
    // pulse on G1
    analogWrite(G1, brightness);
    G2 = 0;
  } else {
    // pulse on G2
    analogWrite(G2, brightness);
    G1 = 0;    
  }
}
// the loop routine runs over and over again forever:
void loop() {
  int cntAcCycles = 0;
  if (newcmd != cmd) { // command has changed. Initialization.
    G1 = 0;
    G2 = 0;
    S=0;
    ac = 0;           // 0: negative half-cycle;  1: positive half-cycle
    v=0;
  }
  if (cmd == 1) {
    turnOnNextCycle();
    // change the brightness every second: 50 cycles per second for 50Hz
    if (++cntAcCycles > 50) {
      cntAcCycles = 0;
      brightness = brightness + increase;
      // reverse the direction of the fading at the ends of the fade:
      if (brightness <= 0 || brightness >= 255) {
        increase = -increase;
      }  
    }
  } else if (cmd == 0) {
    turnOff();
  } 

}

Description:

How to switch DC ON
Principle for switching DC ON
How to switch dc on oyzcvrliqg
coolMos pinout
The pin-out is referenced in electronics schematics
Coolmos pinout unwtjdevsy
schematics of power variator
overall schematics of the project
Schematics of power variator 5fqnrwqmrb
How to switch AC ON - positive half-cycle
principle of conduction during AC positive half-cycle
How to switch ac on positive llcwniy8ua
How to switch AC ON - negative half-cycle
principle of conduction during AC negative half-cycle
How to switch ac on neg nskpv2uv02
zero crossing detection
principle of zero crossing detection on AC
Zero crossing detection emwmpxy1h9


YOU MIGHT ALSO LIKE