Unravel Preset Piano Easy Arduino (Even a Ghoul Can Make It)
DESCRIPTION
Down below the most recent version
IntroductionSo first off, I had to make an electric device for a school project. I wanted to do something not too hard, but also something that's in my interest. When I was looking at random projects I saw a mini-piano arduino instructable and. I immediately knew what I and my partner were going to do. The video above shows a demonstration. It's an easy project using the arduino program and it's pretty self-explanatory: you press one of the first four buttons and the buzzer will play a note. You can code whatever note you want and I chose from left to right the piano notes G4, A4, A#4 and C5. It's too bad, but only one note can be played at the time. The fifth button is coded for a melody. Which means that when you press it a song, which you can code, will play. The song in the video is Unravel from the popular anime Tokyo Ghoul. I didn't have enough time to do the whole opening, so it's only the first 30seconds, however, I will update this instructable until I got the whole opening song. I used this video as a reference:
If you want to make do a song yourself using Arduino my guess is it'd take at least an hour or two, depending on the difficulty and different tone lengths.
1. Setting up the hardware- 1.1 Buttons

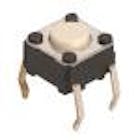
First off, attach the buttons to the breadboard. One pair of legs of the button extending towards the + rail of the breadboard and the other pair of legs extending towards the - rail of the breadboard.
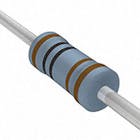
- 1.2 Resistors

Connect a resistor (1k Ohm) each per button. Connect one leg of the resistors towards the blue line of the breadboard in extension of a leg of a button. Connect the other leg of every resistor to the - side of the power rail. (See above picture)
- 1.3 Buzzer

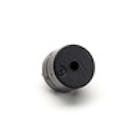
Attach the buzzer in the 5th mounting hole next to the last button (hole 29). One side of the buzzer attached towards the + rail of the breadboard and the other to the - side.
- 1.4 Jumper cables into the arduino

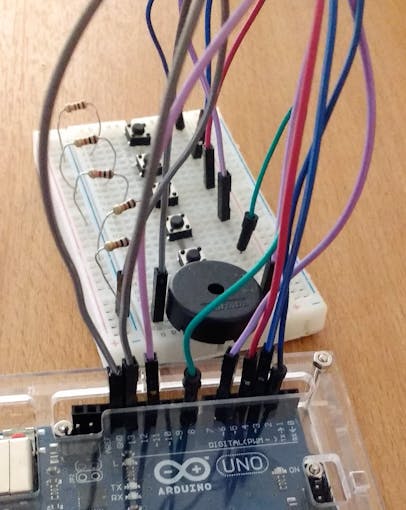

Attach a jumper cable to a button each. Connect it to the other leg of the button on towards the + side of the breadboard. Attach 2 jumper cables to the buzzer: one towards the + side and one towards the -, both in row 29. Connect the last jumper cable to the - side of the power rail like the resistors.
Connect the jumper cables of the buttons to the pins 2, 3, 4, 6, 8 from left to right as shown in the picture with the arduino and connect the jumper cable of the buzzer pointing towards the + and - both to pin 11 and 13 respectively.
Lastly, connect the jumper cable from the - power rail to GND so you have a closed electric circuit and your hardware is good to go :)
2. The Code- 2.1 Basics
You start off with including the pitches.h tab, which you can download here. The pitches.h tab contains over 8 octaves of notes, which will give you enough variety to play around with. After that comes naming what button is called and is using which pin and the void setup. The void loop contains the code which note will be played when you press the button. The note will play for as long as you press the button. For the melody you can see how the sequence of the notes work, no explanations needed except for if you want a pause/silence in your song, the 'note' is 0, while the noteduration is not. You'll have include in the code how long the pause is the same way as a normal note.
- 2.2 Personalizing
You can change the tone of a button in the loop to whatever note you'd like. This way you can change the note intervals between them and change it to your liking. Don't forget to also change the code at the beginning if you change the name of the button accordingly to the note.
The song in the code is Unravel, but you can put a song of your own in it by changing the notes. You can look up the notes using piano sheets and change the code along with the note durations accordingly to the song you want the arduino to play. The duration of a note in this code is 600ms/ the note duration you used as stated in the code in the void loop. You can change the speed of the song by changing this. E.g. change 600 to 1000 to make it play slower or to 500 to make it play faster.
3. Ready and play!You've got the hardware, you've got the code and adjusted it to your liking, all what's left is to play!
 |
| × | 5 | |||
 |
| × | 8 | |||
 |
| × | 1 | |||
 |
| × | 1 | |||
 |
| × | 1 | |||
 |
| × | 5 |

Down below the most recent version
IntroductionSo first off, I had to make an electric device for a school project. I wanted to do something not too hard, but also something that's in my interest. When I was looking at random projects I saw a mini-piano arduino instructable and. I immediately knew what I and my partner were going to do. The video above shows a demonstration. It's an easy project using the arduino program and it's pretty self-explanatory: you press one of the first four buttons and the buzzer will play a note. You can code whatever note you want and I chose from left to right the piano notes G4, A4, A#4 and C5. It's too bad, but only one note can be played at the time. The fifth button is coded for a melody. Which means that when you press it a song, which you can code, will play. The song in the video is Unravel from the popular anime Tokyo Ghoul. I didn't have enough time to do the whole opening, so it's only the first 30seconds, however, I will update this instructable until I got the whole opening song. I used this video as a reference:
If you want to make do a song yourself using Arduino my guess is it'd take at least an hour or two, depending on the difficulty and different tone lengths.
1. Setting up the hardware- 1.1 Buttons
First off, attach the buttons to the breadboard. One pair of legs of the button extending towards the + rail of the breadboard and the other pair of legs extending towards the - rail of the breadboard.
- 1.2 Resistors
Connect a resistor (1k Ohm) each per button. Connect one leg of the resistors towards the blue line of the breadboard in extension of a leg of a button. Connect the other leg of every resistor to the - side of the power rail. (See above picture)
- 1.3 Buzzer
Attach the buzzer in the 5th mounting hole next to the last button (hole 29). One side of the buzzer attached towards the + rail of the breadboard and the other to the - side.
- 1.4 Jumper cables into the arduino
Attach a jumper cable to a button each. Connect it to the other leg of the button on towards the + side of the breadboard. Attach 2 jumper cables to the buzzer: one towards the + side and one towards the -, both in row 29. Connect the last jumper cable to the - side of the power rail like the resistors.
Connect the jumper cables of the buttons to the pins 2, 3, 4, 6, 8 from left to right as shown in the picture with the arduino and connect the jumper cable of the buzzer pointing towards the + and - both to pin 11 and 13 respectively.
Lastly, connect the jumper cable from the - power rail to GND so you have a closed electric circuit and your hardware is good to go :)
2. The Code- 2.1 Basics
You start off with including the pitches.h tab, which you can download here. The pitches.h tab contains over 8 octaves of notes, which will give you enough variety to play around with. After that comes naming what button is called and is using which pin and the void setup. The void loop contains the code which note will be played when you press the button. The note will play for as long as you press the button. For the melody you can see how the sequence of the notes work, no explanations needed except for if you want a pause/silence in your song, the 'note' is 0, while the noteduration is not. You'll have include in the code how long the pause is the same way as a normal note.
- 2.2 Personalizing
You can change the tone of a button in the loop to whatever note you'd like. This way you can change the note intervals between them and change it to your liking. Don't forget to also change the code at the beginning if you change the name of the button accordingly to the note.
The song in the code is Unravel, but you can put a song of your own in it by changing the notes. You can look up the notes using piano sheets and change the code along with the note durations accordingly to the song you want the arduino to play. The duration of a note in this code is 600ms/ the note duration you used as stated in the code in the void loop. You can change the speed of the song by changing this. E.g. change 600 to 1000 to make it play slower or to 500 to make it play faster.
3. Ready and play!You've got the hardware, you've got the code and adjusted it to your liking, all what's left is to play!

I keep updating this code, adding to the song til it's done.