Using FreeRTOS multi-tasking in Arduino © GPL3+
DESCRIPTION
The Arduino IDE and environment has many drivers and libraries available within an arms reach, but the Arduino environment is limited to just setup() and loop() and doesn't support multi-tasking effectively.
This is a simple, easy to use and robust FreeRTOS implementation that can just shim into the Arduino IDE as a Library and allow the use of the best parts of both environments, seamlessly.
BackgroundMost operating systems appear to allow multiple programs or threads to execute at the same time. This is called multi-tasking. In reality, each processor core can only be running a single program at any given point in time. A part of the operating system called the scheduler is responsible for deciding which program to run when, and provides the illusion of simultaneous execution by rapidly switching between each program.
The scheduler in a Real Time Operating System (RTOS) is designed to provide a predictable (normally described as deterministic) execution pattern. This is particularly interesting for embedded systems, like the Arduino devices, as embedded systems often have real time requirements.
Traditional real time schedulers, such as the scheduler used in FreeRTOS, achieve determinism by allowing the user to assign a priority to each thread of execution. The scheduler then uses the priority to know which thread of execution to run next. In FreeRTOS, a thread of execution is called a Task.
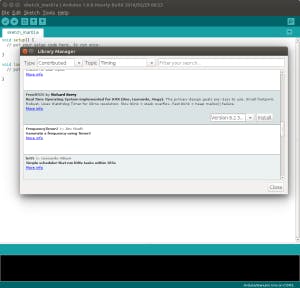
Let's get startedFirstly in the Arduino IDE Library manager, from Version 1.6.8, look for the FreeRTOS Library under the Type: “Contributed” and the Topic: “Timing”.
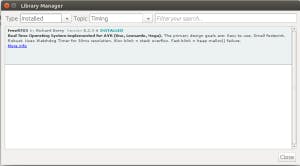
Ensure that the most recent FreeRTOS Library Release is installed. As of writing that is v10.2.0-1.
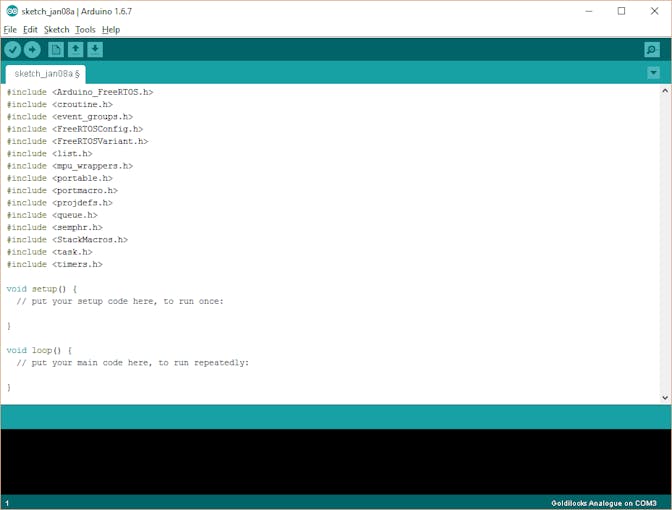
Then under the Sketch->Include Library menu, ensure that the FreeRTOS library is included in your sketch. A new empty sketch will look like this.
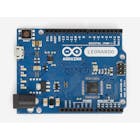
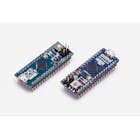
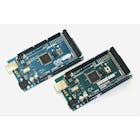
Compile and upload this empty sketch to your Arduino Uno/Yun/Leonardo/Mega or Goldilocks 1284p device. This will show you how much of your flash is consumed by the FreeRTOS scheduler. As a guide the following information was compiled using Arduino v1.6.9 on Windows 10.
// Device:   loop() -> FreeRTOS | Additional Program Storage
// Uno:         444 ->   7018   |     20%
// Goldilocks:  502 ->   7086   |      5%
// Leonardo:   3618 ->  10166   |     23%
// Yun:        3612 ->  10160   |     23%
// Mega:        656 ->   7086   |      2%
At this stage FreeRTOS is already running on your device.
Next stepsNow upload and test the Blink sketch, with an underlying Real-Time Operating System simply by inserting #include <Arduino_FreeRTOS.h> at the start of the sketch. That’s all there is to having FreeRTOS running in your sketches.
The next step is to explore the features provided by a professional RTOS within the Arduino IDE.
Blink_AnalogRead.ino is a good way to start off as it combines two basic Arduino examples, Blink and AnalogRead into one sketch with two separate Tasks. Both Tasks perform their duties, managed by the FreeRTOS scheduler. This sketch can be found in the Examples Folder of the Arduino IDE.
If you're interested in low power or battery applications, it is easy to use FreeRTOS to support the AVR ATmega power reduction modes.
Later articles will cover the use of Semaphores to protect hardware resources (like the Serial port), Queues to transfer data between Tasks, or Timers to manage exact delays and timeouts. The FreeRTOS Getting Started page has lots of further information on how to use the advanced features, and provides Demonstration Examples. Also many more AVR FreeRTOS example applications are available, that can be simply converted to use the Arduino environment.


The Arduino IDE and environment has many drivers and libraries available within an arms reach, but the Arduino environment is limited to just setup() and loop() and doesn't support multi-tasking effectively.
This is a simple, easy to use and robust FreeRTOS implementation that can just shim into the Arduino IDE as a Library and allow the use of the best parts of both environments, seamlessly.
BackgroundMost operating systems appear to allow multiple programs or threads to execute at the same time. This is called multi-tasking. In reality, each processor core can only be running a single program at any given point in time. A part of the operating system called the scheduler is responsible for deciding which program to run when, and provides the illusion of simultaneous execution by rapidly switching between each program.
The scheduler in a Real Time Operating System (RTOS) is designed to provide a predictable (normally described as deterministic) execution pattern. This is particularly interesting for embedded systems, like the Arduino devices, as embedded systems often have real time requirements.
Traditional real time schedulers, such as the scheduler used in FreeRTOS, achieve determinism by allowing the user to assign a priority to each thread of execution. The scheduler then uses the priority to know which thread of execution to run next. In FreeRTOS, a thread of execution is called a Task.
Let's get startedFirstly in the Arduino IDE Library manager, from Version 1.6.8, look for the FreeRTOS Library under the Type: “Contributed” and the Topic: “Timing”.
Ensure that the most recent FreeRTOS Library Release is installed. As of writing that is v10.2.0-1.
Then under the Sketch->Include Library menu, ensure that the FreeRTOS library is included in your sketch. A new empty sketch will look like this.
Compile and upload this empty sketch to your Arduino Uno/Yun/Leonardo/Mega or Goldilocks 1284p device. This will show you how much of your flash is consumed by the FreeRTOS scheduler. As a guide the following information was compiled using Arduino v1.6.9 on Windows 10.
// Device: loop() -> FreeRTOS | Additional Program Storage
// Uno: 444 -> 7018 | 20%
// Goldilocks: 502 -> 7086 | 5%
// Leonardo: 3618 -> 10166 | 23%
// Yun: 3612 -> 10160 | 23%
// Mega: 656 -> 7086 | 2%
At this stage FreeRTOS is already running on your device.
Next stepsNow upload and test the Blink sketch, with an underlying Real-Time Operating System simply by inserting #include <Arduino_FreeRTOS.h> at the start of the sketch. That’s all there is to having FreeRTOS running in your sketches.
The next step is to explore the features provided by a professional RTOS within the Arduino IDE.
Blink_AnalogRead.ino is a good way to start off as it combines two basic Arduino examples, Blink and AnalogRead into one sketch with two separate Tasks. Both Tasks perform their duties, managed by the FreeRTOS scheduler. This sketch can be found in the Examples Folder of the Arduino IDE.
If you're interested in low power or battery applications, it is easy to use FreeRTOS to support the AVR ATmega power reduction modes.
Later articles will cover the use of Semaphores to protect hardware resources (like the Serial port), Queues to transfer data between Tasks, or Timers to manage exact delays and timeouts. The FreeRTOS Getting Started page has lots of further information on how to use the advanced features, and provides Demonstration Examples. Also many more AVR FreeRTOS example applications are available, that can be simply converted to use the Arduino environment.