ZScope - Arduino Oscilloscope, 8-Channels, Up to 100 kHz © CC BY-ND
DESCRIPTION
Use your PC and Arduino as an oscilloscope!
Features- 1-100 kHz sampling rate (up to 75-80 kHz for 2+ channels)
- Up to eight channels simultaneously
- Basic trigger and cursor functions
- Download https://github.com/ZaidaTek/ZScope/raw/master/ZScope-v20200706.zip
- Extract to folder of your choice
- Upload included at328p.ino file to your Arduino Uno/Nano or similar AT328P
- Execute ZScope.exe, choose your COM-Port, channel config and sampling rate, and click Connect
- If your Arduino uses an FTDI USB/Serial Chip, you need to adjust latency from the default 16 ms to 1 ms for best performance. To do this, go to Device Manager, open COM port, go to Port Settings, click Advanced and adjust latency to 1 ms. USB/Serial chip CH340 does not have this issue, but has many COM communication errors at higher sampling rates.
- For higher sampling rates you may need to add a voltage follower to your signal, especially if your signal is high impedance, because the internal impedance of the Arduino will be very low at higher sampling rates. Otherwise, your signal will drop to zero volts. Following is an example of an eight channel voltage follower system using two low-cost LM324A op-amps, a 10K input resistor and UV/OV protection using 1N4148 diodes. The bare minimum would require just an op-amp in a voltage following configuration.
- Windows 7 or newer operating system (Tested on Windows 7 and Windows 10 systems)
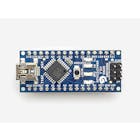
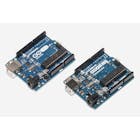
- Arduino Uno/Nano/other AT328P systems
Copyright (C) 2019-2020 ZaidaTek and Andreas Riebesehl
This work is licensed under: Creative Commons Attribution-NoDerivatives 4.0 International Public License
For full license text, please visit: https://creativecommons.org/licenses/by-nd/4.0/legalcode
Components and supplies
About this project
Description:
Use your PC and Arduino as an oscilloscope!
Features- 1-100 kHz sampling rate (up to 75-80 kHz for 2+ channels)
- Up to eight channels simultaneously
- Basic trigger and cursor functions
- Download https://github.com/ZaidaTek/ZScope/raw/master/ZScope-v20200706.zip
- Extract to folder of your choice
- Upload included at328p.ino file to your Arduino Uno/Nano or similar AT328P
- Execute ZScope.exe, choose your COM-Port, channel config and sampling rate, and click Connect
- If your Arduino uses an FTDI USB/Serial Chip, you need to adjust latency from the default 16 ms to 1 ms for best performance. To do this, go to Device Manager, open COM port, go to Port Settings, click Advanced and adjust latency to 1 ms. USB/Serial chip CH340 does not have this issue, but has many COM communication errors at higher sampling rates.
- For higher sampling rates you may need to add a voltage follower to your signal, especially if your signal is high impedance, because the internal impedance of the Arduino will be very low at higher sampling rates. Otherwise, your signal will drop to zero volts. Following is an example of an eight channel voltage follower system using two low-cost LM324A op-amps, a 10K input resistor and UV/OV protection using 1N4148 diodes. The bare minimum would require just an op-amp in a voltage following configuration.
- Windows 7 or newer operating system (Tested on Windows 7 and Windows 10 systems)
- Arduino Uno/Nano/other AT328P systems
Copyright (C) 2019-2020 ZaidaTek and Andreas Riebesehl
This work is licensed under: Creative Commons Attribution-NoDerivatives 4.0 International Public License
For full license text, please visit: https://creativecommons.org/licenses/by-nd/4.0/legalcode
Code
Description:
Github
https://github.com/ZaidaTek/ZScope
Github file
https://github.com/ZaidaTek/ZScope/raw/master/ZScope-v20200706.zip
Schematics
Description:
Example for UV/OV protected voltage follower setup for higher measuring rates, with 10K input resistor and using LM324A op-amp.


